Four Cheese Mac & Cheese ðŸ§€

I’m a big fan of classic comfort food and what’s more comforting than Four Cheese Mac and Cheese? 🧀 This recipe features sharp cheddar, goat cheese, Parmesan and asiago cheeses, but you can sub with your favorite cheeses — cream cheese is great in place of goat cheese, gruyere or gouda are wonderfully nutty, mozzarella is also good but sometimes a bit bland — experiment with your favorite varieties. This dish is creamy, indulgent and perfect for a weeknight dinner. Yum!

INGREDIENTS

  • 1/2 cup of butter (1 stick)
  • 1/2 cup of AP flour
  • 1/4 teaspoon of nutmeg
  • 1 teaspoon of ground mustard
  • 1 teaspoon kosher salt
  • 1/2 teaspoon of black pepper
  • 1 teaspoon of granulated garlic or garlic powder — 2 tsps if using fresh and make sure it’s finely minced 
  • 1 cup of cheddar cheese, shredded – I prefer sharp cheddar but you can use any strength you like 
  • 1 + 2 tablespoons cup Parmesan or Pecorino Romano cheese, grated
  • 2 tablespoons of bread crumbs
  • 1 cup of shredded Asiago cheese
  • 1 cup of goat cheese — I like to use garlic and herb flavored but plain is fine. You can also sub cream cheese
  • 1 quart of whole milk (or 4-5 cups) — it’s important that you use whole milk for this. If you only have skim milk, then the sauce might be a bit thin so you’ll need a thicker roux
  • 1-2 lbs of your favorite pasta shape

DIRECTIONS:

  • Preheat the oven to 375 degrees Fahrenheit
  • Meanwhile, bring a pot of water to a boil and add big pinch of salt (this will season the noodles)
  • Add the pasta and boil until al dente (about 6-7 minutes) — give it a taste and it should still be firm but a soft chew. Don’t worry if you think it’s underdone since it will cook again in the oven
  • In a large saucepan or pot over a medium flame, add the butter and melt
  • Once the butter is melted, add the flour and start to stir until the butter and flour become one homegenous almost paste-like mixture
  • Cook for at least 5-6 minutes, stirring every 30 seconds so it doesn’t burn, then add your salt and pepper
Bechamel Sauce
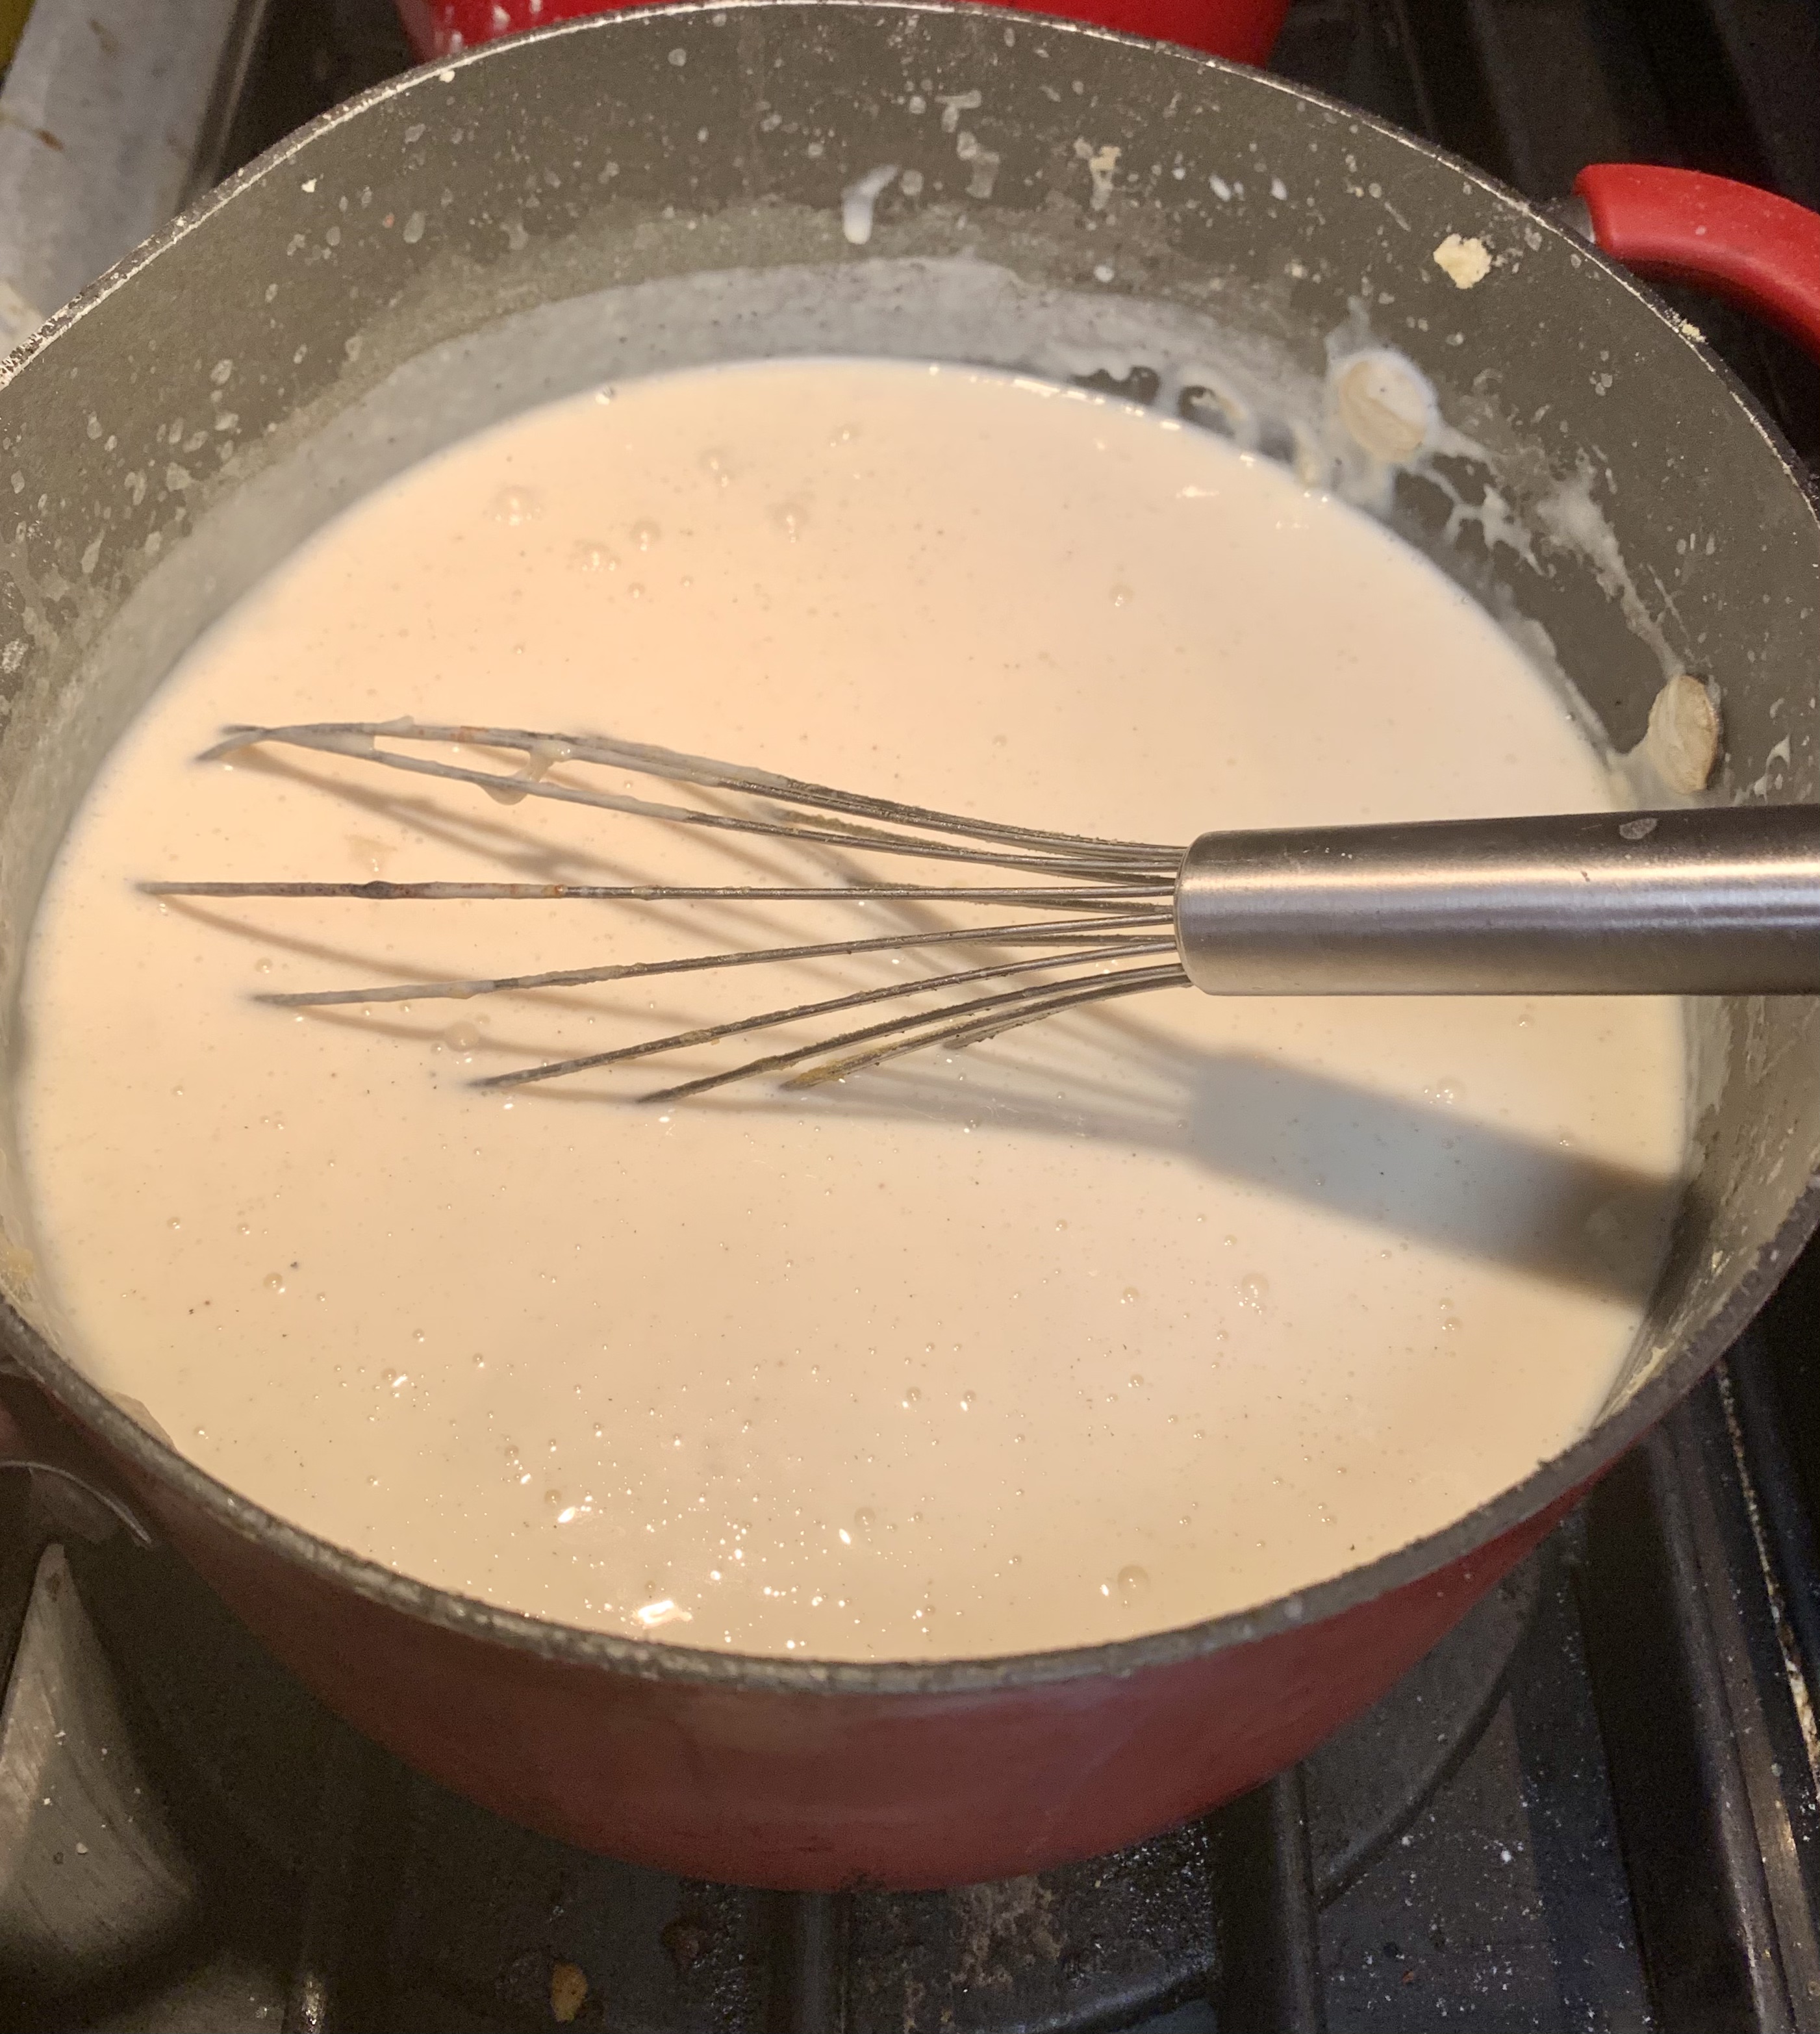
  • While whisking, slowly add the milk — make sure the roux is completely incorporated and a smooth white sauce (also known as a bechamel) will form. This is one of the 5 mother sauces in classic French cooking. Once we add cheese it becomes a Mornay sauce
Season, season, season
  • Once the sauce has come together, add the nutmeg, dried mustard, salt, pepper, and garlic and bring to a simmer
  • Once the sauce is continuously simmering, add the Parmesan or Romano cheese and stir well
Add all the cheeses!
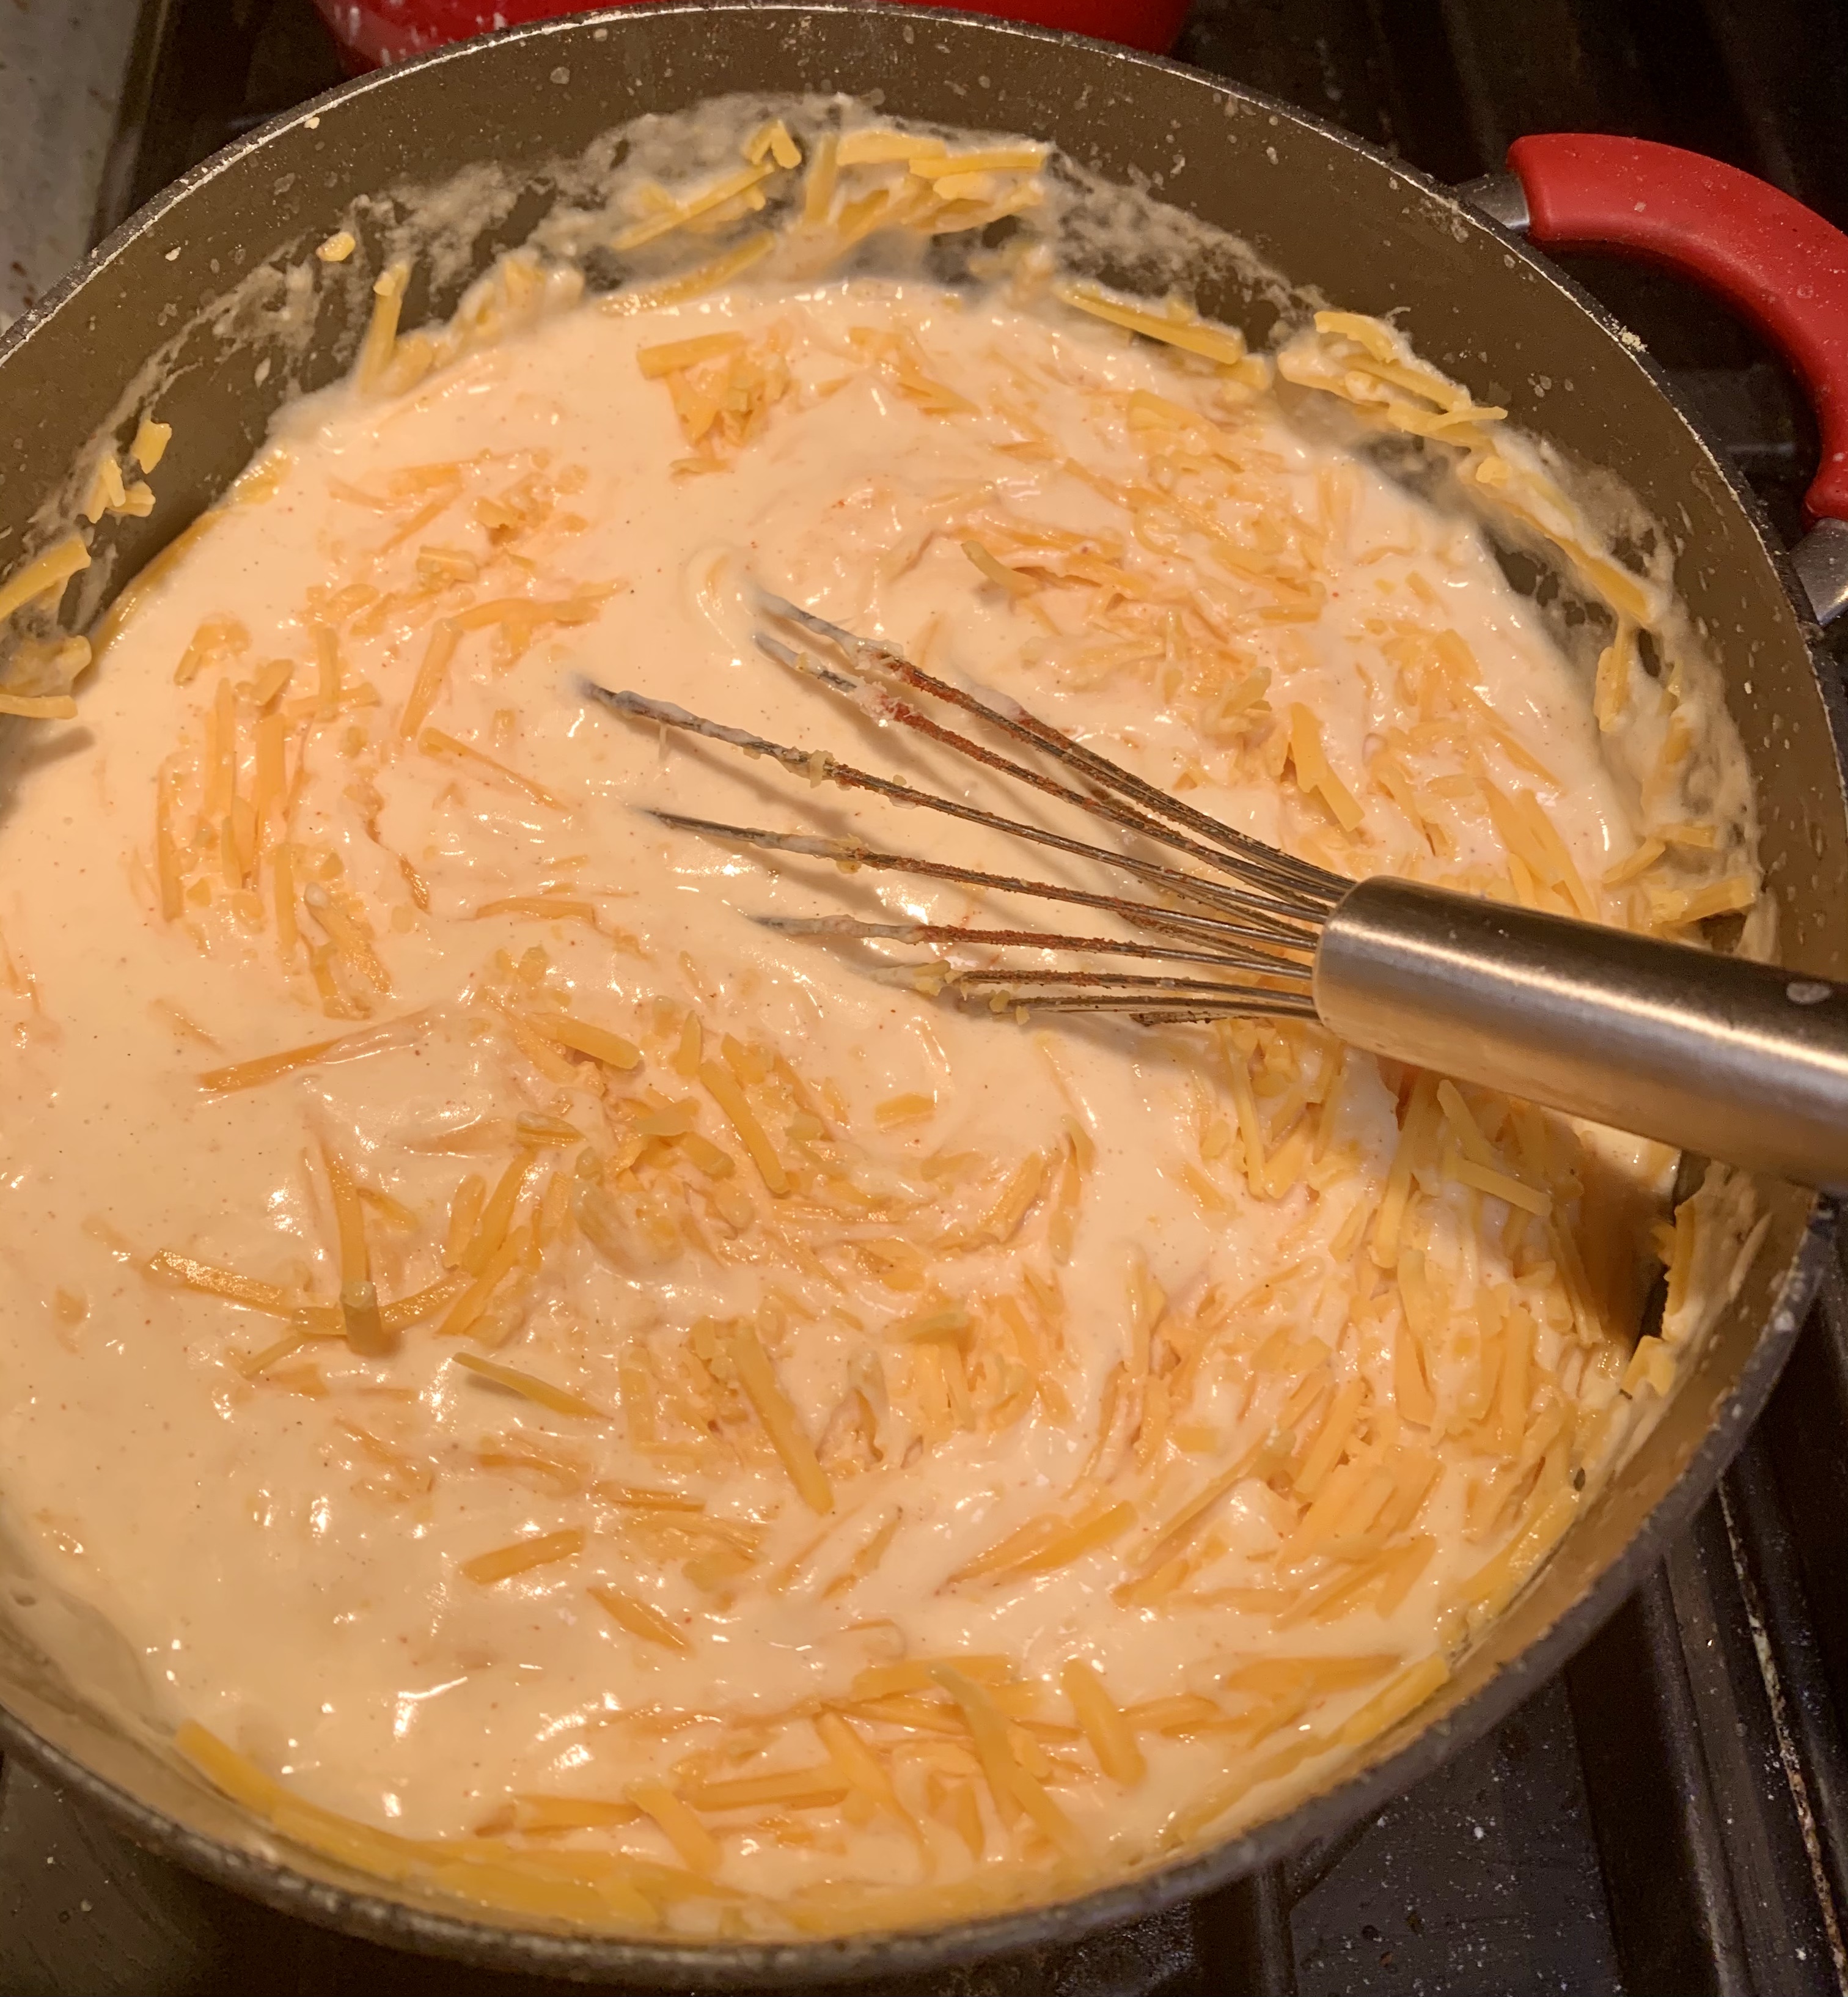
  • Once the Parmesan is incorporated, start adding the rest of the cheeses a handful at a time and stirring to incorporate each time — don’t add a new handful until the precious one has melted into the sauce
Bechamel becomes Mornay sauce!
  • Once the last of the cheese has been melted into the sauce, let it cook for another few minutes as it settles then turn the heat off
Add the pasta
  • Add the cooked and drained pasta to the cheese sauce and stir so every noodle is coated in cheesy goodness— resist the urge to eat the whole pot! 😉 
Cheesy goodness!
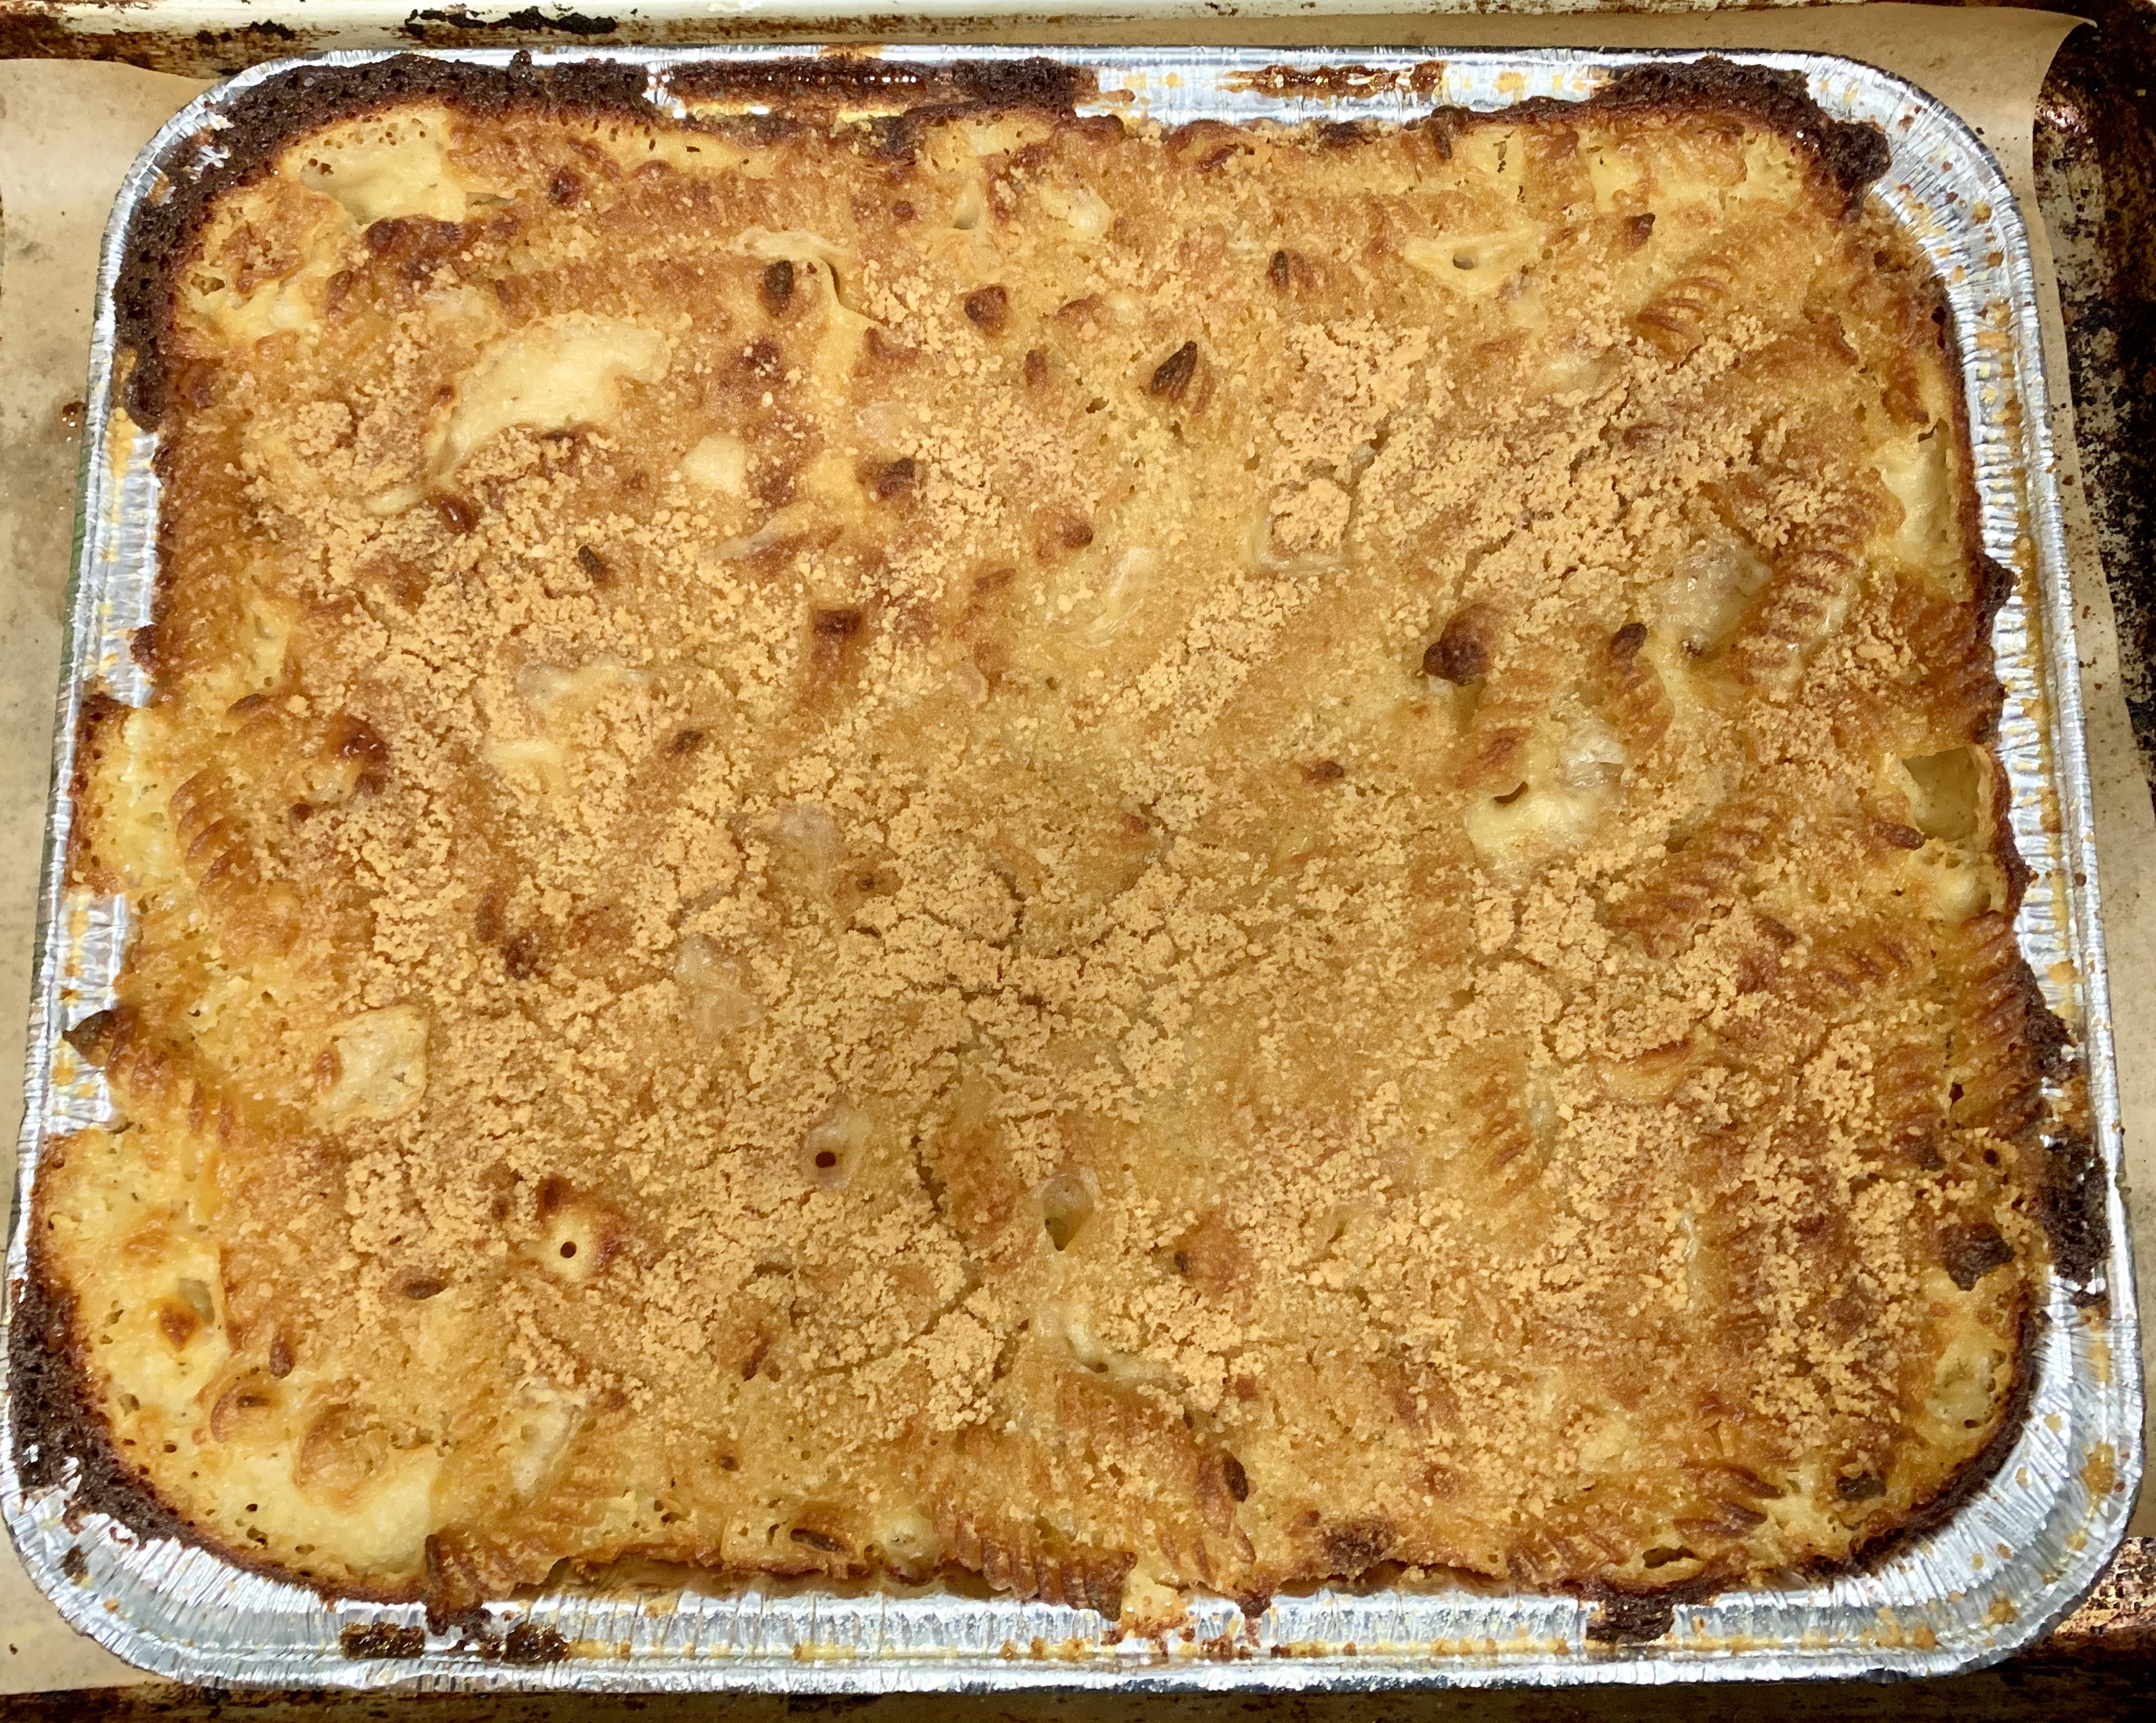
  • Add the cheese noodles to a greased 13×9 dish and flatten with your stirring spoon
Ready to Bake!
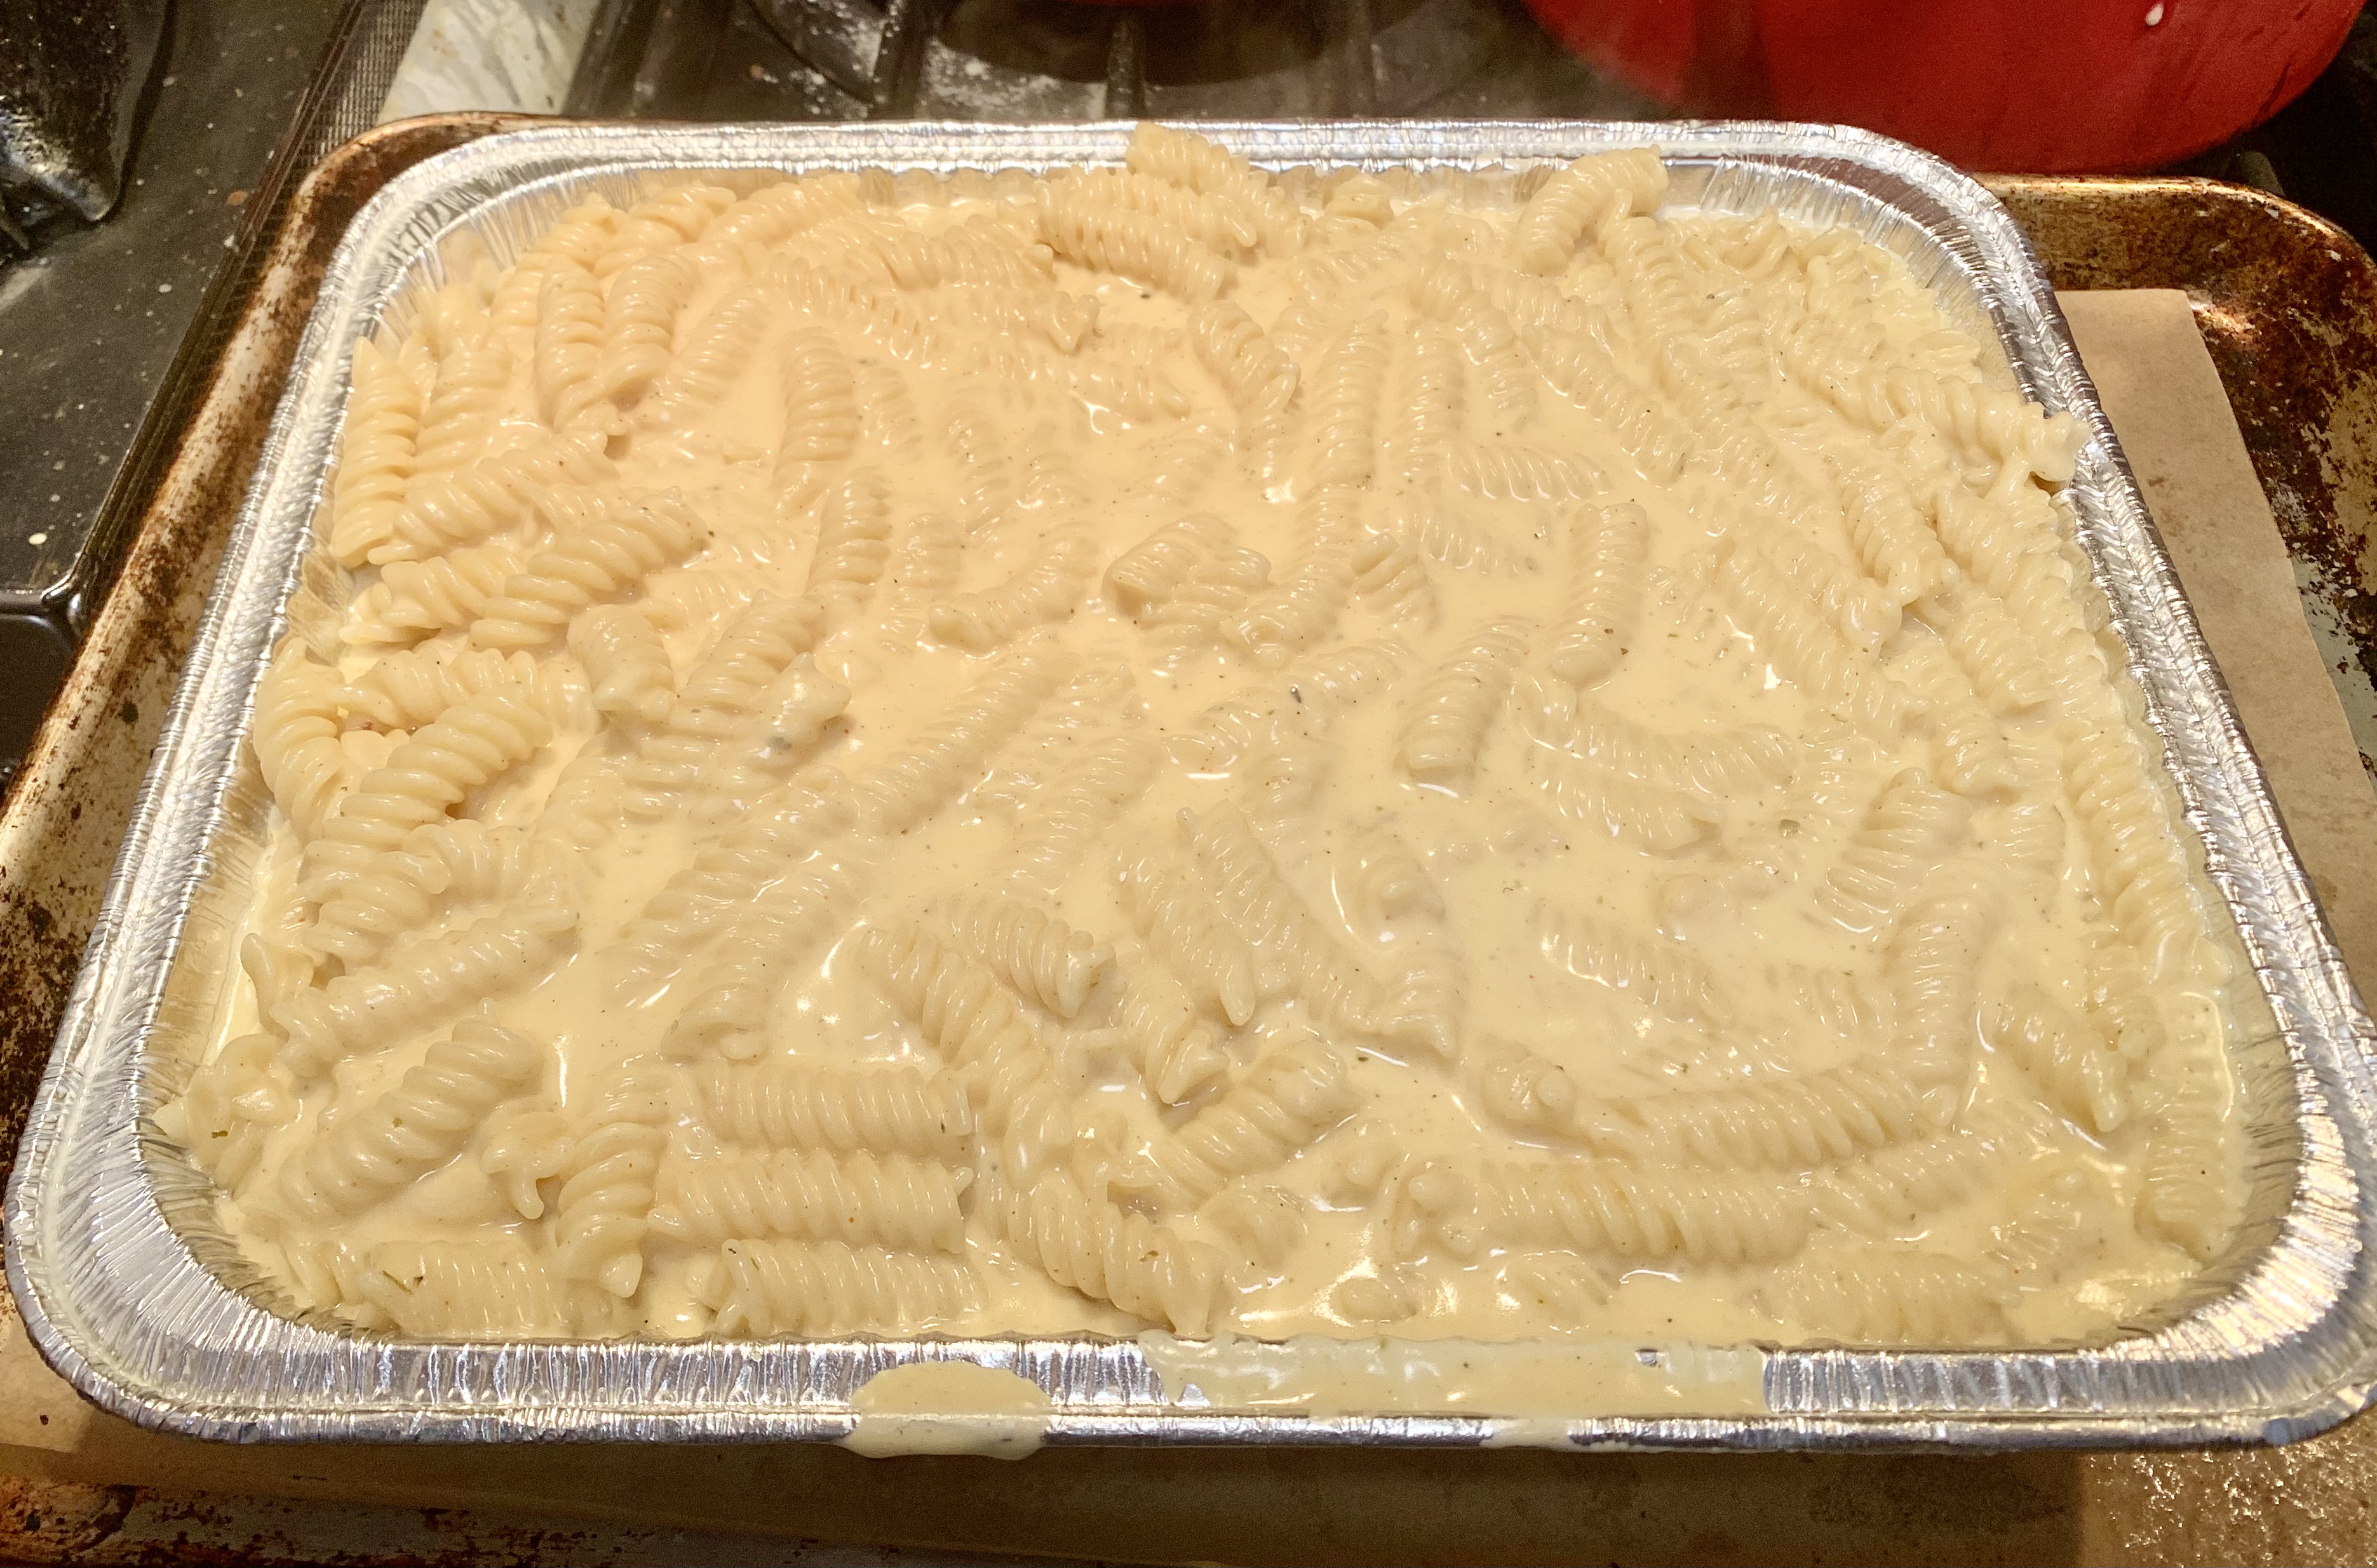
  • Mix the remaining Parmesan and breadcrumbs and sprinkle all over the top of the mac and cheese dish
  • Bake at 375 for at 25-30 minutes or until the crust gets golden brown

Enjoy with a simple green salad for a delicious midweek dinner or as a side. Yum!

Tip: want to make this dish healthier? Add some broccoli or spinach to the cheesy noodle mixture. Mmm 😋

Four Cheese Mac & Cheese
Advertisement

Fall Harvest Chicken Pot Pie

For our next episode of Cooking Under Quarantine, we’ll be making another wondering Fall dish — chicken pot pie! This is one of my personal favorites, and this version features festive fall flavors and is wonderful for the cooler weather. The filling is made with roasted root vegetables and tender chicken, with a homemade crust. This dish comes together very easily and is very versatile and adaptable to what you have in your pantry and fridge. So follow along with Chef Jon, and let us know how yours turns out!

Cooking Under Quarantine – Fall Harvest Chicken Pot Pie

Ingredients:

  • 2-3 medium parsnips
  • 2-3 medium carrots
  • 2 sweet potatoes or yams
  • 1 butternut squash, peeled and chopped
  • 2 cups + 2 tablespoons of all-purpose flour
  • 2 tablespoon of sugar
  • Salt
  • Black pepper
  • ​4 cups of chicken stock — can also sub vegetable stock
  • Dried rosemary, 1 tablespoon
  • Poultry seasoning, 2-3 tablespoons — or combo of dried sage and dried thyme
  • Turmeric, 1-2 tablespoons
  • 2 sticks of butter or margarine
  • 1/2 cup ice water
  • 1 lb of boneless, skinless chicken thighs — can use chicken on the bone as well, but will need to cook longer
  • 1 large Spanish or yellow onion
  • Garlic, 6-7 cloves
  • Olive oil

Equipment:

  • Parchment paper
  • 2 baking sheets
  • 1 large skillet or pot
  • Food processor (optional)

Directions:

  1. Preheat the oven to 425 degrees Fahrenheit
  2. Season the chicken with olive oil, salt and pepper and bake for 25-30 minutes
  3. Chop the carrots, parsnips, butternut squash, and sweet potatoes into chunks — don’t worry if they’re not all the exact same size. That’s what makes this dish rustic, and they’re also going to be covered with our crust.
  4. Toss the veggies with olive oil, salt, pepper, and rosemary and spread on a parchment lined sheet pan, and roast for 45 minutes to 1 hour
  5. Meanwhile, let’s make the crust — this is a super simple crust, but you can also feel free to use a store-bought pie crust or puff pastry
  6. For the crust: add 2 cups of flour, sugar, butter/margarine, turmeric, half of the poultry seasoning, and 1 teaspoon of salt into the bowl of a food processor. Don’t have a food processor? Feel free to use a hand mixer, pastry cutter, or even 2 forms — just try to resist the urge to use your hands since we want the butter/margarine and the dough to stay cold
  7. Pulse the ingredients together, then start to pour the ice water (ice included) through the feeder (or add a bit at a time if not using food processor) until the dough starts to crawl up the side of the bowl and becomes a loose ball of dough
  8. Empty the dough out onto a floured board or counter and gently form into a ball —resist the urge to knead!
  9. Wrap the dough in plastic wrap and refrigerate for at least 30 minutes, but up to overnight
  10. While the dough is chilling, sauté chop up the onions and garlic, and start to sauce the onion on medium heat with a little bit of olive oil and season with salt and pepper
  11. Once the onions are golden brown, add the garlic and rest of the poultry seasoning and a bit more olive oil
  12. Make a roux in same pan by adding a couple of tablespoons of flour — don’t worry about the onions clumping up. They will loosen up when we add the liquid later on
  13. Let the roux cook until it’s nicely browned but not burnt, then add the chicken (or veggie) stock
  14. Lower the heat to simmer and once the sauce has thickened, add the wine
  15. Let the sauce thicken again until it’s about the consistency of gravy, then add the chicken and roasted veggies
  16. Turn off the heat and  mix well — you want the chicken and veggies to all be coated with the sauce and for all of the ingredients to become one
  17. Take your crust out of the fridge, and roll out your dough to about 1/4 inch thickness or until it’s as big as the pan you’ll be using (I usually use a rectangular pyrex)
  18. Fill your pot pie pan with the chicken-veggie mixture until it’s full but not overflowing because the crust will expand a bit
  19. Layer the crust over the mixture and tuck it into the sides — don’t worry about it being perfect. It will patch itself up a bit in the oven
  20. Make sure to cut a few of slits in top crust to allow for steam to escape or your pie may explode (really!)
  21. Bake at 375 for 45min to 1 hour, or until crust is golden brown and crispy

​Serve hot (if making later freeze or refrigerate the pot pie after putting on the top crust on and bake at same temp for an additional 15 min). Enjoy!

Cooking Under Quarantine — Moroccan Chicken Tagine

For our next episode of Cooking Under Quarantine, we’ll be making one of my favorite Fall dishes — Moroccan Chicken Tagine. While my version of this classic Moroccan dish isn’t actually cooked inside of a tagine pot, but it echoes a lot of the flavors that I love when I ordering tagines at Moroccan restaurants — a little bit sweet, salty, sour, savory and the protein is always fall apart tender. It’s very comforting as the weather turns colder, and is also great to make in the slow cooker! So follow along with Chef Jon, and let us know how yours turns out.

Cooking Under Quarantine, Moroccan Chicken Tagine!

Ingredients:

  • 1 chicken cut into 8 pieces or 1-2 lb package of boneless chicken thighs
  • 5-6 carrots chopped into chunks
  • 2 medium onions, roughly chopped
  • 1 cup of pitted green olives
  • 1 cup dried apricots
  • 4-5 garlic cloves
  • Spices: smoked paprika, turmeric, salt, pepper, cumin, cinnamon, coriander, Ras al Hanout (Moroccan spice blend)
  • 1-2 cups of chicken broth
  • 1/2-3/4 cup lemon juice
  • 2 preserved lemons, chopped — Can buy preserved lemons at most specialty food stores, but can also substitute 2-3 regular lemons, juices and zest grated
  • Parsley or Cilantro (optional)
  1. Blend the spices and any other spices you like and add a couple tablespoons of olive oil — enough to form into a rub and coat the chicken on all sides with it, Let the chicken marinate for at least 15 minutes in the spice rub
  2. Sauté chicken in olive oil in a hot Dutch oven or deep pot on both sides until browned but not fully cooked through
  3. Remove chicken and set aside. You’ll come back to it later
  4. In same pot add garlic and onions and cook until starting to brown (approx 5 min)
  5. Add carrots and keep cooking
  6. If you have extra, season the veggies with more of the spice rub and heat until fragrant
  7. Add preserved lemon and olives to the pot
  8. Add broth and lemon juice to veggie pan to deglaze the pan, and make sure to scrape bottom of the pot for flavor bits — add just enough broth so that the liquid covers the ingredients
  9. Add aprocots to the pot and make sure to give everything a good mix!
  10. Add the chicken back in and stir all together — taste the liquid and adjust seasonings to your taste. Maybe add more lemon, salt, etc
  11. Heat on medium high for 5-10 minutes until the liquid begins to simmer, then cover and lower heat to medium low and simmer for about 45 min – 1 hour
  12. Garnish with fresh chopped cilantro and/or parsley then spoon over couscous or serve in a bowl with sides of your choosing.

I love to serve this dish with some lemon couscous, herb roasted tomatoes and some crusty bread to mop up all the delicious sauce. It’s always a big hit and perfect for leftovers!

Summer Wedding Celebration!

My family is celebrating my brother’s upcoming marriage with a small, outdoor wedding. But, I wanted to share the recipes for what we’ll be eating with you, so that you can recreate those flavors at home! So follow along with Chef Jon in the video above (or on YouTube HERE) or by following the recipe below, as we make Pistachio-Coconut Crusted Salmon with an Arugula-Pistachio Pesto and Grilled Corn, Tomato and Avocado Salad. Perfect for a summer celebration!

Pistachio-Coconut Crusted Salmon 

Ingredients

  • Salmon fillets, skin on
  • Garlic, 3-4 cloves
  • 1/2 cup of shelled pistachios
  • 1/2 cup shredded coconut flakes, unsweetened
  • 1 tbsp of dijon mustard — can substitute mayo if desired
  • Olive oil
  • 2 tsp of salt
  • 1/2 tsp of black pepper
  • 2 lemons, halved and grilled cut side down (optional)

Directions

  1. Preheat the oven to 400 degrees
  2. While the oven is preheating, let’s make the crust — in the bowl of a food processor, add the pistachios, garlic, coconut, 1 tsp of salt and pepper
  3. Pulse in the food processor until the mixture comes together and is similar in texture and size to sand — you can do this without a food processor by putting mixture into a plastic bag and taking your aggression out on it with a rolling pin!
  4. Pat the salmon dry with a towel, and then season with the remaining salt, and transfer it to a baking sheet lined with parchment paper — you can use tin foil, but parchment paper will make sure the salmon won’t stick. Plus, makes for super easy cleanup!
  5. Using a brush or a spoon, spread the dijon all over the flesh of the salmon — this is the glue the helps the crust stick
  6. Using your hands, cover the mustard-covered salmon with the crust mixture. Make sure to cover the fish evenly, so it will cook evenly, and cover it all over — we don’t want any parts uncovered
  7. Once the fish is covered, pour some olive oil over the top to help with browning the crust
  8. Bake the fish for 10-12 minutes then remove from oven and let the fish cool for at least 5 minutes
  9. Garnish with the Arugula-Pistachio pesto, grilled lemons and serve with Grilled Corn, Tomato and Avocado Salad. Yum!

Arugula-Pistachio Pesto

Ingredients

  • 1-2 cups of arugula or baby arugula
  • 1 cup of pistachios — you can substitute walnuts if you’ve used up all your pistachios on the fish
  • 1-2 tsps of lemon zest
  • 1-2 tbsps of lemon juice
  • Garlic, 4-5 cloves
  • 1/2 cup of Parmigiano-Reggiano cheese or Pecorino Romano or an aged, hard cheese
  • Olive oil

Directions

  1. In the bowl of a food processor (or mortar and pestle) add all of the ingredients except for the oil
  2. Pulse the mixture continuously while adding olive oil until it turns into a loose paste. I like mine a little coarse and chunky, but you can choose your own thickness
  3. If you find it too thick, add more olive oil or a bit more lemon juice. Make sure to taste it!
  4. Empty mixture into a bowl and let it sit at least 10-15 minutes before using — this pesto is also great as a pasta sauce. Just mix the cold or room temperature pesto into hot pasta. So good!

Grilled Corn, Tomato & Avocado Salad 

Ingredients

  • Corn, 4-5 ears
  • Cherry tomatoes, 1 pint, cut in half
  • Red onion, 1 medium or 1/2 large onion, diced
  • Avocados, 2 — make sure that your avocados are ripe, but not mushy, chopped in 1/2 inch cubes
  • 1/4 cup of champagne vinegar or white wine vinegar
  • 2 tbsp of honey
  • 1 tbsp of dijon mustard
  • 2 tsps of dried mint
  • 1/4 cup of lemon juice
  • 1/3 cup of olive oil
  • 1/2 cup of fresh cilantro

Directions

  1. Heat your grill or grill-pan to medium heat — you want it hot, but not smoking
  2. While the grill is getting hot, clean your corn by removing both the husk and silk strands — you want corn to grill contact to happen
  3. Place the corn on the grill (and some lemon halves which make a great garnish) — don’t worry about turning the corn too too often since you want some of that char and grill color on the corn. You should probably give it a nudge every 3-5 minutes — it will only take about 10-15 minutes total to cook
  4. While the corn is grilling, dice your onion and chop the tomatoes in half and place in a large bowl big enough for mixing
  5. Once your corn has come off the grill and cooled for a few min, cut off the end of the corn so you have a straight edge, and balance the corn on its straight end
  6. Using a sharp, chef’s knife, starting at the top of the ear, cut of the corn kernels by cutting straight down, and rotate the corn once you get to the bottom and repeat until you’ve cut all of the corn off the cob. Repeat for all of the ears or corn. Add the corn to the tomatoes and onions
  7. Cut your avocados by running a sharp knife along the outside, around the pit until you’ve gone all the way around. Use your hands to twist the 2 halves apart
  8. Take your knife and thwack it into the avocado pit so it sticks into it, then twist to detach the pit from the avocado
  9. Use a spoon to scoop out the avocado meat and chop into 1/2 inch pieces
  10. Drizzle the avocado pieces in lemon juice to keep them bright green before you mix into the corn salad mixture.
  11. For the dressing: mix honey, champagne vinegar, olive oil, dijon, salt, pepper, cilantro and mint in a bowl and mix vigorously until the dressing is one homogeneous mixture — I like to use a mason jar.
  12. Pour the dressing over the corn-tomato mixture (reserving some dressing if needed later) and add the avocados
  13. Gently toss everything together until all of the ingredients have a little bit of dressing on them, and make sure to be delicate with the avocado so it doesn’t get mushed
  14. Garnish with more chopped cilantro, and erve with your favorite fish or chicken dish on a beautiful summer day — like for a wedding celebration perhaps. Bon appetit!