Recipe: Everyday Special Tomato Sauce

I am a self-labeled foodie, and I love cooking as much as going out to eat…but I’m also a foodie on a budget. So, I’m always looking for ways to save some money, while at the same time not skimping on the flavor. One of the easiest and tastiest ways I’ve found is by making my own sauces. A quality jar of tomato sauce at the grocery store can run you anywhere between $5-$10. What I like to do is buy the much cheaper canned tomatoes, and make my own sauce at home. Not only will this save a lot of $ over time, but I can flavor it exactly as I like.

This is sauce that I came up with a few years ago and it’s my go to tomato sauce recipe. Flavored with garlic, oregano, crushed red pepper as basil, it has a bold, all day taste, but can be made in 30 minutes.

Ingredients:

IMG_1897
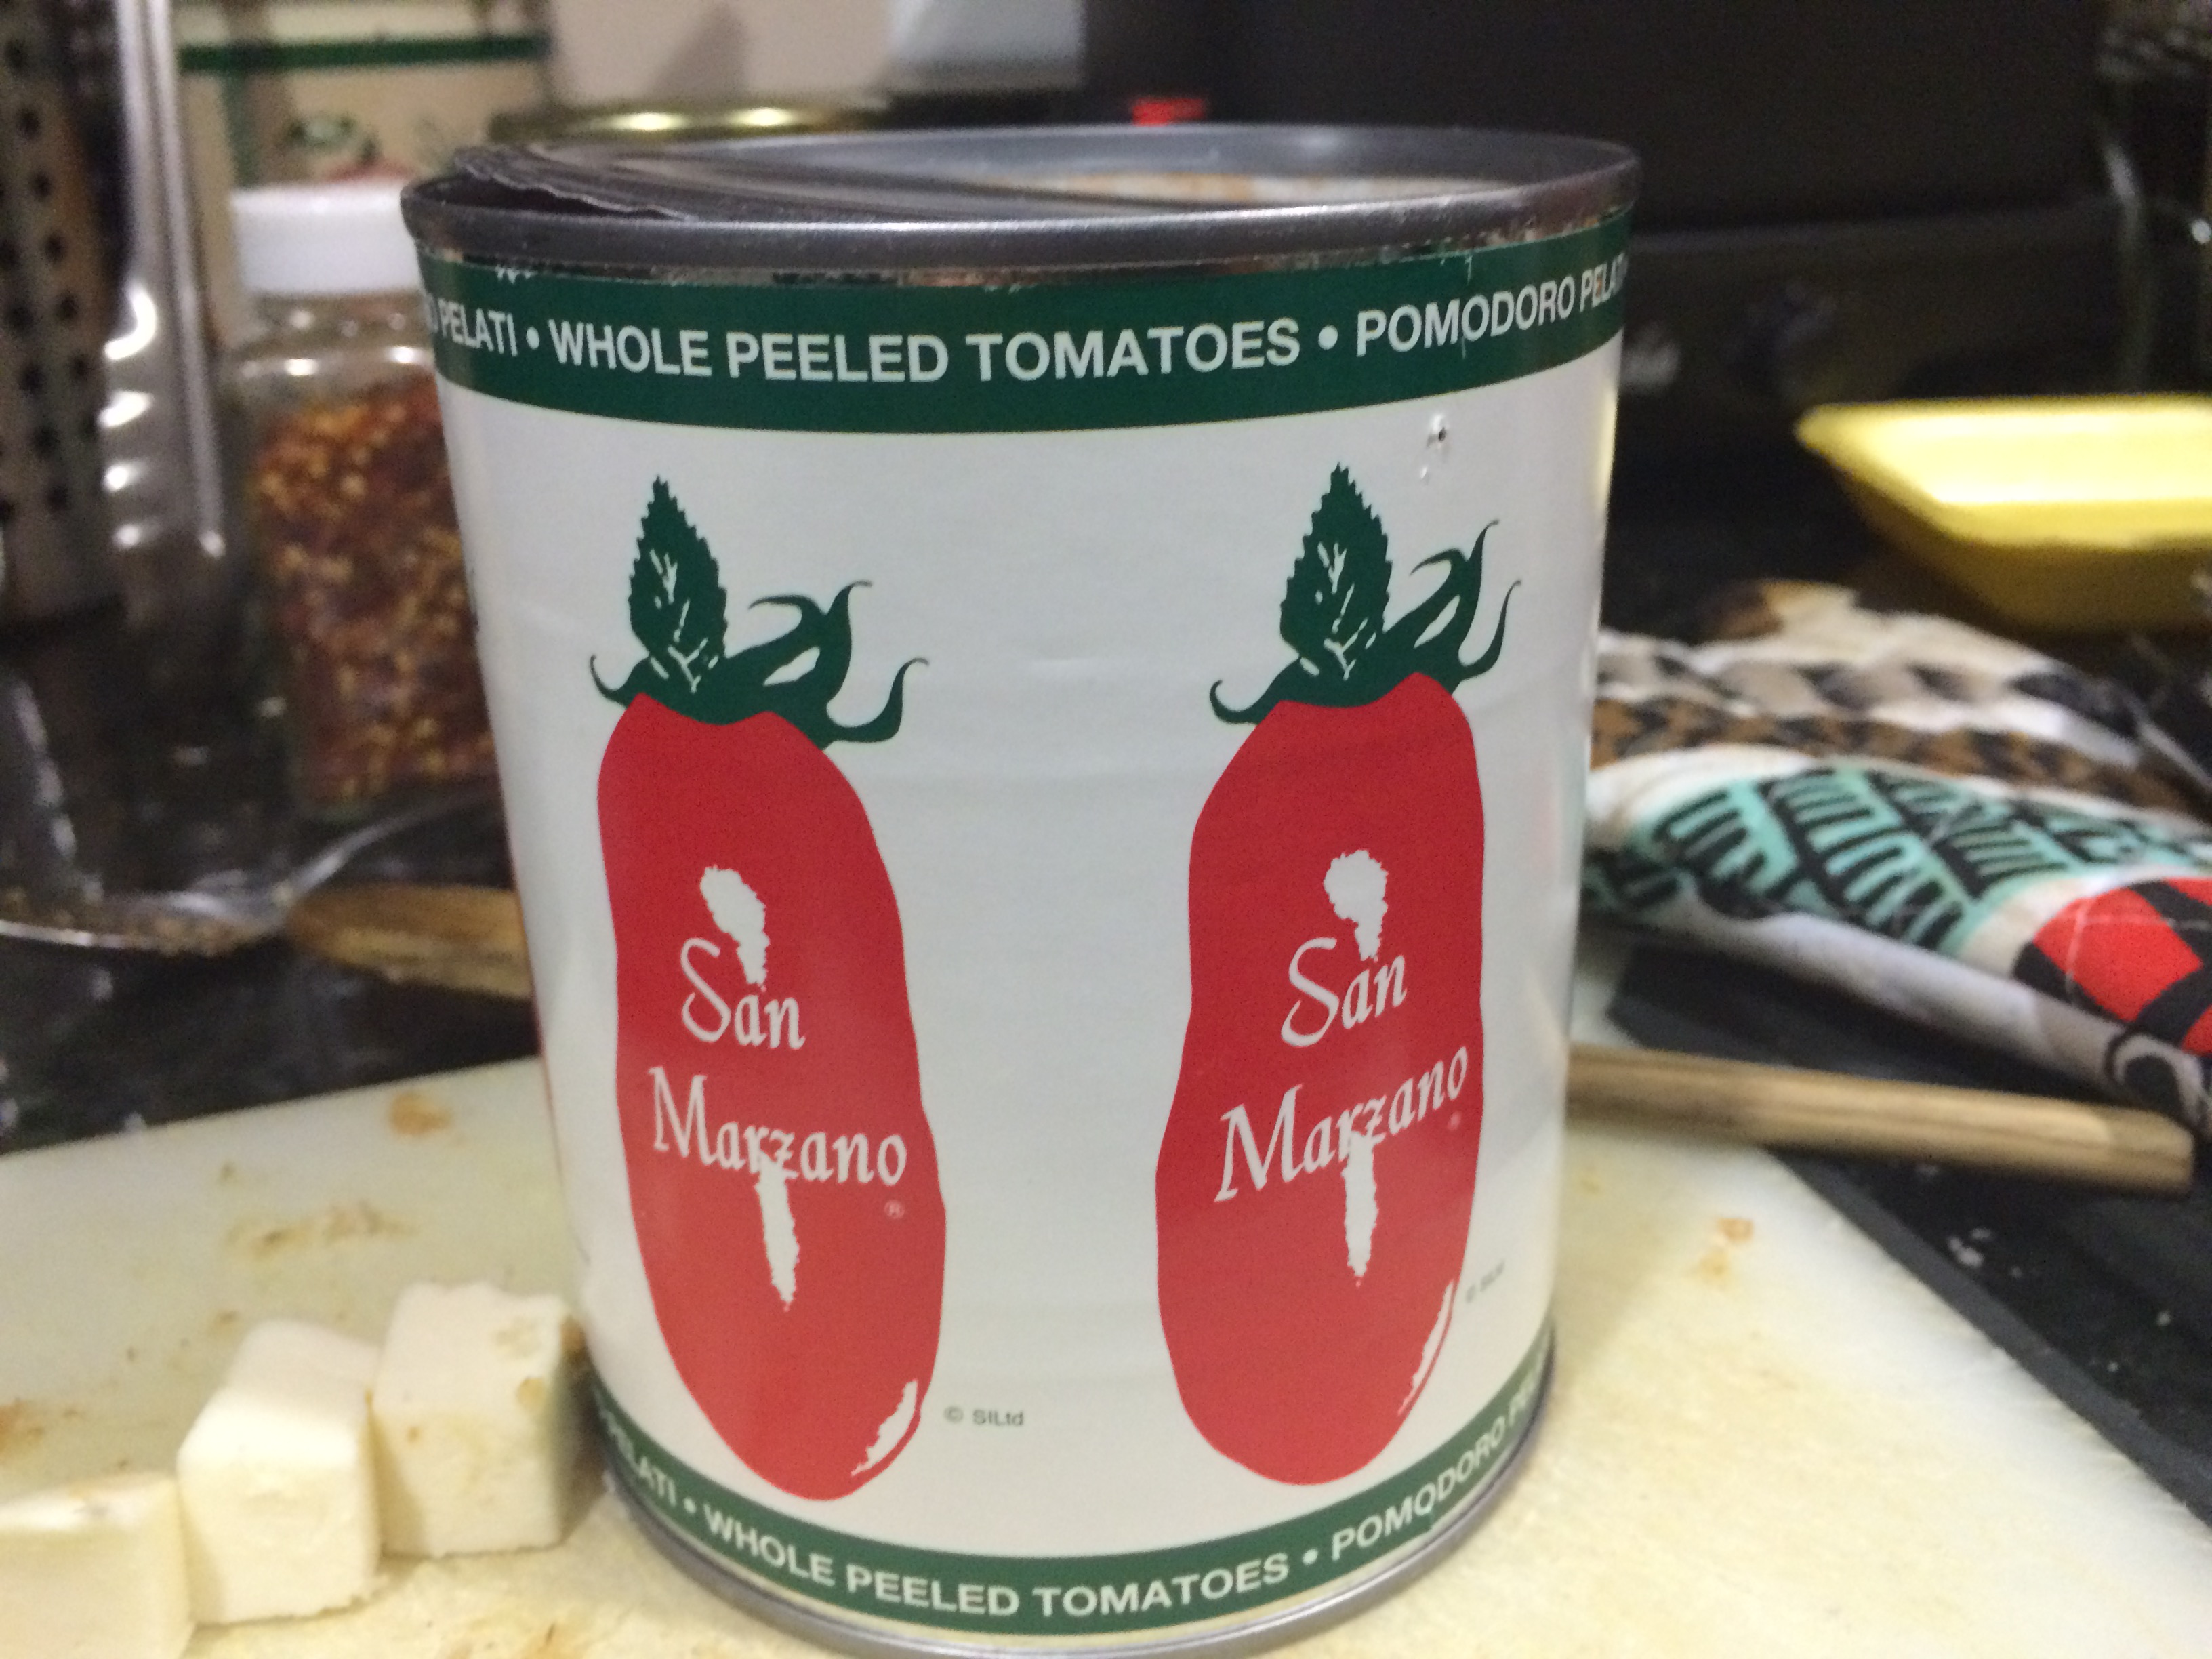
1 28 oz can of whole peeled tomatoes—I prefer San Marzano because they’re sweeter, but any brand works. Just make sure they’re not flavored with anything. Also, don’t get tomato purée or sauce in a can, ugh.

1 package of grape or cherry tomatoes–any kind of tomatoes really works well, even vine ripened or beefsteak tomatoes

Salt

Pepper

4-5 cloves of garlic, minced

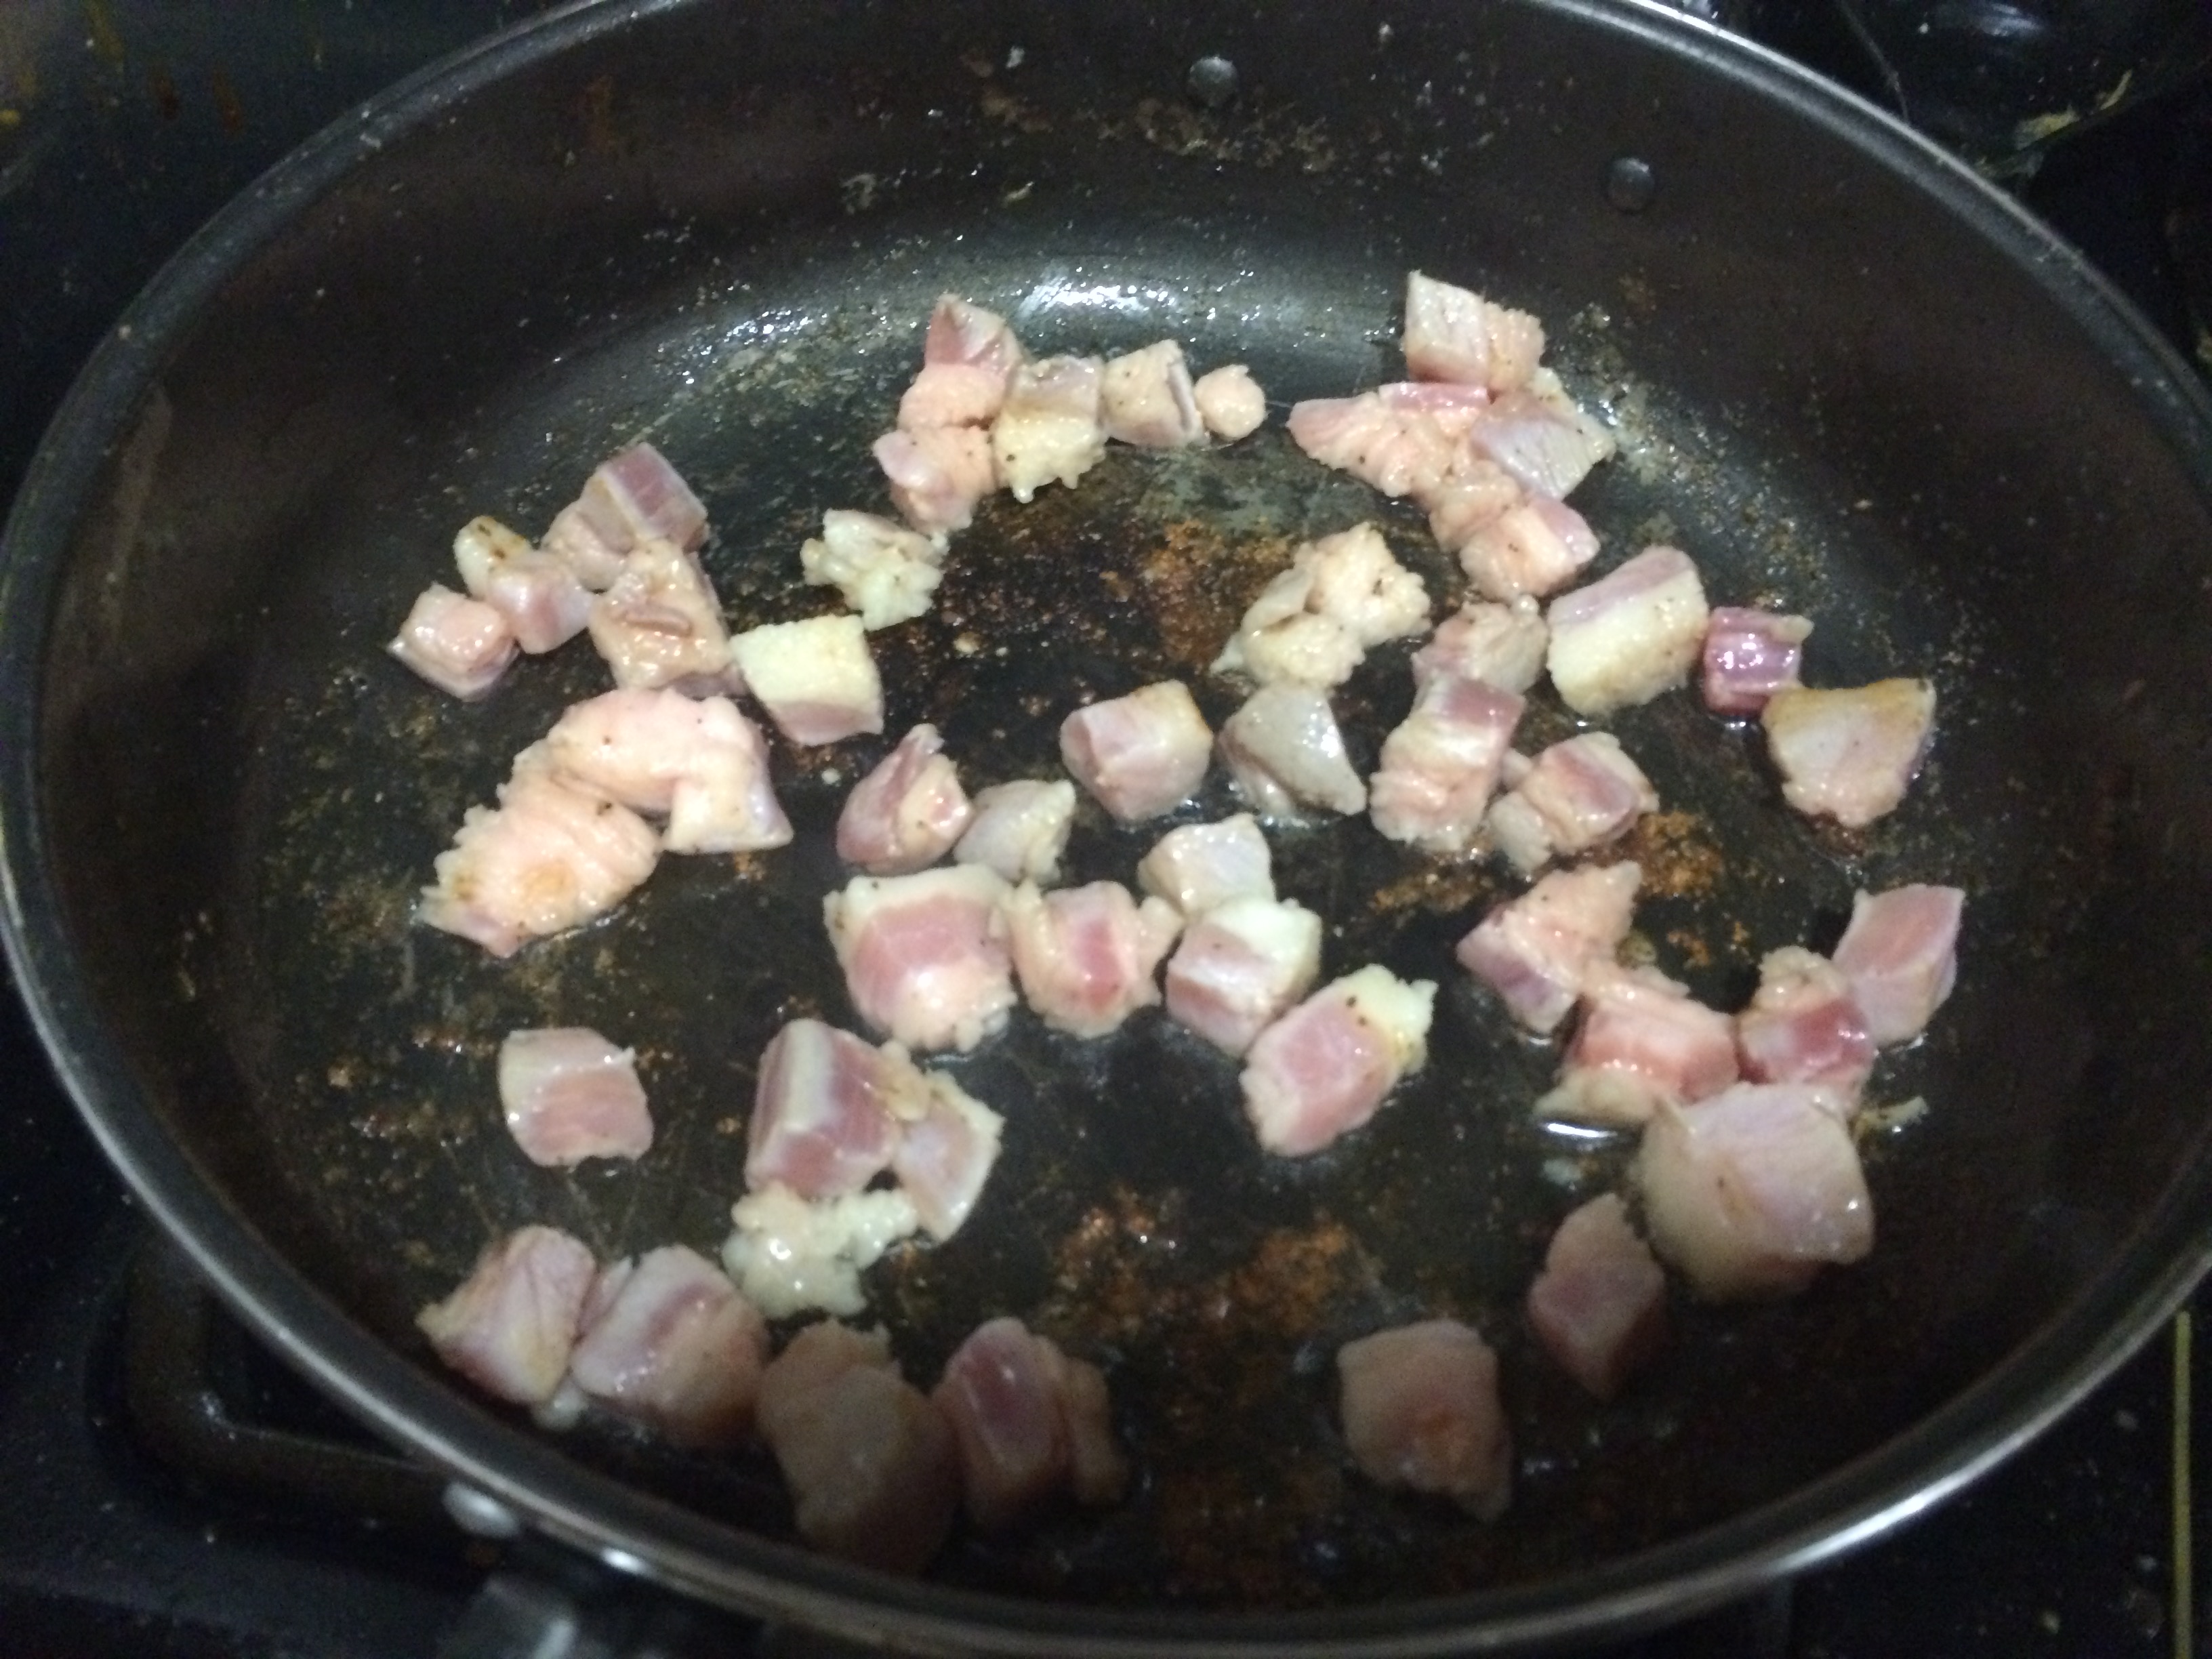
1 tin of anchovy fillets, packed in oil and salted—don’t worry if you don’t like eating anchovies or worry that it’s too fishy. The anchovies will melt in the pan, and give your sauce the salt it needs, and a deep umami flavor. This is actually a trick I learned from Rachael Ray a while ago. I was skeptical when she added as well, but it takes the sauce to another level

1 tablespoon of crushed red pepper flakes

½ tablespoon of oregano, dried

½ tablespoon of basil, dried—if you’re going to serve this sauce right away, then a handful of fresh basil is a great way to finish the sauce before it gets tossed with some pasta

Olive oil

 To Make the Sauce:

  1. Set your oven to 400 degreesIMG_1888
  2. Add the grape tomatoes to a baking pan and toss with olive oil, salt and pepperIMG_1892
  3. Roast in the oven for 15-20 minutes as you complete the rest of the stepsIMG_1893
  4. Heat some oil in the bottom of a sauce pot on medium-high heat until very hot, but not smokingIMG_1894
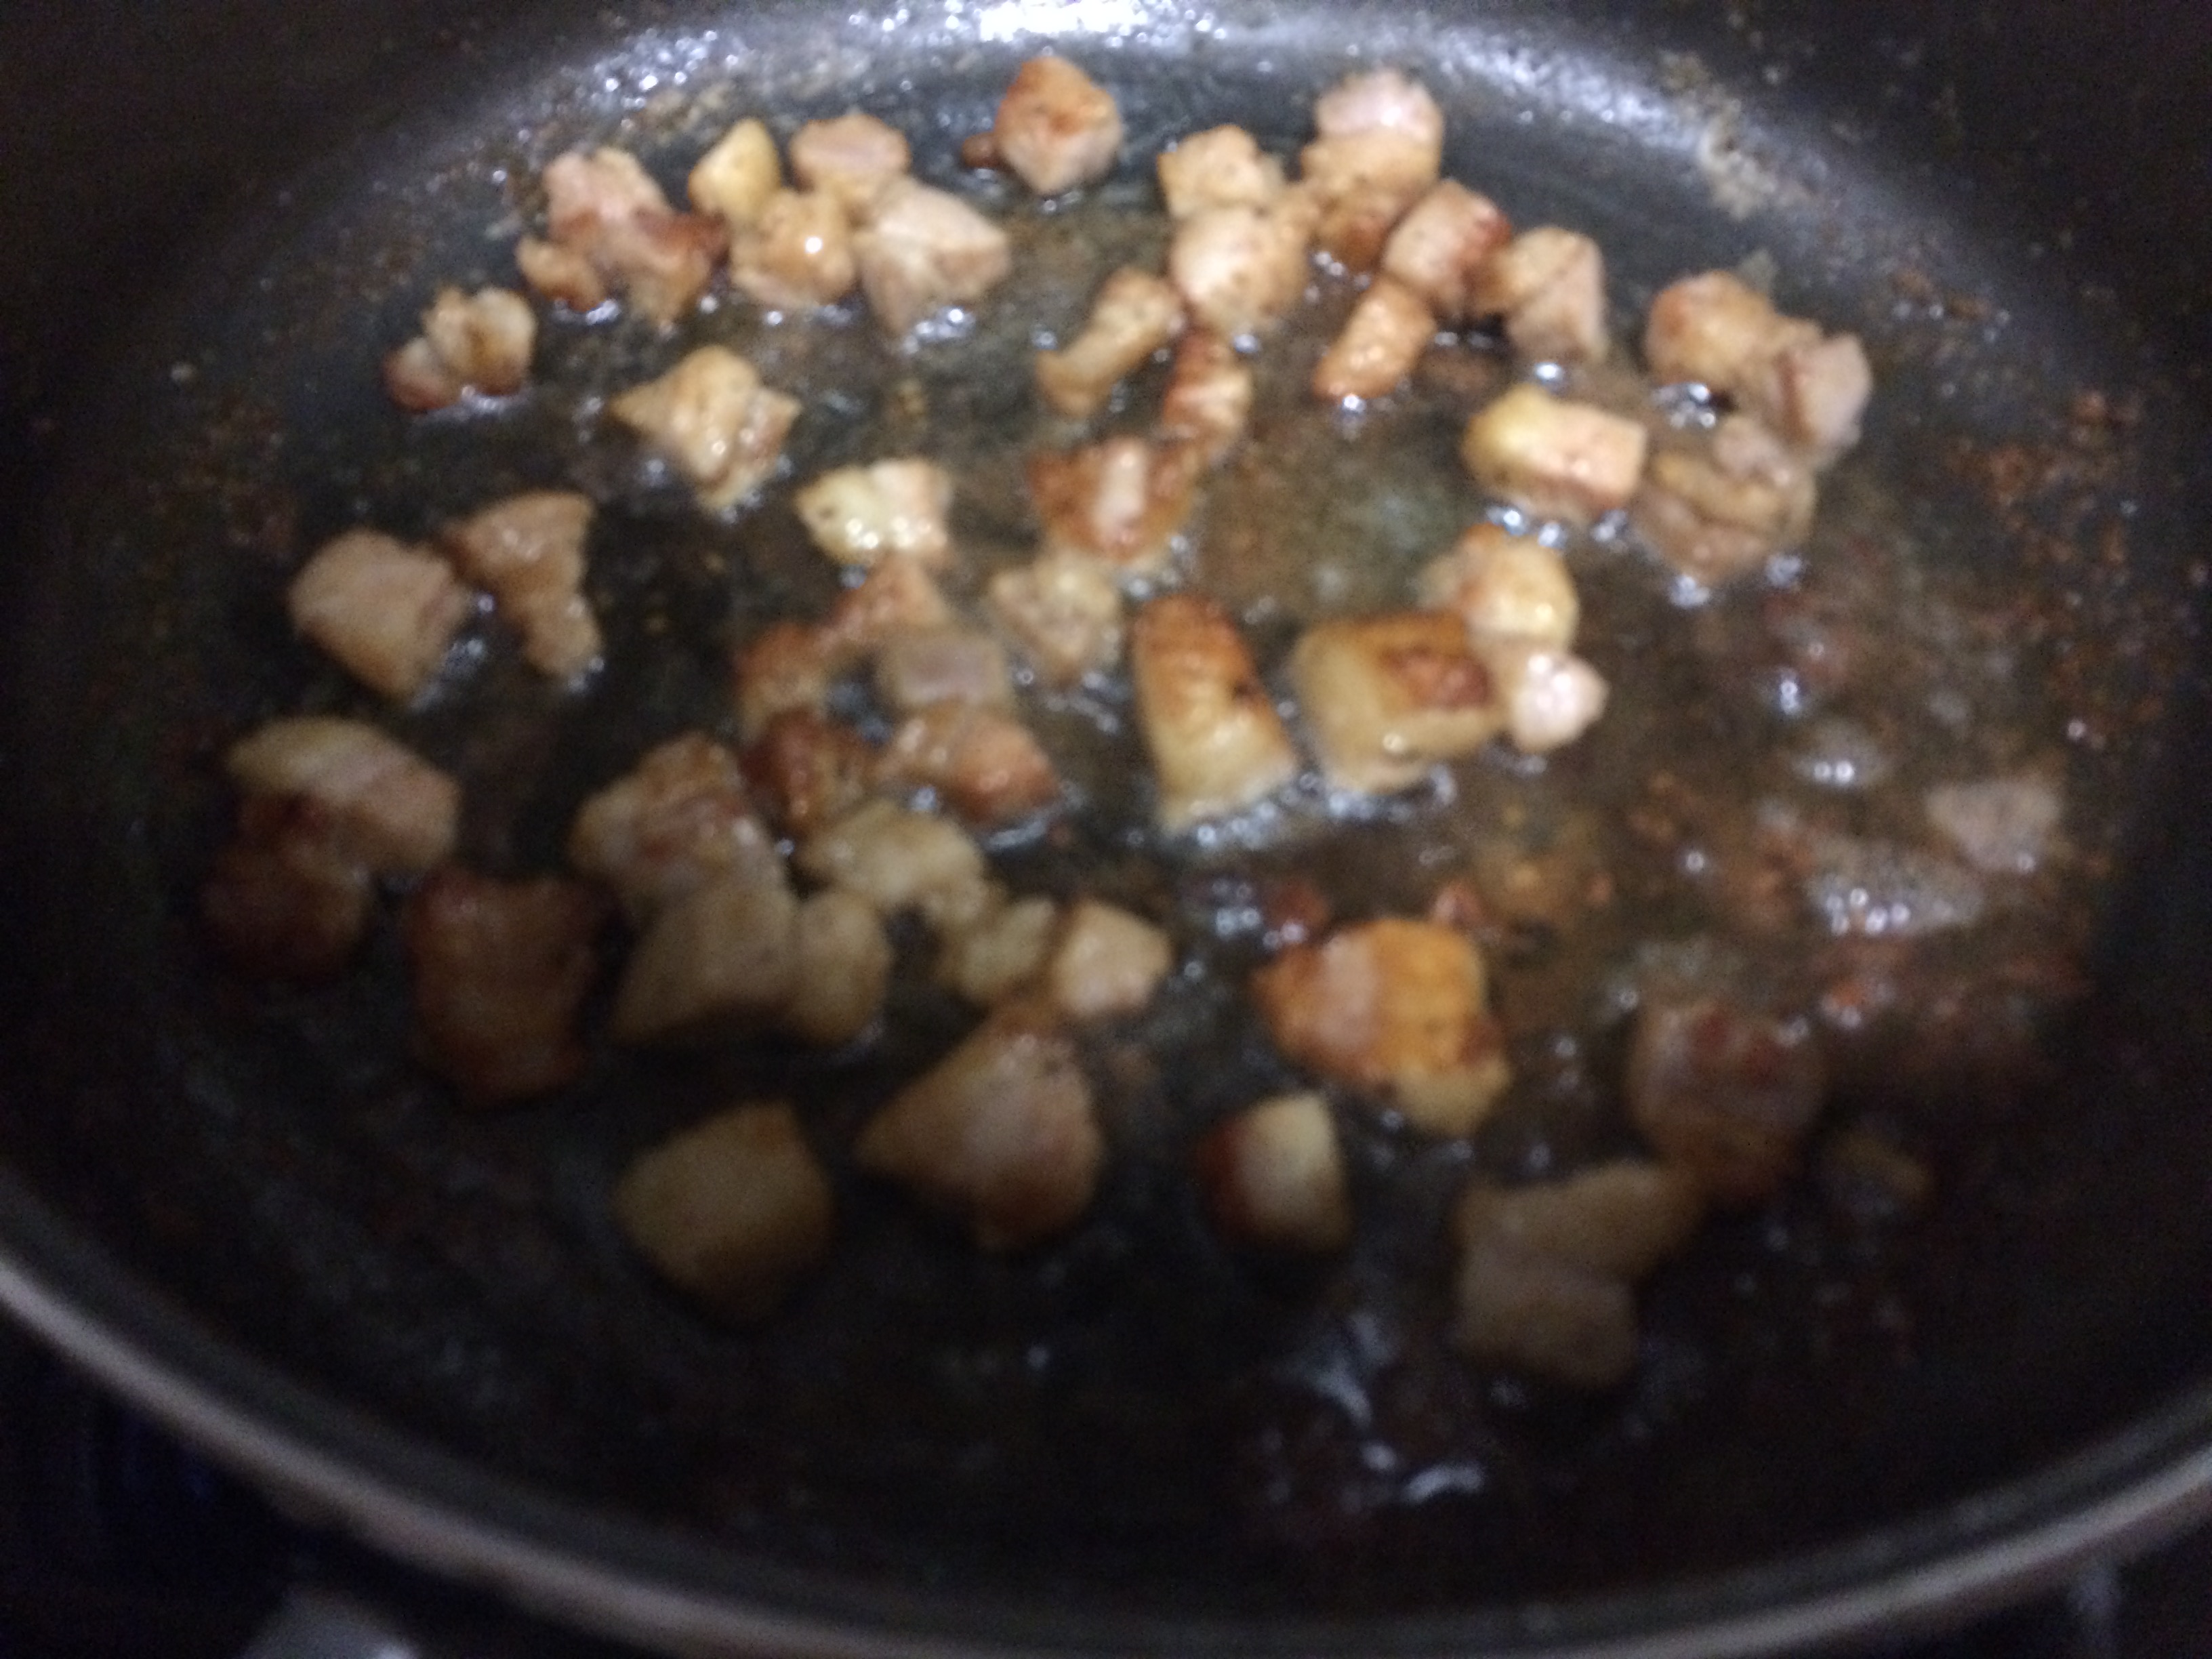
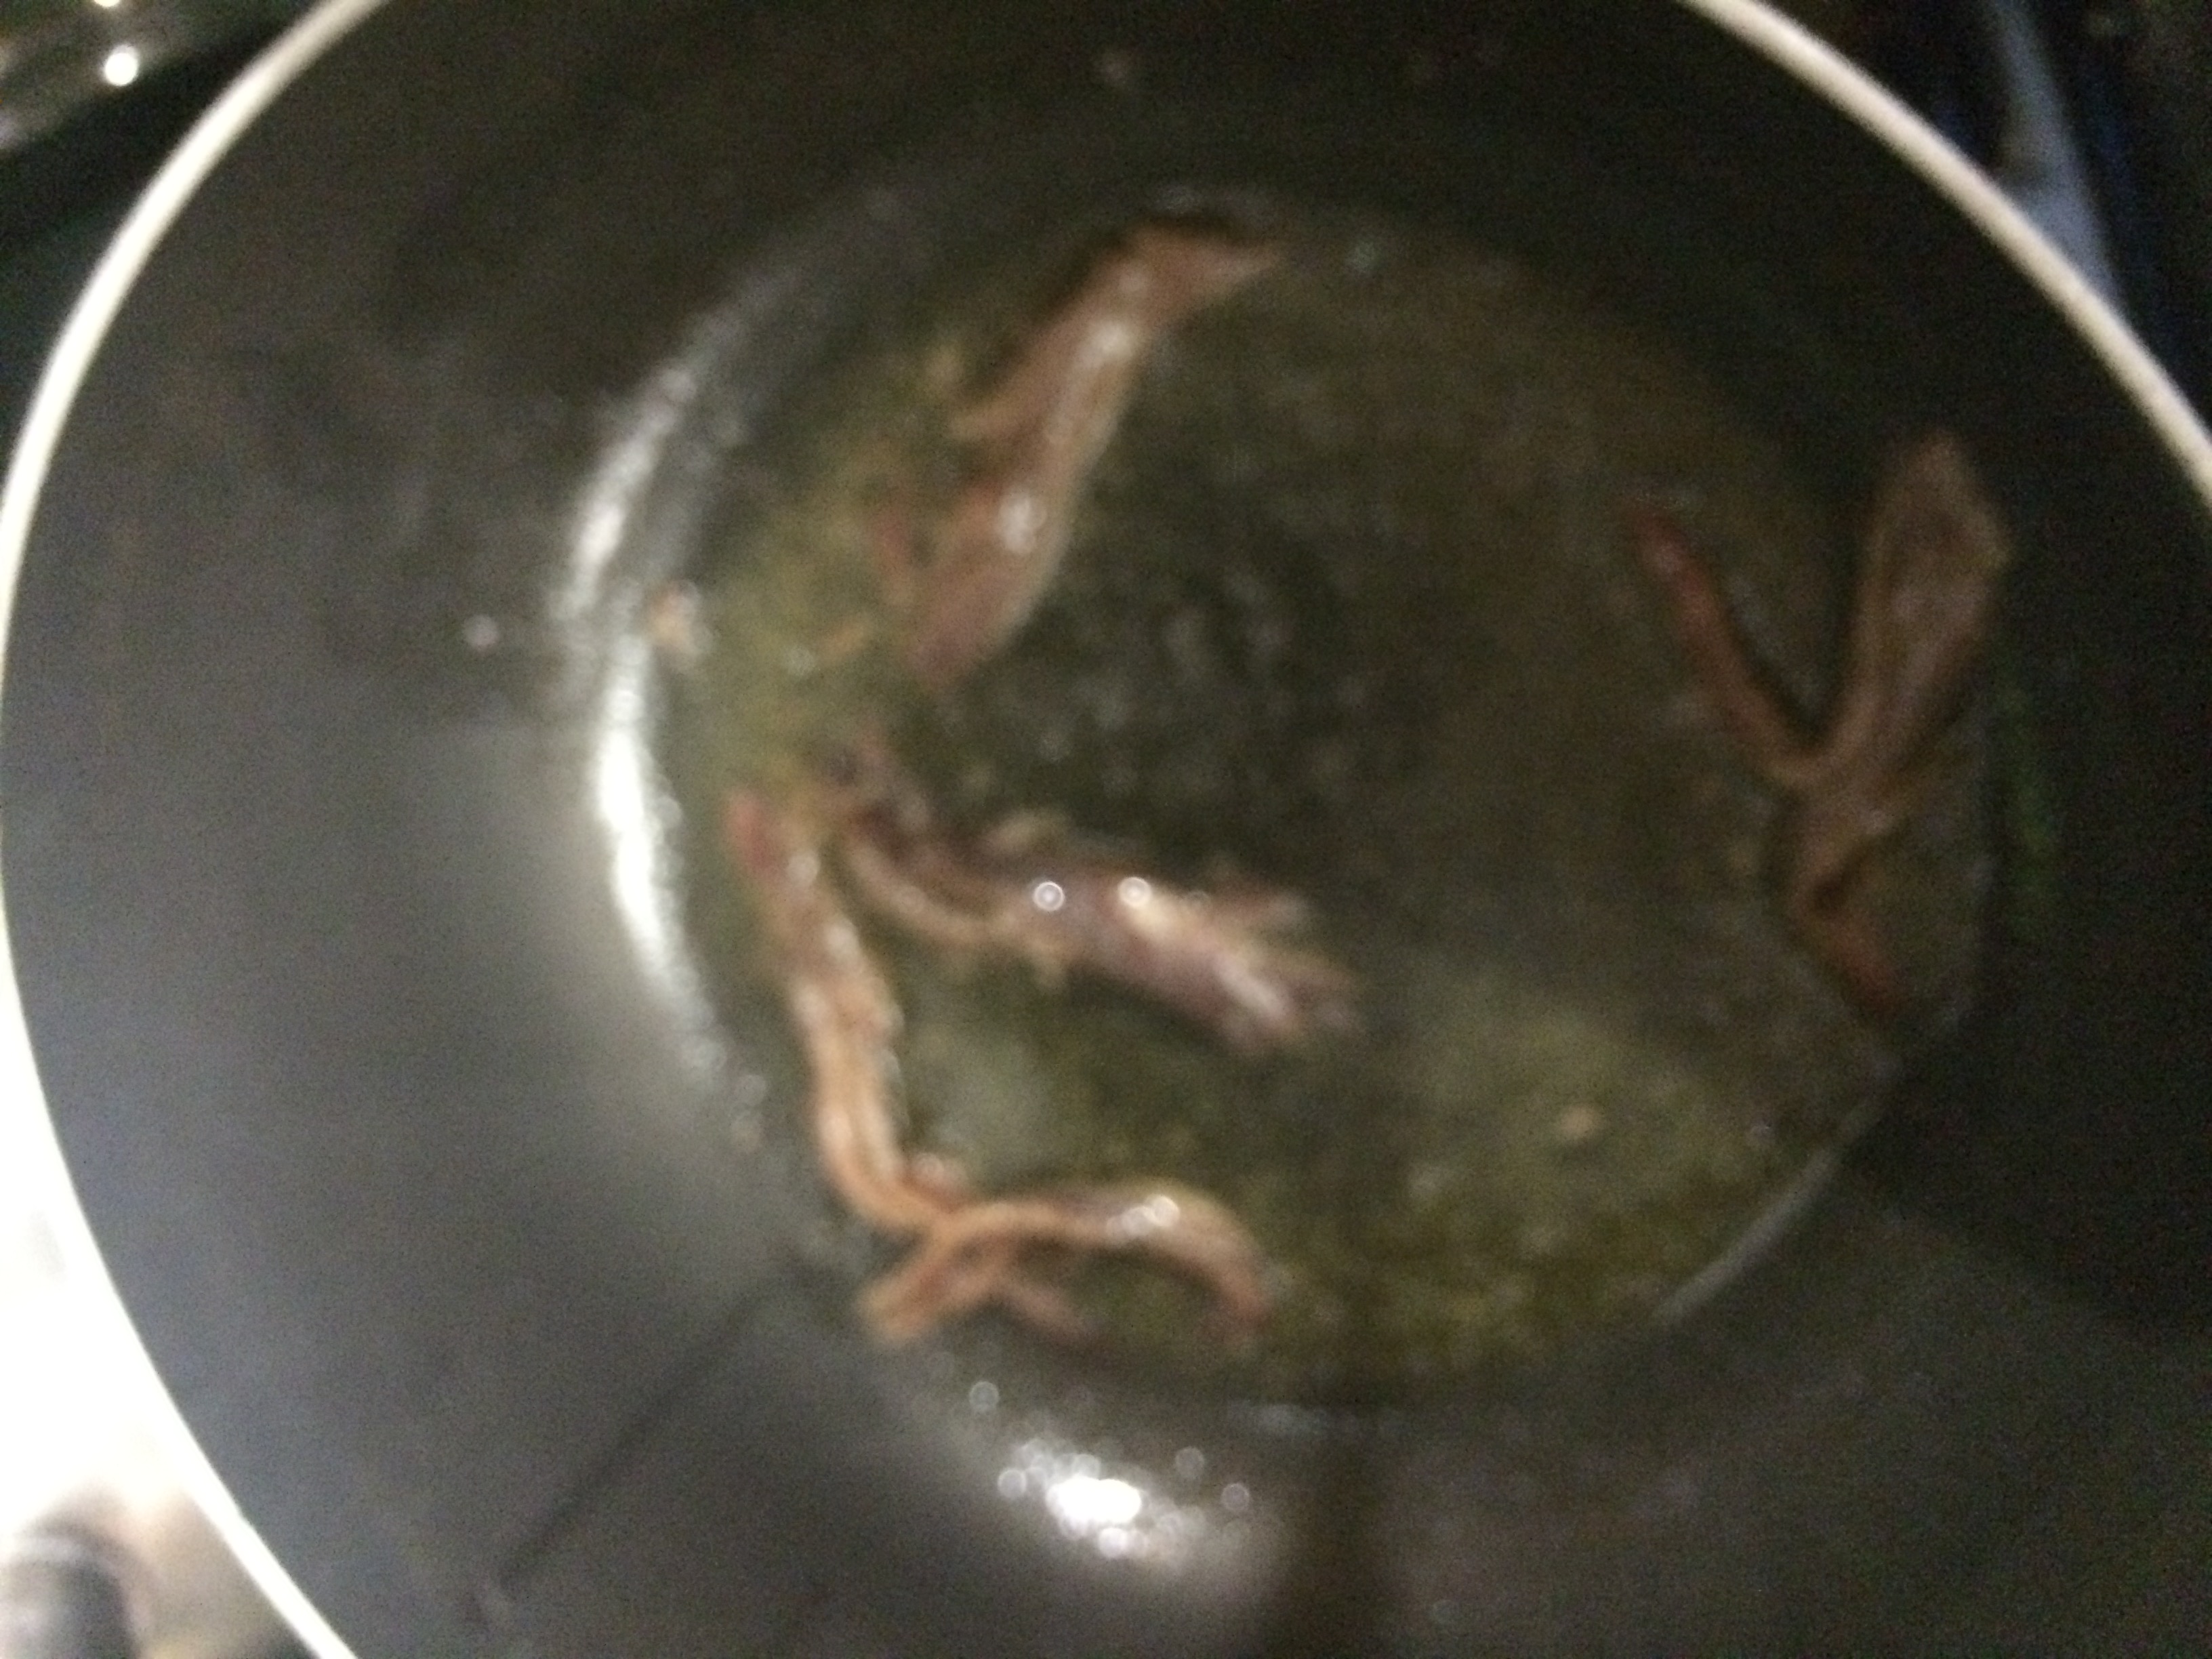
  5. Add the anchovies to the pot. As they hit the hot pan, they will begin to melt. Make sure to break them up with a wooden spoon to help them alongIMG_1895
  6. As the anchovies are melting, add the garlic and cook together. Your kitchen will begin to smell amazing. Like your favorite Italian restaurant!IMG_1896
  7. Let the garlic and anchovies cook for a couple of minutes until the garlic browns a bit
  8. Add the red pepper flakes, oregano and basil to the pot and stir everything together for a couple of minutes more
  9. Add the canned tomatoes to the pot and scrape up any bits that might have stuck to bottom of the pot
  10. Reduce the heat to medium and add the roasted tomatoes to the pot as well. Stir well to incorporateIMG_1898
  11. Cover and cook for about 5-10 minutes. Resist the urge to keep checking on it. Let everybody get to know each other in the hot tub!
  12. Uncover and stir. Taste the sauce for seasoningIMG_1900
  13. If it tastes right, then use an immersion hand blender and pulse the sauce until it is mostly smooth but slightly chunky. If you like a smoother sauce, I would purée it up in a blender or food processor. I like a slight chunkiness to my sauceIMG_1901
  14. Continue to cook the sauce on the stove for another 3-5 minutes, uncovered this time aroundFullSizeRender-1

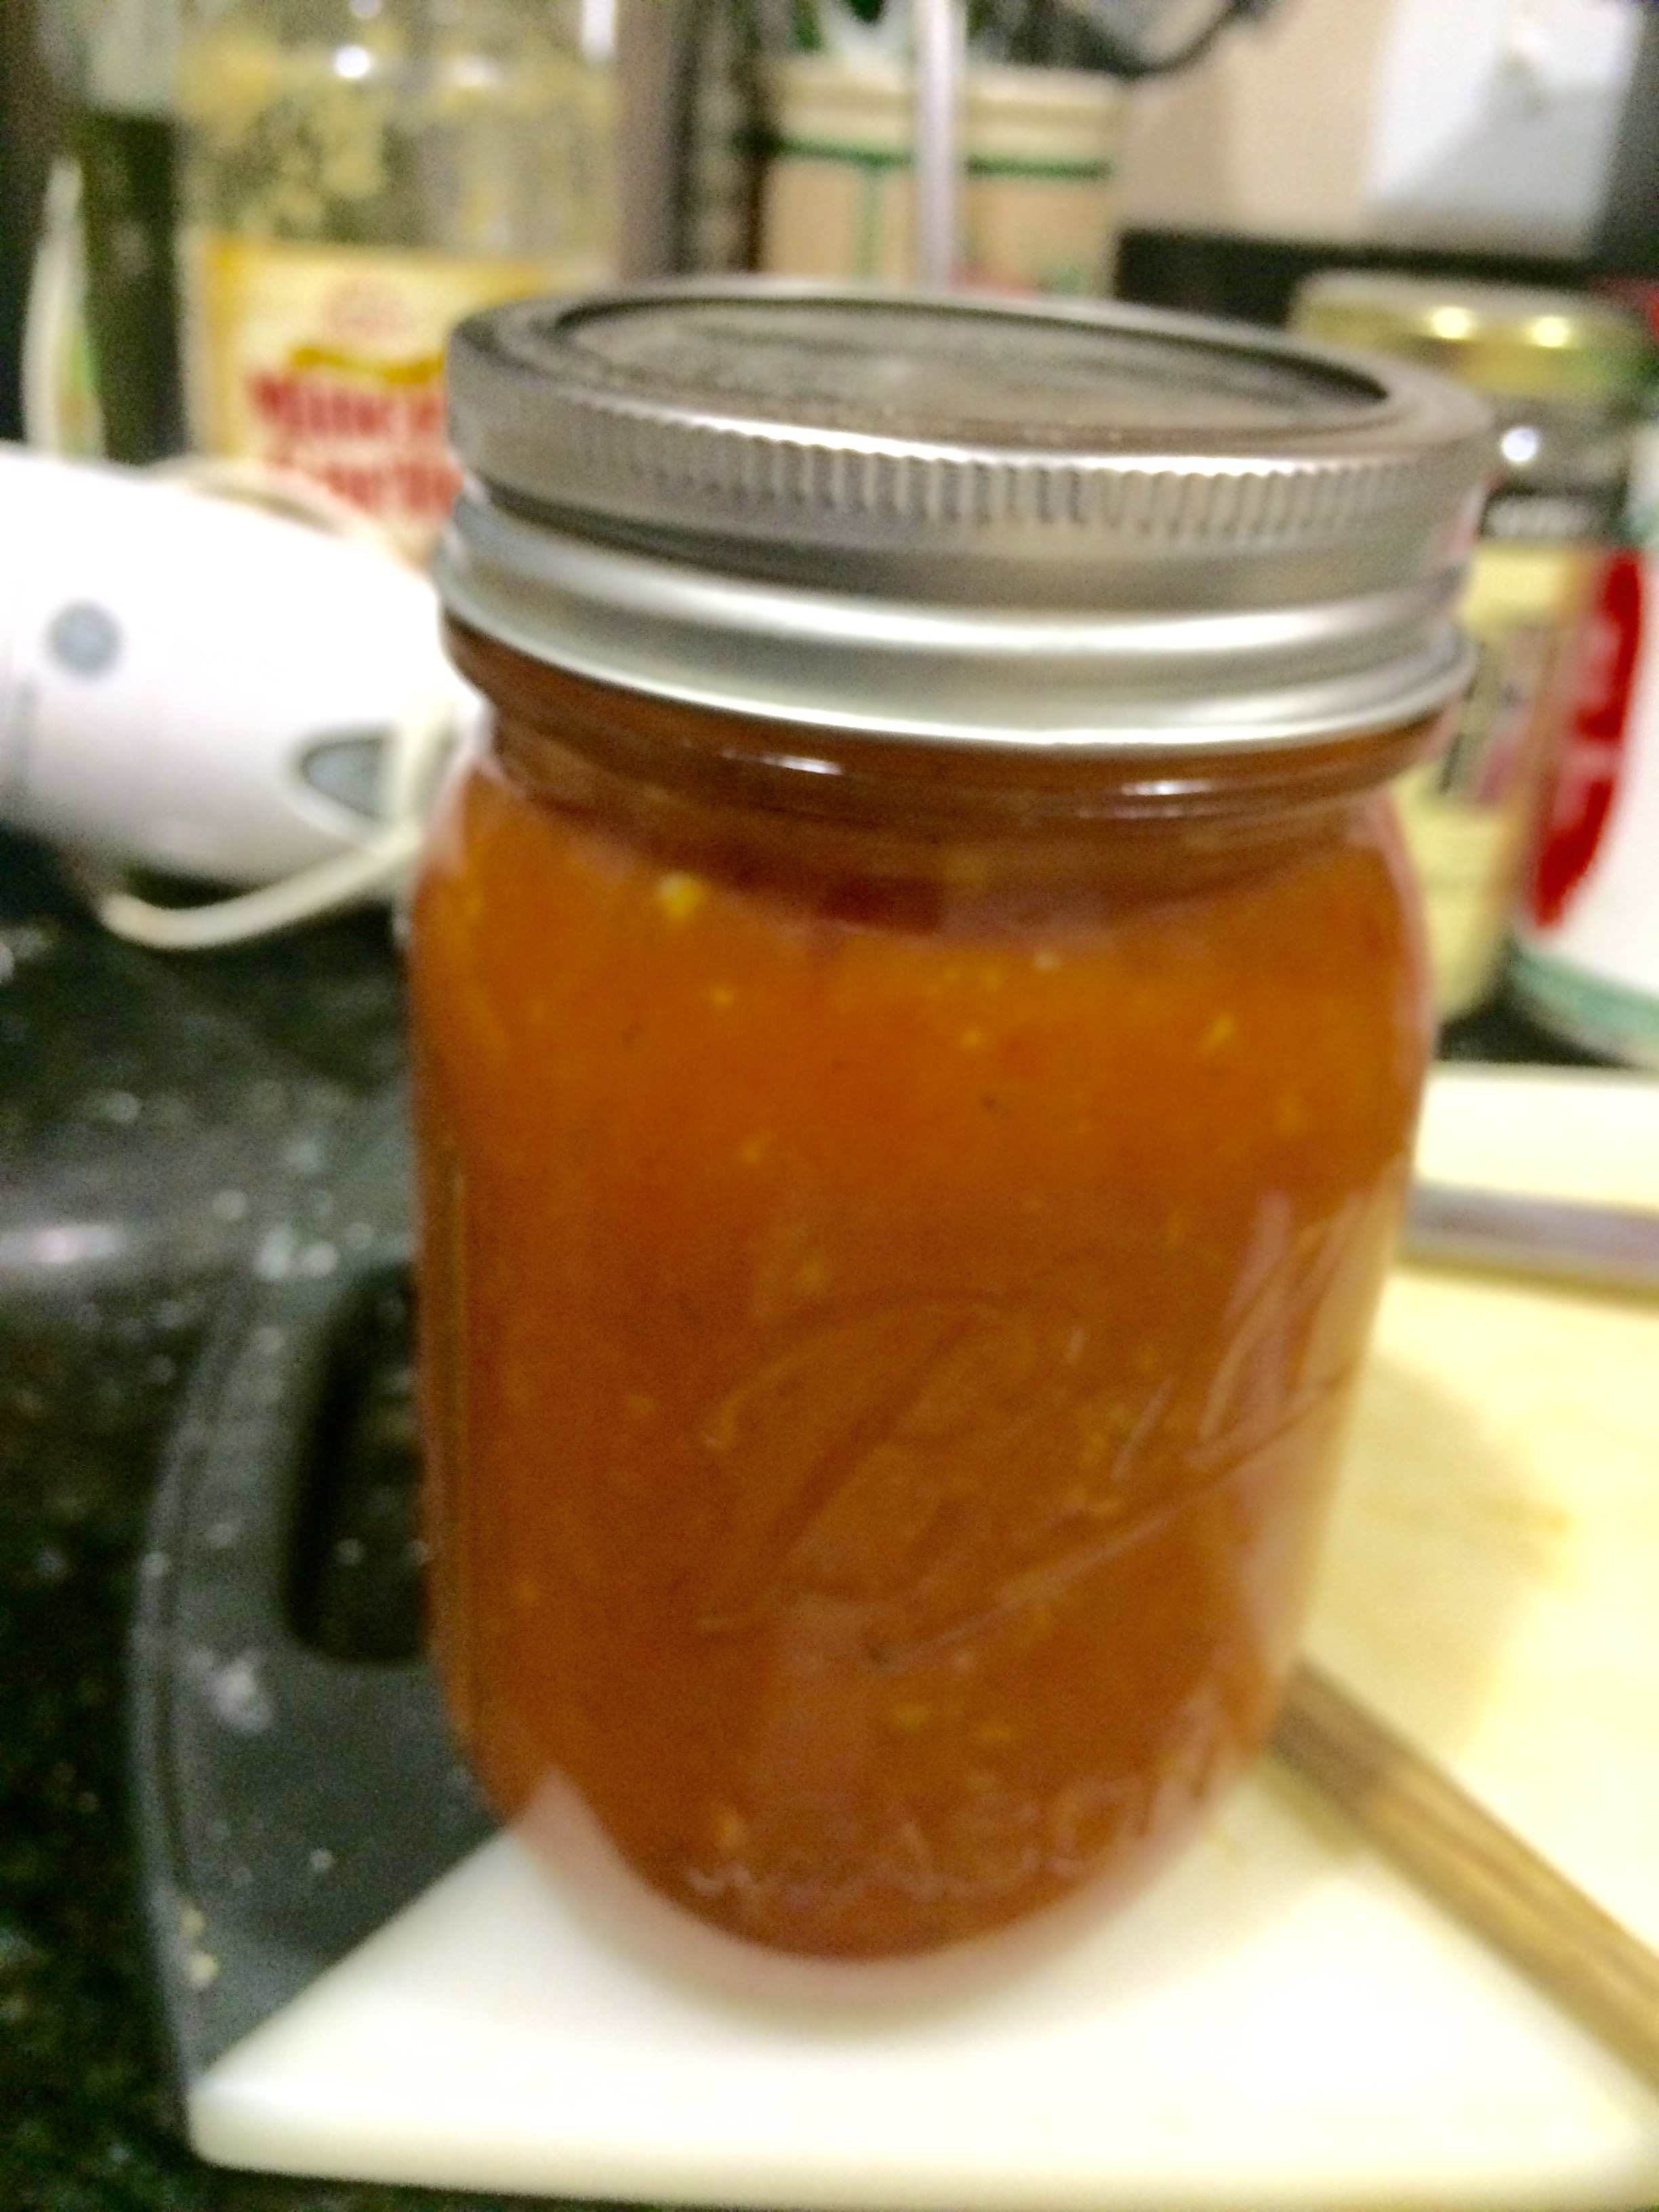
Once the sauce is ready, you can eat it right away, or store it. I always make a big batch of sauce, so I have some to use that day and a jar or two to keep in the freezer. If frozen, it’s good for a couple of months at least. You can use the sauce for pasta, lasagna, meatballs, pizza, as a base for chili, or any number or recipes.

Recipe: Bagels and Lox Pizza

I’m home this weekend for the Passover holiday aka “no carb week,” and many of my memories revolve around food. Since I grew up in New York City, Sunday mornings in our house usually consisted of bagels, lox, cream cheese, whitefish and more appetizing if company was coming. I was inspired to share my recipe for a modern twist one the classic bagel and lox sandwich.

 Lox is simply smoked salmon that has also been cured. It’s usually salty, and is a New York classic. My pizza recipe will help you stretch your lox farther, and this is a great dish to entertain with. Your guests will be so impressed with your creativity! 😉 Salmon, dill, lemon and creme fraiche come together to form an elegant dish that’s great for brunch, dinner or any time of the day!

Ingredients:

1 ball of pizza dough – you can make your own dough, but I find it easier to buy premade dough from the grocery store. You can also ask your local pizza place for a ball of dough, if you really love their crust. Most will sell it to you with no problem

1 container of crème fraiche

1 large lemon

2 tablespoons of capers, drained

1 medium to large shallot, chopped


 4-6oz of smoked salmon, roughly chopped

Fresh dill, chopped

Sesame seeds

Granulated garlic or garlic powder

To Make the Pizza:

  1. Preheat oven to 400 degrees, and if using a pizza stone, place it in the oven
  2. Grease your pizza pan with cooking spray all over
  3. In the meantime, stretch the dough by hand. Slowly start pulling the dough outward
  4. After it is stretched a bit, then use both hand and pass the dough through your hands, and slowly pull it a bit as you pass it through. It might feel like it will break, but the dough is strong, just keep going until its much wider
  5. Once the dough is very stretched, place it on your pizza pan and stretch it out to the edge. If it springs back, then use your fingers to push into the dough all over to keep it steady. In addition, poke it all over with a fork to stop it from rising too much in the oven. You want pizza, not bread!
  6. Once the dough is stretched to the edge of the pan, pour 1 tablespoon of olive oil over the top and make sure the whole top of the pizza has a light coating of oil
  7. Sprinkle the dough with garlic—use as much as you want, but I don’t recommend any more than a fine layer all over since it will overpower the salmon
  8. (Optional) On the outer edge of the dough, where the crust forms, sprinkle a layer of sesame seeds–this step is optional, but it’s a nod to the bagel inspiration behind this pizza. I like sesame bagels, but this would be great with some poppy seeds, and delicious with some eveeything seasoning if your local bagelry will part with some 
  9. Pop the dough into the oven and bake for 10-12 minutes  
  10. Remove the pizza crust and allow it to cool for at least 15-20 minutes. You might want to put it in the refrigerator or freezer for a few minutes if you’re in a rush  
  11. Once the crust has cooled, zest the lemon and add it to the crème fraiche. Mix well to evenly distribute  
  12. Spread the crème fraiche mixture all over the crust, leaving the sesame seed lined crust as a border of the pizza
  13. Sprinkle the pizza with some salt and a good amount of freshly ground black pepper  
  14. Allow the crème fraiche to set, and then spread your pieces of smoked salmon around the pizza. A nice single layer is best and will make sure your crust can hold all of the ingredients  
  15. Drain the capers, and sprinkle around the pizza—they will most likely fall into the crevices between the salmon pieces  
  16. Repeat this process with the chopped shallots—I like shallots since they’re not as strong as onions in terms of flavor, but give a nice onion-y flavor to the pizza. If you want a more mild onion taste, then chopped scallions are a good substitute. If you want something with a little more of a bite, then red onion is always great as well—just remember, raw onion is not as sweet or mild as cooked
  17. Scatter the dill all over the pizza. If some pieces are smaller or larger than others, that’s fine. I like my pizza a little more rustic, since it shows that it’s homemade!
  18. Add another pinch of black pepper and squeeze the juice of ½ of the lemon over the top  
  19. Use a pizza cutter, or a very sharp chef’s knife, to cut the pizza into 8 pieces    

Serve garnished with the other ½ of the lemon cut into wedges. Enjoy!

Creamy Tomato Chicken Pasta

The first time I made this dish wasn’t actually at home. I was on vacation in the UK, and staying by a friend for a few days in Birmingham, England. I had been going out for most of my meals, and I thought it would be a nice change to not only have something homemade, but also cook a meal that my friend could have as leftovers for a few days after I left. I didn’t want to spend a lot of money, since I was a traveler on a budget, and the chicken thighs at Tesco looked really good that day. if you want something that might be fancier than chicken, if you’re entertaining with this dish, then some meatballs would be a nice substitute. After forming the meatballs, I would brown them for a couple of minutes on each side in a pan, and then let them finish cooking in the sauce.

Pasta is a great way to spread a dish out over a few meals, and it’s also an easy way to stretch a protein into several portions. This dish is creamy, comforting, and easy to make—it will stick to your ribs and definitely make you want another plate, so make sure to make the whole recipe, even if you live on your own—the leftovers are amazing. This dish only gets better the next day!

Ingredients:

1 package of boneless, skinless chicken thighs

1 cup of pancetta cut into cubes—if you don’t have pancetta, then salt pork would be a good substitute though it has less meat so you’ll have to use slightly more of the block. Bacon is ok too, just make sure it’s not flavored too heavily, and that it’s thick enough to cut into lardon-sized pieces

1 28oz can of crushed tomatoes—I prefer San Marzano tomatoes since they’re sweeter, but any brand should be fine. A fun variation of this recipe is to use fire roasted diced tomatoes along with a few sun-dried tomatoes then pulse them in the blender until a sauce forms, but not completely smooth

Granulated garlic or garlic powder

3-4 cloves of garlic

1 large Spanish onion (or 2 medium)—any onion is fine really, except for red, which I feel has a little too much bite for this recipe

1 package of Baby Bella or Cremini mushrooms, halved—white button mushrooms are also fine, but cremini have a little more flavor. I think large Portobello mushrooms are too bold for a dish like this. If you were to use them, then I may suggest using a heavier protein like turkey cutlets

¼ cup of white wine—use something you would drink. If it doesn’t taste good straight up, it won’t taste good concentrated in your dish!

1 cup of heavy cream

Olive oil

1-2 teaspoons crushed red pepper flakes—adjust to your own taste. I like spicy, but feel free to omit the pepper flakes if you prefer a milder sauce

1½  teaspoons of dried oregano

1 tablespoon of fresh basil, roughly chopped

1 box of fusilli or rotelle—I like to use a pasta shape that will hold a lot of the sauce and is bite-sized

Parmesan cheese (garnish)

Cooking Steps:

  1. Cut all of the chicken thighs in half
  2. Season the chicken liberally with salt, pepper and granulated garlic.
  3. Add enough oil to coat the bottom of a large, deep skillet, and turn the burner to medium heat.
  4. After a couple of minutes, add the chicken to the pan. Try to make sure that the chicken is in a single layer, and that they all get some pan space. This way they cook in about the same timeIMG_2863
  5. Cook the chicken for a few minutes, flipping occasionally, until it’s browned, but not cooked through. Don’t worry; it will finish cooking in the sauce later.IMG_7134
  6. Remove the chicken from the pan and set aside in a bowl or a plate for later
  7. In the same pan, add the pancetta and cook—stirring occasionally so that the pieces don’t stick to the bottom of the panIMG_2477
  8. When all of the pancetta has browned and has a crispy exterior, remove to the same bowl as the chicken. Resist the urge to drain them or place on a paper towel—trust me, you’ll want this fattiness later!IMG_9331
  9. Add garlic and sauté for 30-45 seconds on medium to medium-high heat until it starts to brown, but pay attention. Burned garlic can ruin a dish!
  10. Add the onions and sauté for about 5 minutesIMG_7298
  11. Once the onions start to brown and caramelize a bit, add the mushrooms—again, you should make sure the onions and mushrooms are spread around the pan, and stir occasionally, so that they all get some “sizzle”IMG_3043
  12. Add the dried oregano and crushed red pepper flakes, as well as well as ½ teaspoon of salt and a teaspoon of black pepper—hold off on adding any extra salt since the pancetta will lend some saltiness to the sauce. You can always add more later!IMG_5693
  13. When the mushrooms are cooked tender and the onions have continues to caramelize, deglaze the pan with the white wine. Make sure to scrape up all the bits from the bottom of the pan. That’s pure flavor!FullSizeRender-1
  14. Let the alcohol cook off for a couple of minutes and then add the tomatoes to the pan
  15. After 2 minutes, add the chicken and pancetta back to the pan along with the basilIMG_6382
  16. Reduce the heat to medium-low and simmer for 12-15 minutes, and stir it after about halfway to make sure it doesn’t stick to the pan and move everything aroundIMG_5863
  17. About halfway through the previous step, put your pasta water on to boil.
  18. Cook the pasta according to package directions—the only unique thing I do in this dish is add a clove of garlic, roughly chopped, to the pasta water in order to give the noodles a subtle garlic flavor, and make sure to add a nice amount of salt since it will flavor the noodlesIMG_8148
  19. When you drop the pasta into the pot, add about 1 cup of heavy cream to the sauce (or 3 turns around the pan). Stir to incorporate well into the sauceIMG_6979
  20. Drain the pasta when it’s al dente, even if you like it softer since it will continue to cook in the sauce for a couple of minutes.IMG_4452
  21. Add the pasta to the sauce pan, and mix the pasta, sauce, chicken, pancetta, onions and mushrooms all together. You want the noodles to be completely covered in sauce, but not swimming in it. Simmer together for another couple of minutes.IMG_4359
  22. Add a few big spoonfuls of the dish on a big plate or shallow bowl, and garnish with some Parmesan cheese, freshly cracked black pepper, and maybe a sprig of fresh basil

IMG_1796

Buon Appetito!

Recipe: Asian Fusion Chicken Curry

This recipe was inspired by the delicious Chicken Rendang dish I had at Malaysia Grill recently. One of the cooking methods that made that dish so unique was the use of ground onions in the gravy. The onions gave an amazingly aromatic and deep flavor to the dish. In my spin on a chicken curry, shallots are roasted and pureed into a paste in order to impart a similar flavor profile. This curry also incorporates flavors from Thai and Indian cuisines. I chose to make it with chicken, but it would be delicious with beef, shrimp or even vegetarian. Some crispy tofu or eggplant would be nice options. It might seem like a lot of steps, but once you’ve prepped, it really cooks quickly. You’ll love to eat this curry on a chilly day, or on any day of the year.

IMG_1553Ingredients:

1 package of boneless, skinless chicken tenders, chopped into medium sized chunks

3 stalks of lemongrass

2 tablespoons of fish sauce

2 heaping spoonfuls of hot chili oil

2 tablespoons of rice wine vinegar

2 tablespoons of dried shrimp – this might seem like a weird ingredient, but it’s very prevalent in Asian dishes. It also gives a great umami flavor

3 small or 2 large limes

2 tablespoons of palm sugar (if you don’t have any palm sugar, then brown sugar or even white sugar is fine as a substitute)

2 tablespoons and 1 teaspoon of peanut oil

2 tablespoons of olive oil

4 medium shallots

2 medium (or 1 extra large) russet potatoes (you want a good starchy potato to help thicken the curry and stand up to the cooking process)

2 teaspoons of Garam Masala

2 teaspoons of curry powder

1 teaspoon of ground ginger

1/2 cup of water

1.5 teaspoons of freeze-dried cilantro

1/2 of a 4oz jar of green curry paste (Thai kitchen is a good brand)

FullSizeRender-2

1 can of coconut milk

2-3 Thai green chilies, minced (jalapeños are a good substitute) — this is an optional ingredient, but really helps being a nice beat to the dish

IMG_1564

To make the marinade:

  1. Chop the lemongrass into 1-2 inch long pieces and place into a plastic Ziploc bag (about gallon size)–Make sure the lemongrass isn’t cut too small since you’ll have to take it out before cooking.
  2. Add the rice wine vinegar, hot chili oil, the juice of 1 large or 2 small limes, fish sauce, 1 tablespoon of palm sugar, 1 tablespoon of peanut oil, 1 shallot roughly chopped, 2 tablespoons of soy sauce, and the dried shrimp.
  3. Place the chicken, cut into chunks, along with the rest of the marinade ingredients into a Ziploc bag with a strong zipper. Trust me, you’ll need the good kind, unless you want marinade all over your counter or the inside of your refrigerator. FullSizeRender-4
  4. Toss the cut lime into the bag as well since the zest will help flavor the chicken. You can also add some fresh ginger to this marinade if you want to turn this into a chicken stir-fry style dish. After marinating the chicken, sauté it with some broccoli or peppers or snow peas in a hot wok and serve over rice. Yum!
  5. Marinade for 30 minutes minimum, and up to 1 day in the fridge.
This is what the chicken looked like after a day in the marinade

To Make the Roasted Potatoes:

  1. Preheat the oven to 375 degrees.
  2. Chop the potatoes in half lengthwise, then cut those pieces lengthwise again. Cut the long quarters into medium-large chunks. Don’t worry if all of the pieces aren’t the same size, your dish will look rustic and let people know that it’s homemade.
  3. Place the potatoes onto a baking sheet.
  4. Add a tablespoon of olive oil, salt and pepper, and dried cilantro. If you don’t have dried cilantro, then cumin would be tasty and would give the potatoes a smoky taste.FullSizeRender-8
  5. Toss to coat all of the potatoes with the oil and spices.
  6. Roast in the oven for about 30 minutes. You want them be crisp and light brown on the outside, but be careful to not let them get too dark. These don’t require a lot of babysitting.
Potatoes out of the oven

To Make the Shallot Paste:

  1. Peel the shallots (there will be 2 bulbs in each skin).
  2. If the shallot is large then cut the bulbs in half, if not then place it whole onto a baking sheet.
  3. Season the shallots with salt, pepper and remaining olive oil
  4. Put the shallots into the oven about 10 minutes after the potatoes.
  5. Once you’ve taken the shallots out of the oven, allow them to cool a bit.
  6. Put the shallots into a blender with the curry powder, garam masala, ground ginger, and remaining teaspoon of oil.
  7. Pulse while adding water until it comes together into a loose paste.FullSizeRender-12
  8. The potatoes and shallot paste could both be made ahead of time, just make sure to refrigerate.

To Make the Curry:

  1. Add remaining peanut oil to a wokIMG_1563
  2. Heat your wok on medium to medium high heat until the oil is shimmering, but not smoking
  3. Add curry paste to the wok along with the zest of 1/2 a lime and minced Thai chilies, and heat through (1-2 minutes)FullSizeRender-5
  4. Add the shallot paste to the wok. You’ll be able to smell the aromas of Garam Masala and curry powder after cooking for a few minutes.FullSizeRender-9
  5. Add the coconut milk to the wok as well as the remaining sugar.FullSizeRender-13
  6. Let the sauce come up to a simmer and taste. You can add more fish sauce to taste.
  7. Once the sauce is simmering steadily, it’s time to add the chicken. Remember to pick the lemongrass and limes out of the marinade bag. The lemongrass is inedible in this form and has done its job in flavoring the dish. Also, drain most all of the marinade out of the bag.FullSizeRender-3
  8. Cook the chicken for a couple of minutes, then add the roasted potatoes.FullSizeRender-1
  9. Now is the fun part. Stir the wok around and let it go on the stove for at least 10-15 minutes on medium low – medium in order to give the chicken time to cook in the sauce and the potatoes do lost their crispy exterior and absorb some sauce. Use this time to get a drink, or wash the chili off of your hands.FullSizeRender-6
  10. After it starts simmering again, squeeze half of a lime into the wok and keep simmering. Save the remaining lime half.
  11. When the curry has reduced and has thickened up, so that sticks heavily to your spoon, then it’s done.

    FullSizeRender-11
    Doesn’t that look delicious?
  12. Garnish with a wedge of lime and serve! A dollop of Greek yogurt or raita would be delicious to help cool down the palate as well.
A Taste for the Chef

There’s a deep Indian-spiced, curry flavor to the dish, with an escalating heat from the Thai chilies—no bite though, rather it’s a kind of heat that rests on the back of your tongue. You also taste the warming flavors of curry, garam masala and ginger, as well as an earthiness from the roasted shallots.

The chicken almost braises in the curry sauce, and doesn’t get chewy while cooking in the sauce. The potatoes also have a great mouth feel; they absorb some of the sauce, and the starchiness of the potatoes helps thicken up the gravy. The lemongrass complements the lime throughout the dish, and gives it a subtle citrus flavor, which helps cut across the heaviness of the dish itself. The dried shrimp rehydrates in the marinade as well as the curry, and much of it melts. The leftover pieces become chewy and add a nice fishiness to round out the flavor profile. Rice or naan is a great vehicle to scoop up the thick curry sauce, although the dish is filling enough to eat on its own. It’s so good you may lick your plate clean!

Hello world!

Hello foodies, amateur chefs, lifelong culinarians, or anyone that’s hungry,

I’m starting this blog to share my experiences in the food world. Although I’m not a chef and I never went to culinary school, I do love to eat and love to cook. One of my favorite activities is to try and recreate restaurants dishes at home, but with my own spin. I’ll play around with the flavor combinations, the protein, the ingredients, and come up with something that shares similarities, but it uniquely my own. In this blog, I’ll post my review of restaurants that I eat at, and then later in the week, I’ll post a recipe for a dish inspired by what I’ve eaten. Plus, I’ll also try to share some of my favorite recipes along with a story of how they came to be or what the inspiration was for the origin of that dish. So, I hope you join me for the tasty food ride. Buckle Up, and Bon Appétit! Jonathan chef