Just got back from an amazing vacation abroad. Look for lots of foodie pictures, as well as new, inspired recipes coming soon 🙂
Just got back from an amazing vacation abroad. Look for lots of foodie pictures, as well as new, inspired recipes coming soon 🙂

Loulay
600 Union Street
Seattle, WA 98101

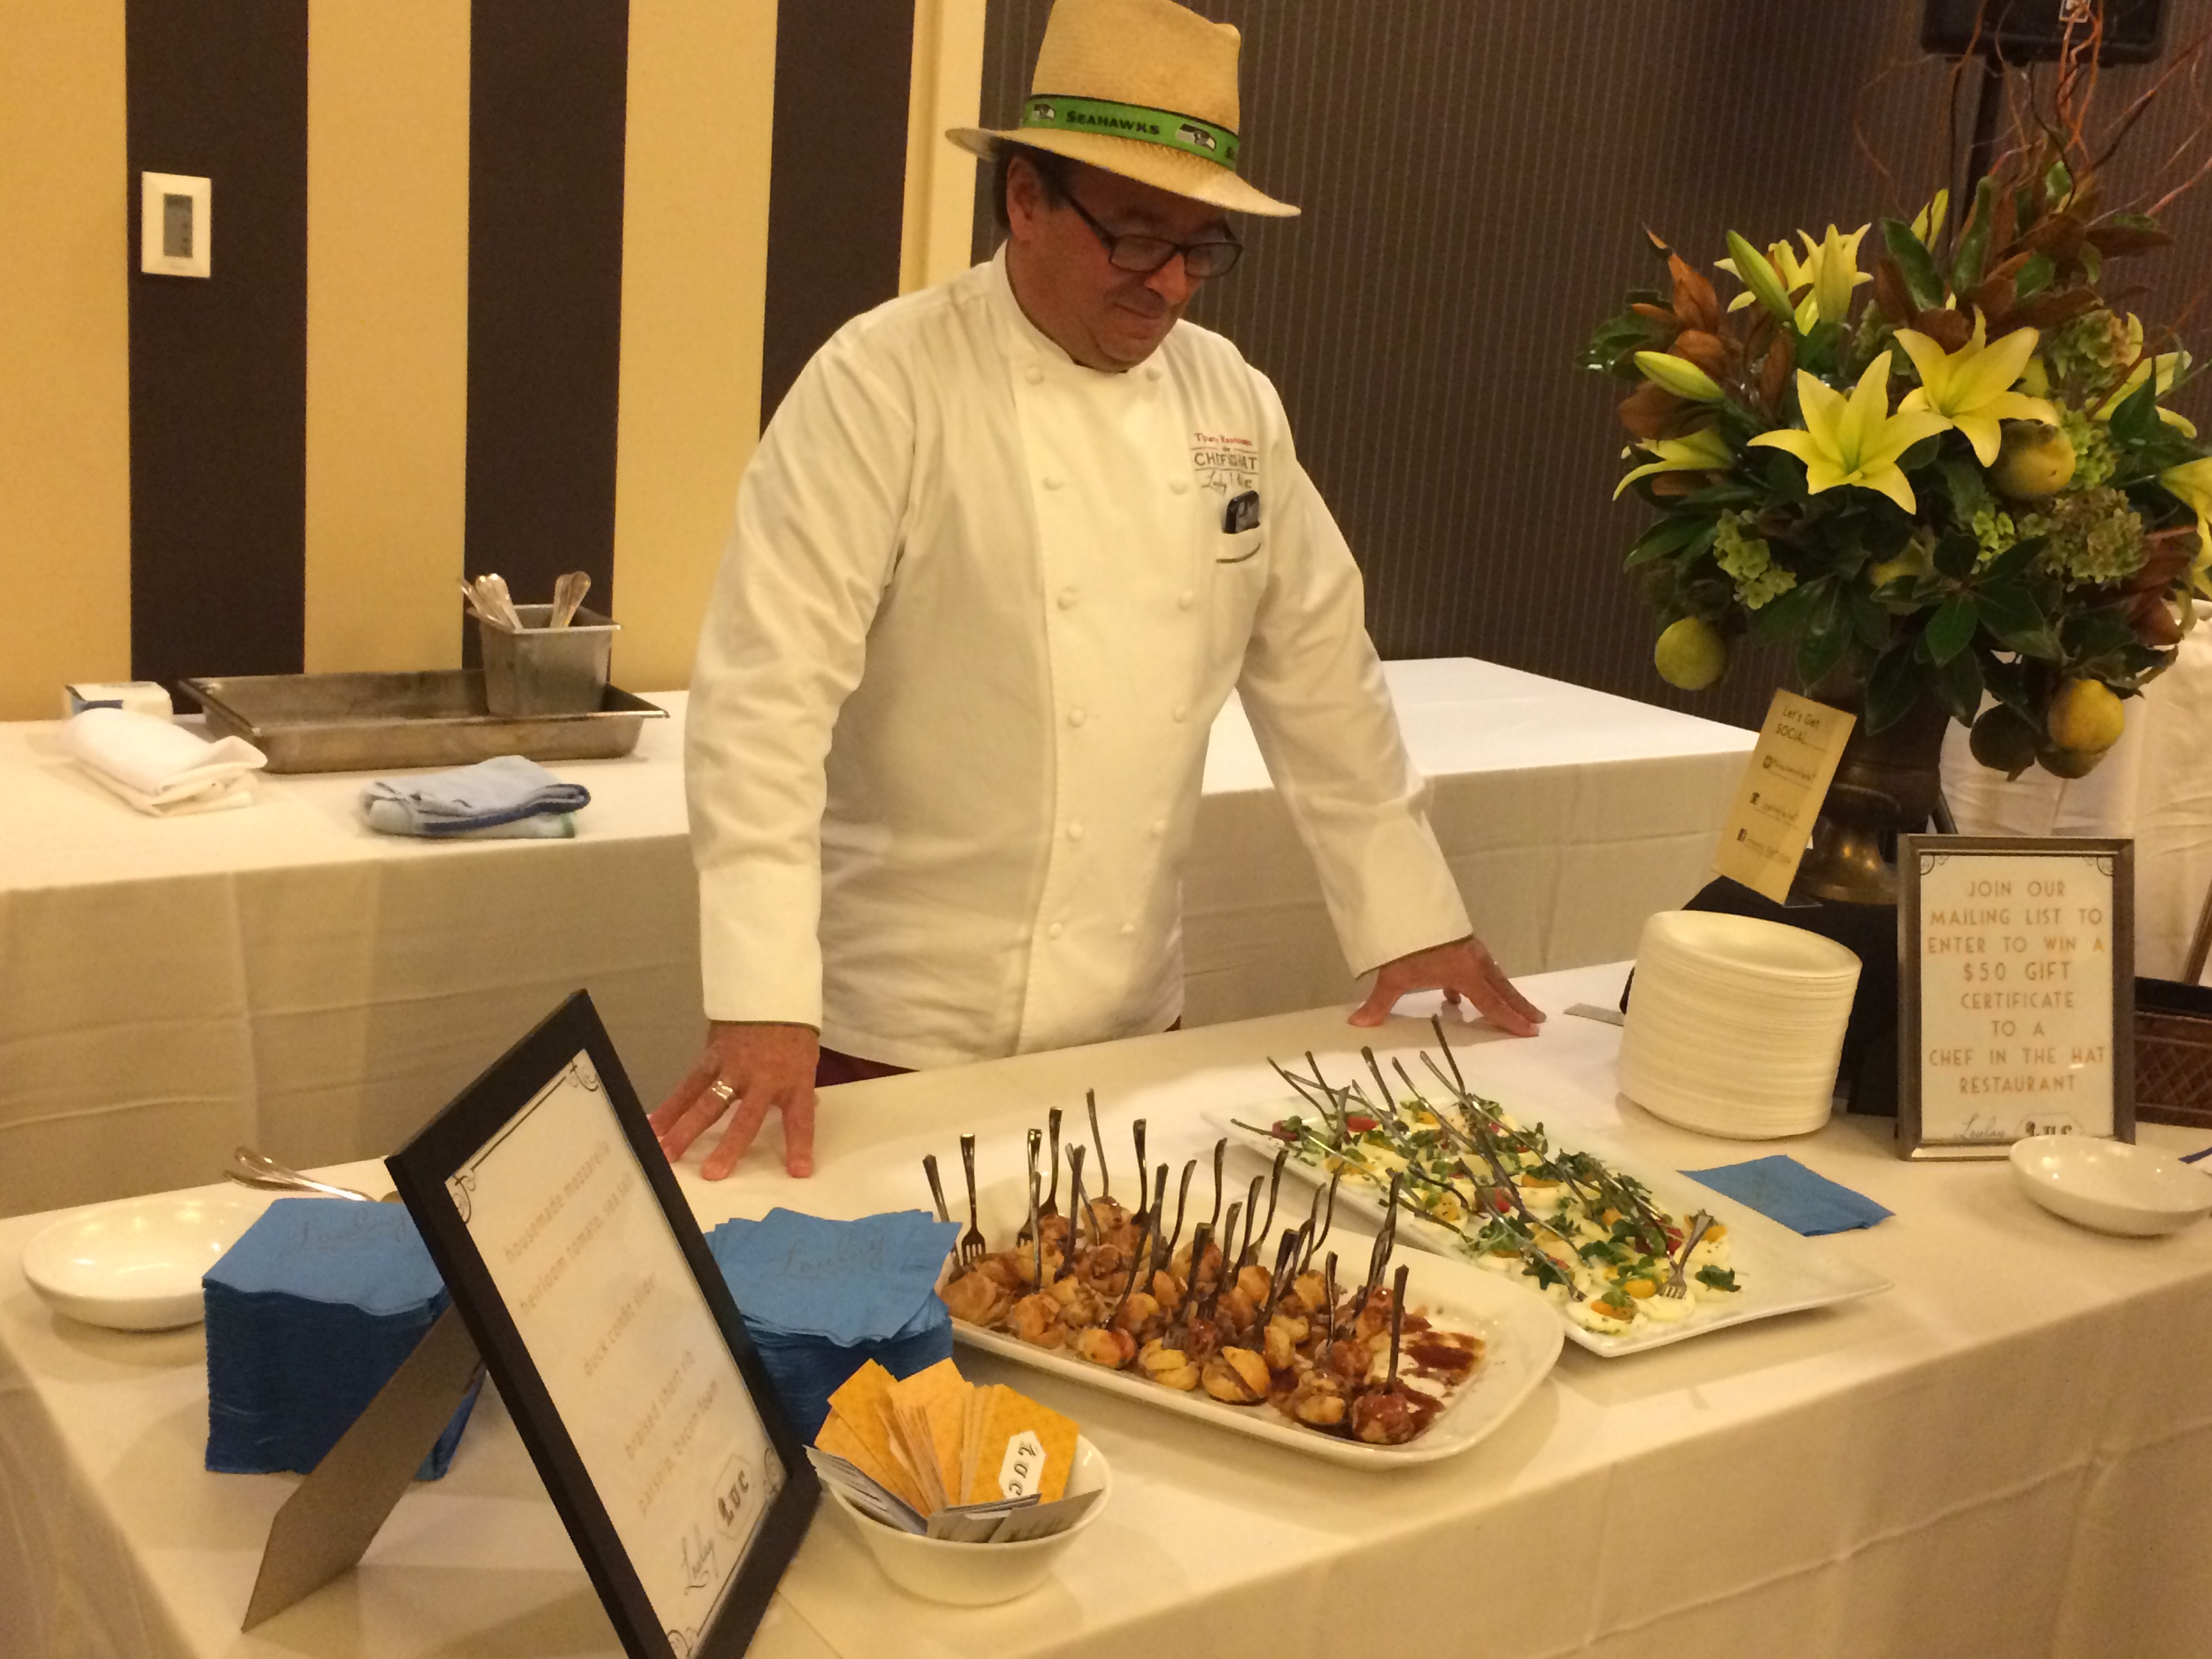 It was the final day of the 2015 International Food Bloggers’ Conference in Seattle, and I was tired and hungry. I had a chance to sample some of Chef Thierry Rautureau’s dishes the night before at the Culinary Tasting and Expo and they were all delicious. Luckily, this made my dilemma on where to eat on my final night in Seattle easy, since the restaurant is attached to the Sheraton hotel downtown. Chef Thierry Rautureau, or the “Chef in the Hat” as he’s known among the Seattle food scene, focuses Loulay on recipes and dishes from his French upbringing with a modern twist, and local, seasonal ingredients.
 Before my started came to the table, the chef sent out an amuse bouche, which is a fancy French term to refer to a pre-appetizer. It usually consists of a single bite, and is meant to wake up the palette before the meal really begins. That night, the chef prepared an olive and jalapeño tapenade with harissa aioli on a crispy French bread crouton. Within that single bite, there was tanginess from the briny olive, bite from the spicy jalapeno, crunch from the crouton, as well as a warm heat from the harissa, and a textural contrast between the creamy aioli and course tapenade. It definitely woke up my tastebuds!
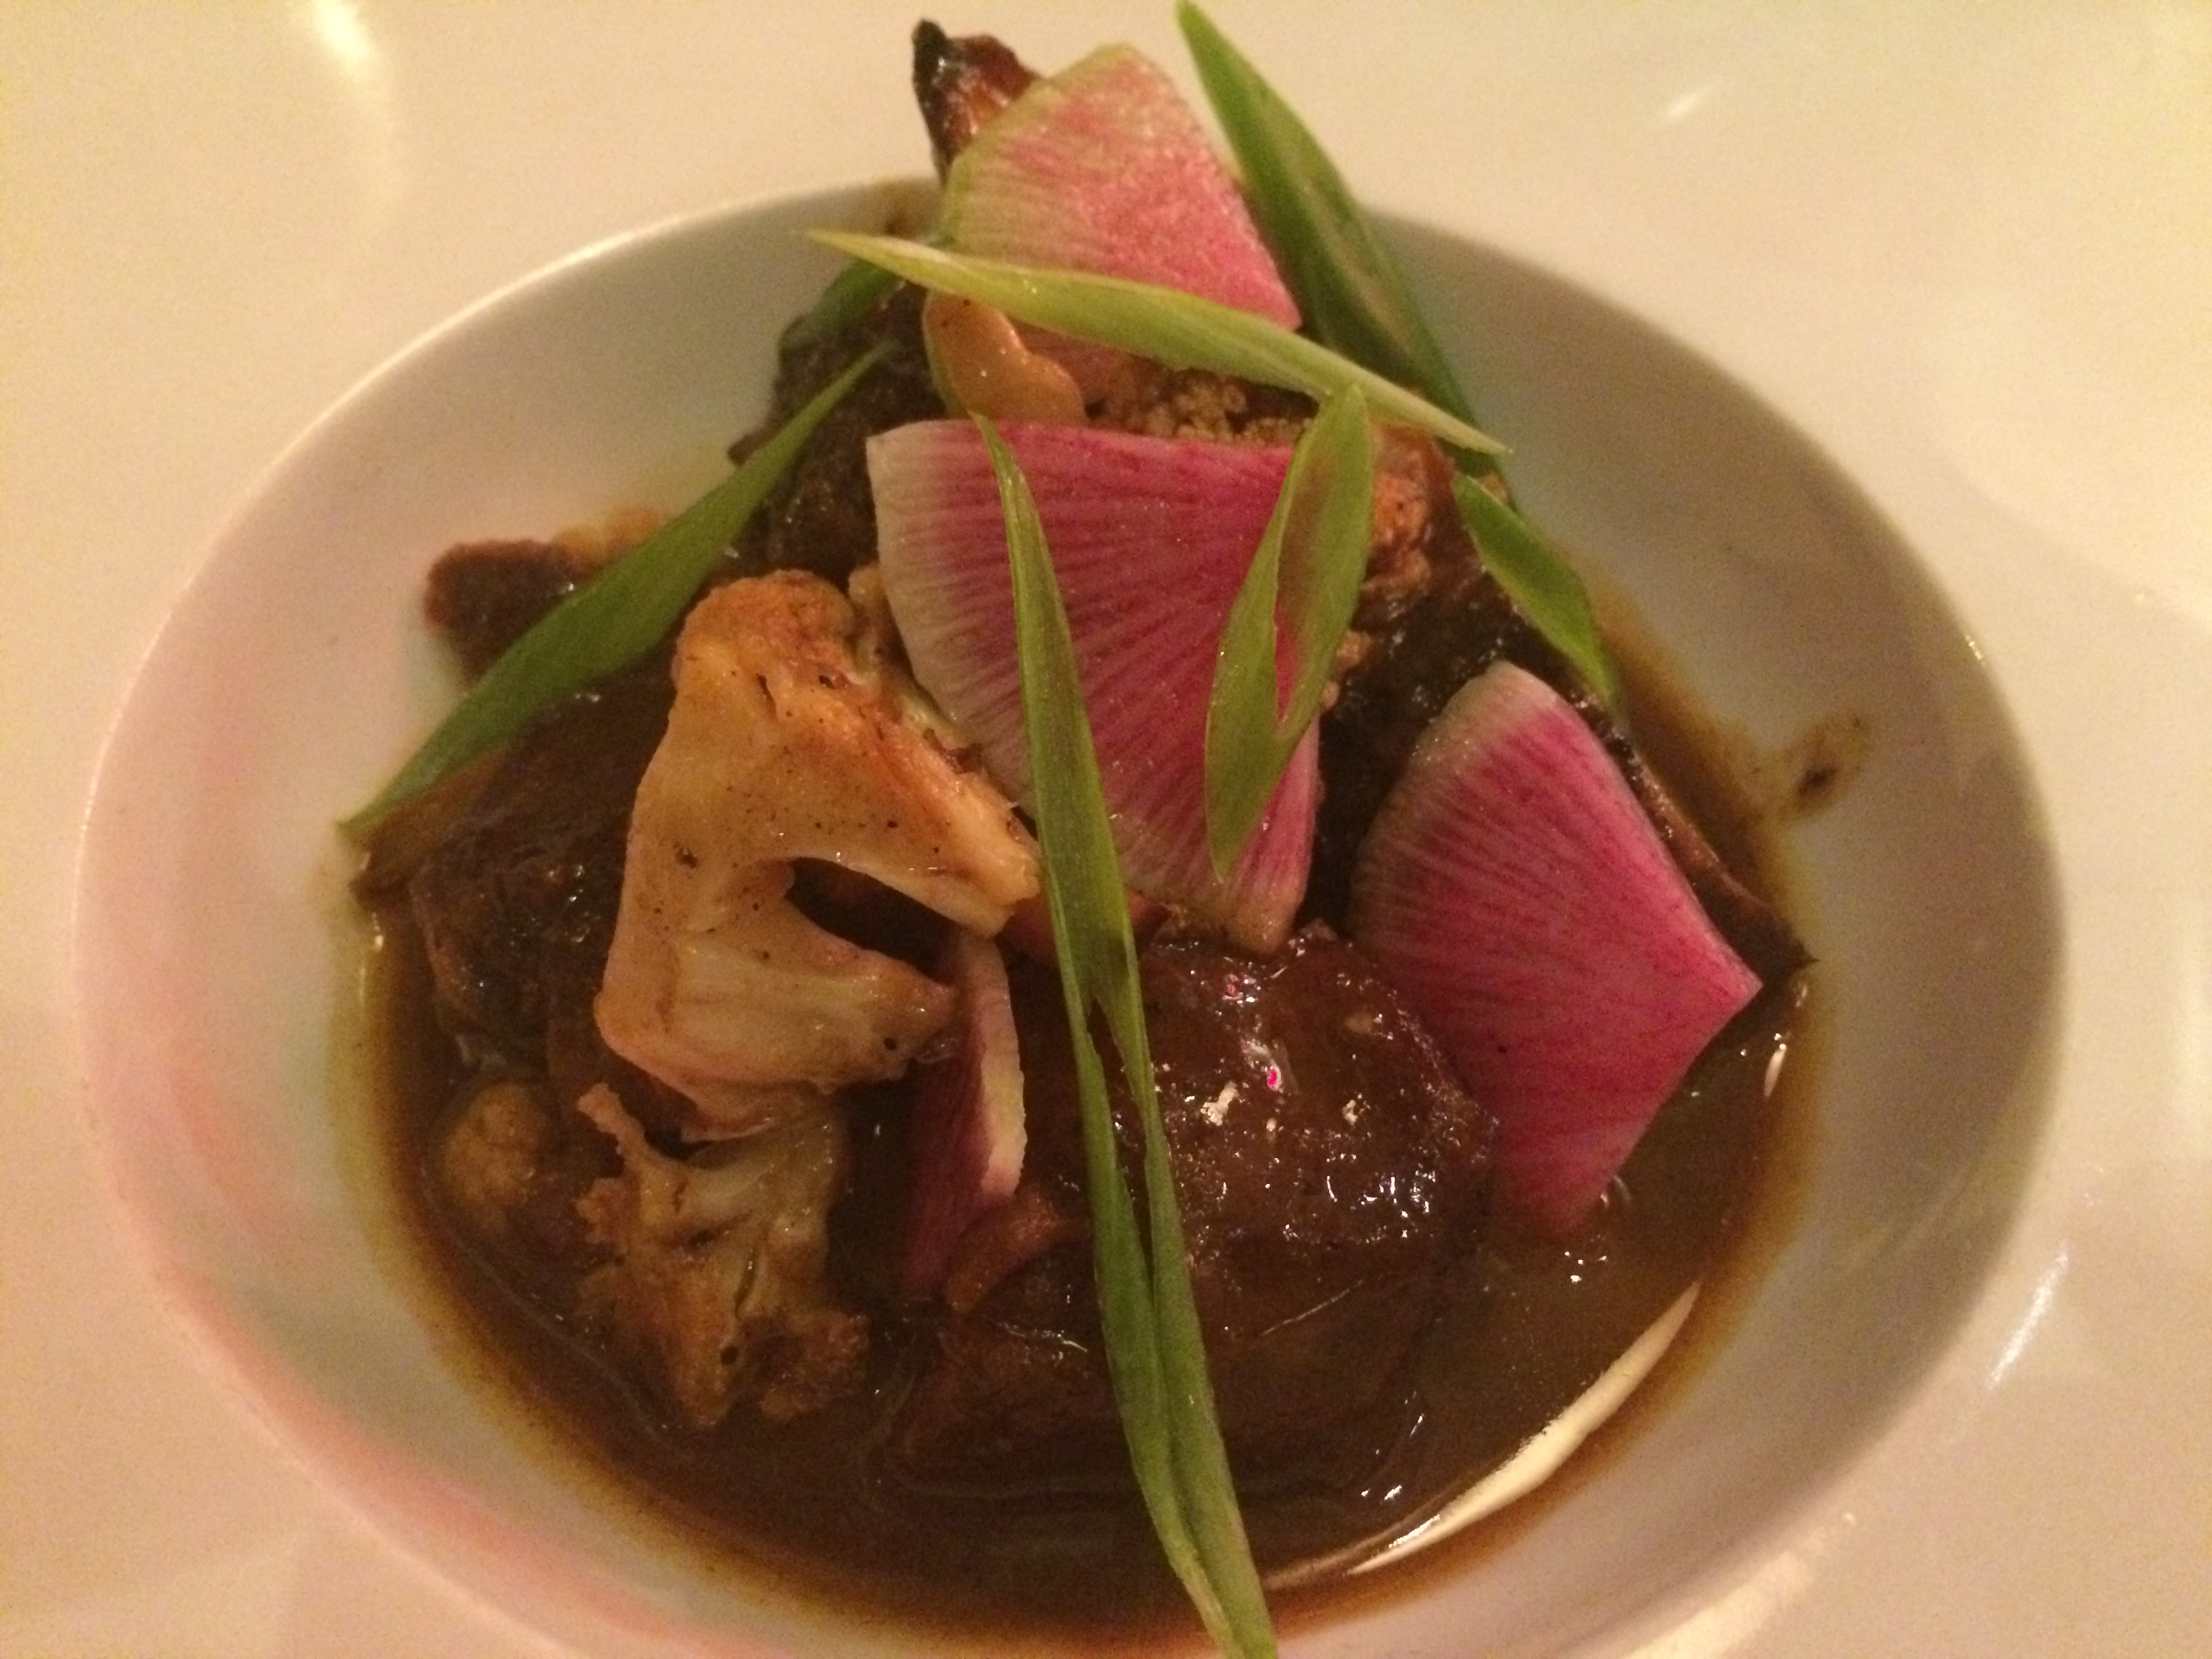
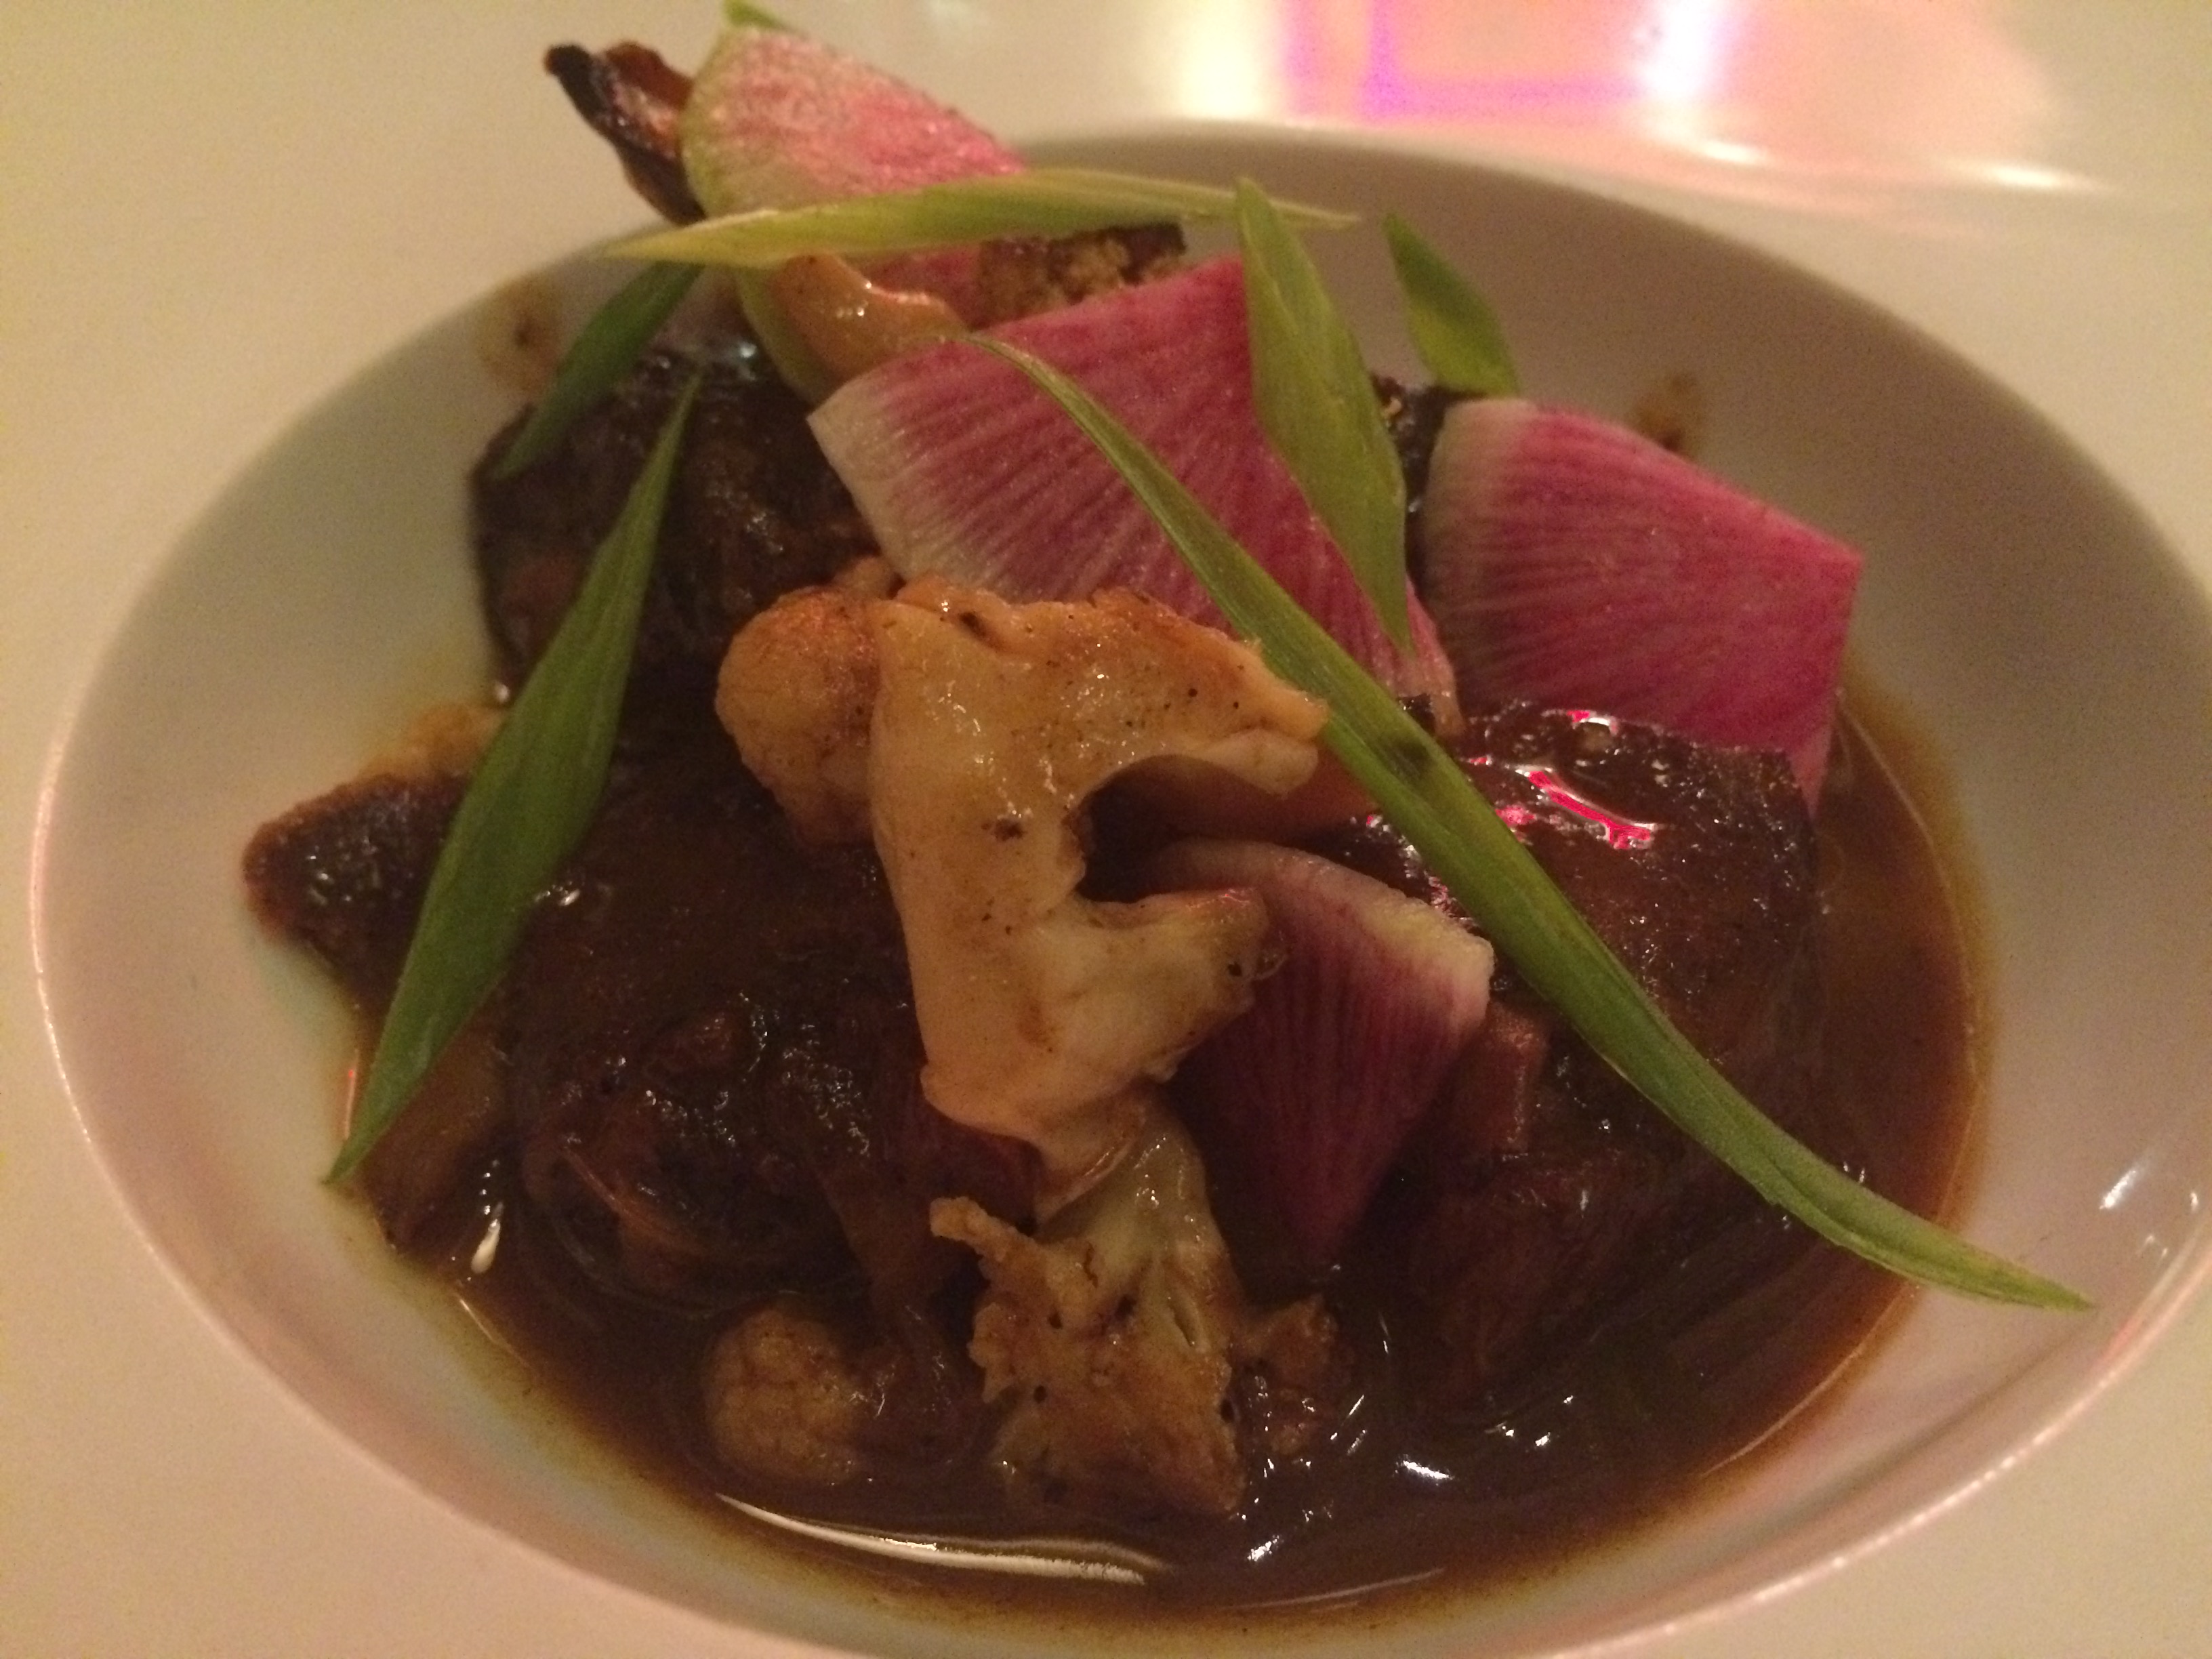 The Smoked Pork Cheeks ($19) exemplified nose to tail cooking at some of its finest. While some may consider cheek to be a throwaway item, it can be some of the most succulent meat if cooked correctly and given a little love. The meat definitely had a certain level of smokiness, and was so tender without losing all of its chew—think of a perfectly cooked short rib. The sauce was super delicious and resembled a pork demiglace flavored with sweet onion and wine. The bread basket came in handy to sop up extra broth. The charred cauliflower side was not mushy at all and, in fact, had a subtle crust that contrasted nicely with the soft meat. The dish was garnished with some shaved scallion and watermelon radish that provided much needed color and a fresh, crunch factor to the heavy starter.

 Up next was one of the Chef in the Hat favorites, Seared Fois Gras ($21). The fois gras was perfectly browned and caramelized on the outside, while maintaining its fatty rareness inside. It was sinfully decadent, and served atop chewy, eggy brioche, and in a small bowl of a sweet apricot puree with pine nuts for texture, and a spiced honey glaze that played nicely with the crust on the fois gras.
 The dishes at Loulay are somewhat small—as is the norm with many French restaurants—so I definitely had room for dessert. Thank god, since French cuisine has some of the best desserts on the planet! I had been considering the Caramelized Pineapple Turnover, but went with the advice of my server and tried the Portuguese Beignets ($10). While beignets are mainly known in the United States as a New Orleans delicacy of fried dough covered with powdered sugar, and eaten hot, they are actually a variation of a traditional French dish of deep-fried choux pastry. Choux pastry is the base for many well-known French desserts such as profiteroles, croquembouches, éclairs or cream puffs. These beignets were so light and airy that I could have eaten a whole box of them. They were lightly sweetened and sitting on a velvety creme anglaise flavored with vanilla. To complement the hot pastry was a funky blue cheese ice cream. The ice cream was a wonderful yoyo of sweet and salty bites, and made me think of a gorgonzola dolce flavor profile. Pears that were soft and sweet in contrast to the ice cream were lightly caramelized and helped cut through the richness of the dish.
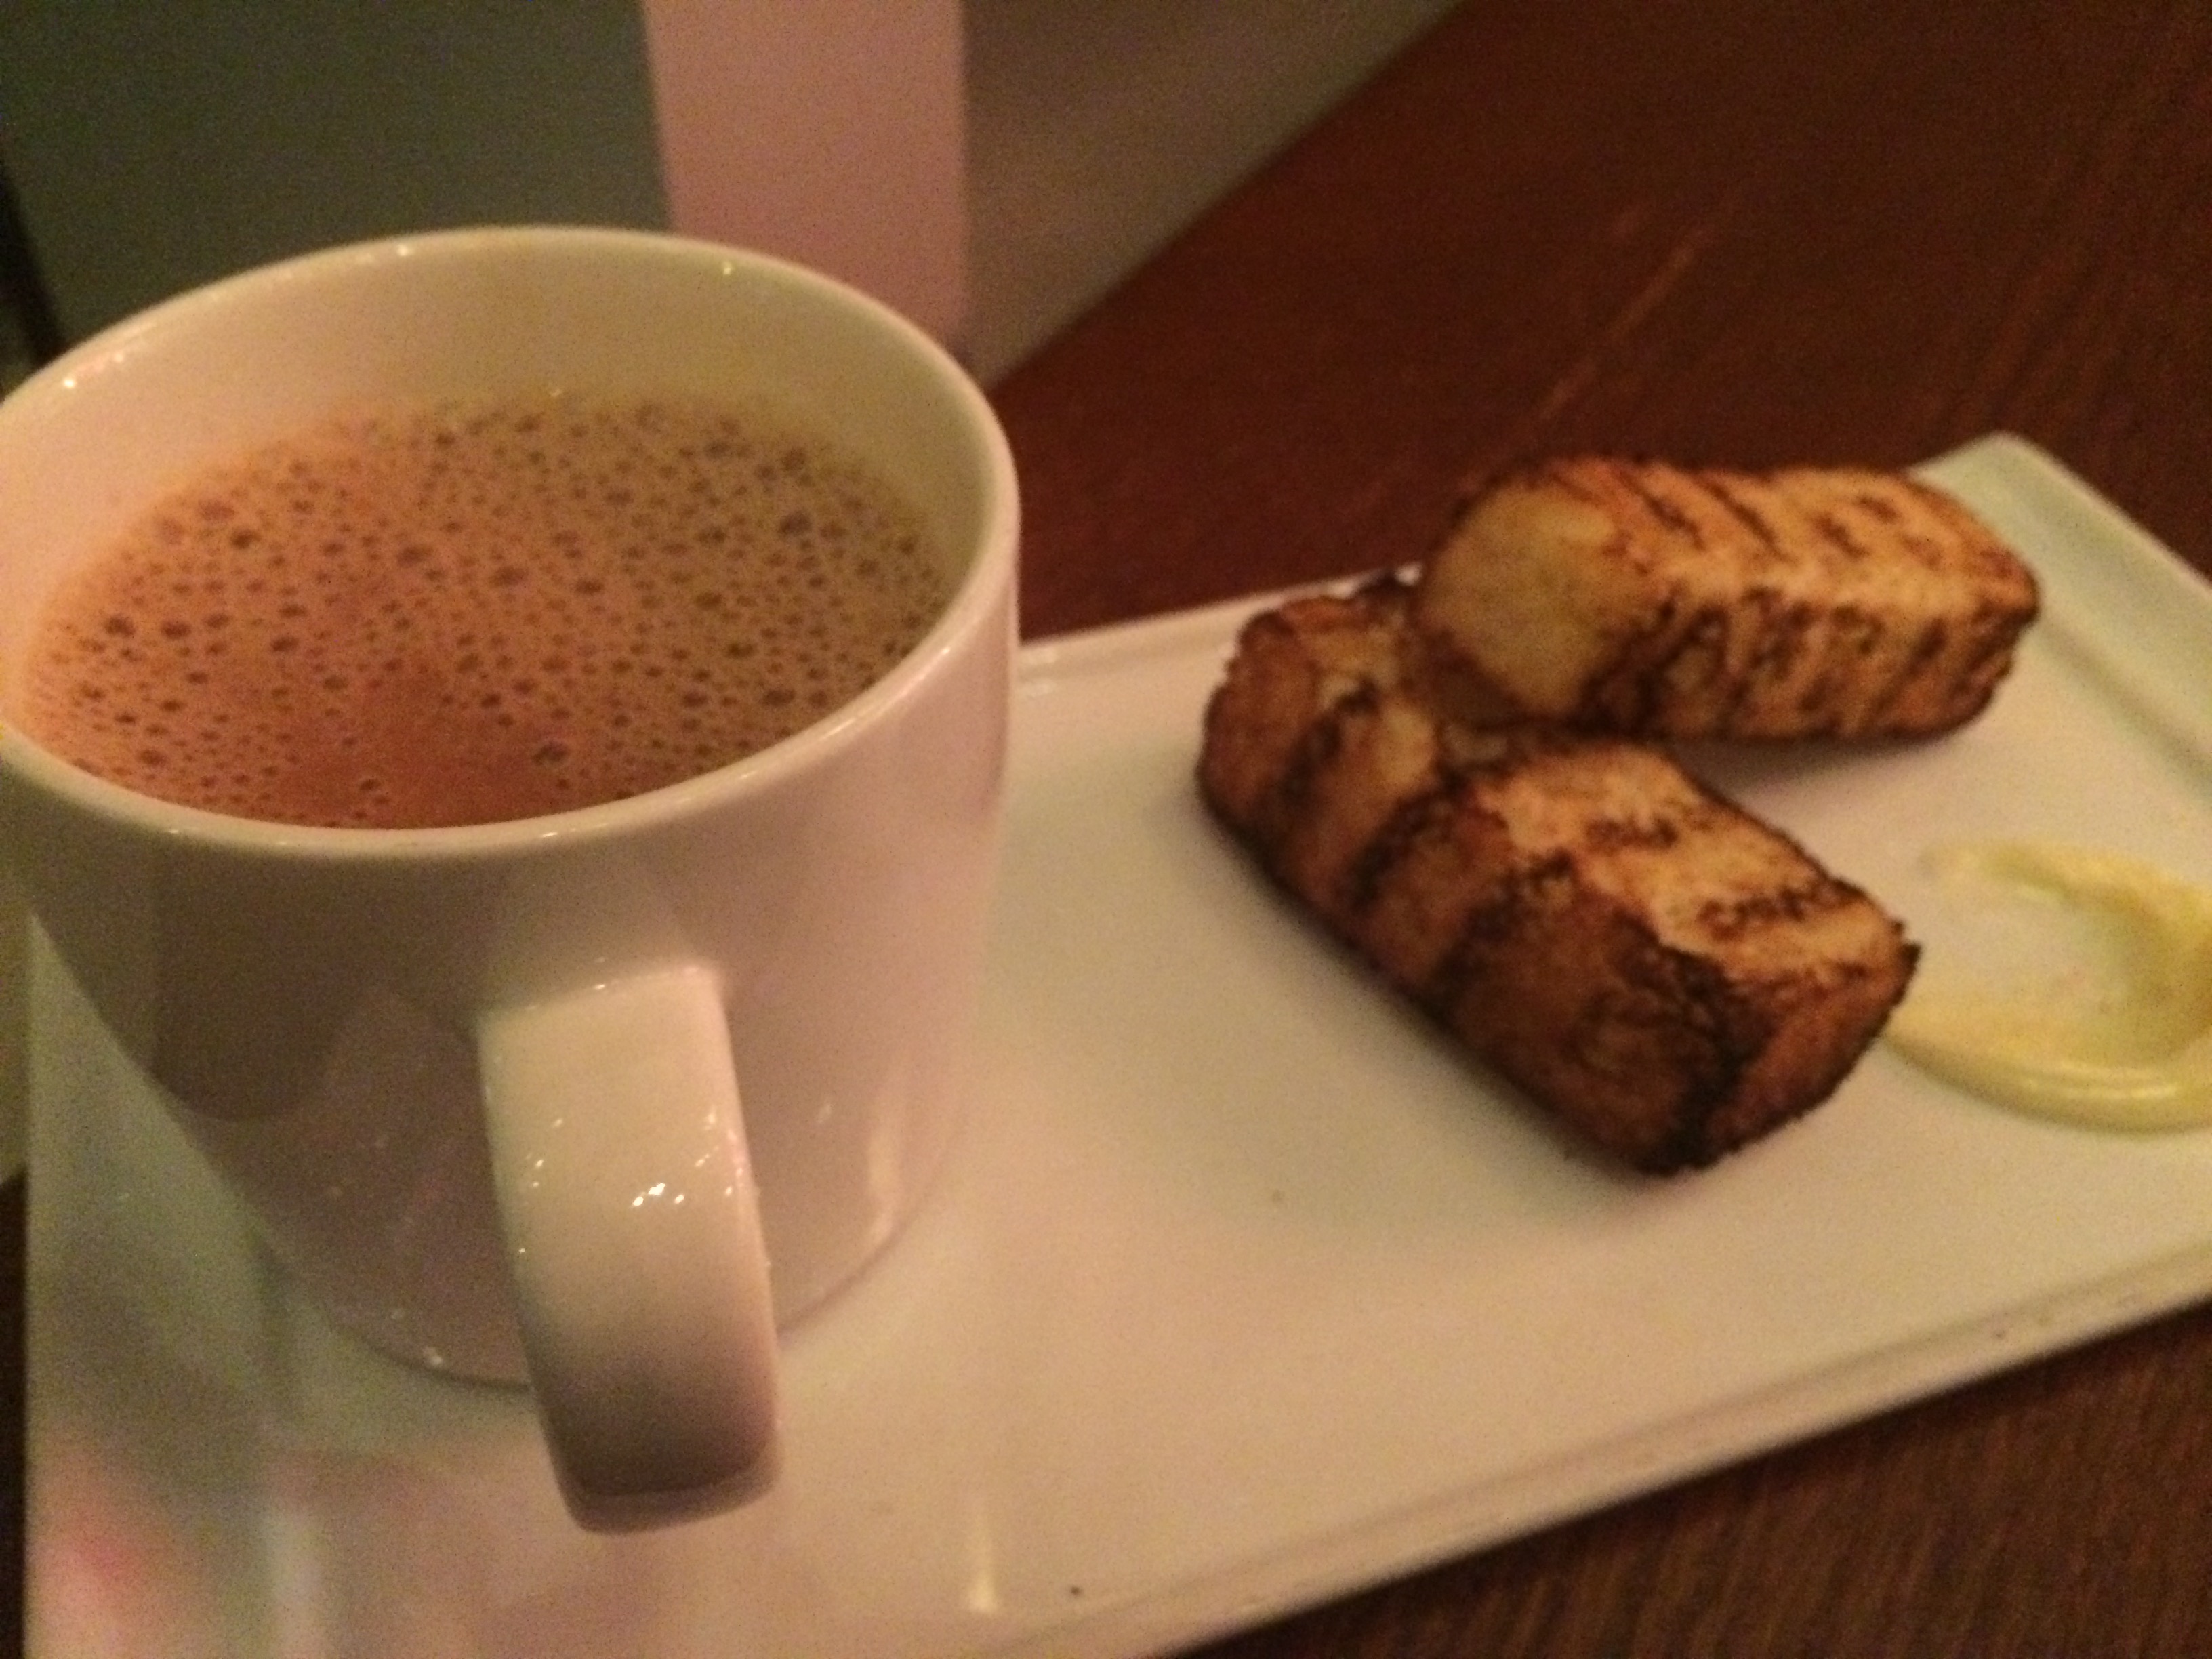 To help wash down the beignets, was another chef in the hat favorite of the Chef’s Hot Chocolate ($5). Inspired by a recipe from his grandparents, the hot chocolate was unique in that it was not very sweet, but had a very forward cocoa flavor. Alongside the drink came brioche sticks to act as dippers and salty butter. The ideal bite was to smear some butter on the toasted brioche, dip in the hot chocolate, and eat. The hot chocolate not only was absorbed by the soft bread, but also melted the butter and it changed the whole texture of the dessert as they came together. The saltiness of the butter also tied in well with the blue cheese ice cream.
Overall, the food and atmosphere at Loulay were top notch and delicious! It was a great way to wind down a supremely foodie weekend. What was also very cool was being able to pay my bill through the new feature on OpenTable that allows you to pay for your meal through the app. How convenient is that?

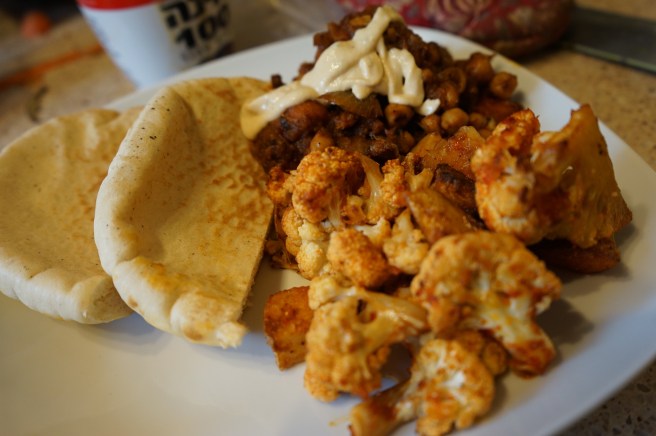
The other night I was thinking about what to make for dinner on my way home, when I passed by one of the ubiquitous Halal carts. I don’t know why, but whenever I pass a Halal food cart, I always take a big sniff…it just smells so good! It immediately made me think of Middle Eastern flavors with lots of spices, citrus, and conversation. That night I made chicken shawarma for dinner with fixings, and instead of using store-bought dips, I decided to make my own–and it was so easy! Rustic lemon hummus consists of a quick trip to the pantry for most of the ingredients, and roasted eggplant babaghanoush will make your fellow diners think you’re a spice savant! Try these Middle Eastern spreads at home and you’ll never feel the need to head to the grocery the next time you want to eat some hummus.
Rustic Lemon Hummus


Roasted Eggplant Babaghanoush


All I know is that both of these spreads are absolutely delicious, and are perfect for any dinner party or even an afternoon snack. You can also feel free to customize your hummus and babaghanoush—substitute cilantro for the parsley for a more Mexican version, top your hummus with some mushrooms sautéed with zhatar spice, or make a festive zucchini version of babaghanoush and spread it on some thick toast and top with avocado. Yummy! I love to simply serve them with some homemade pita chips!

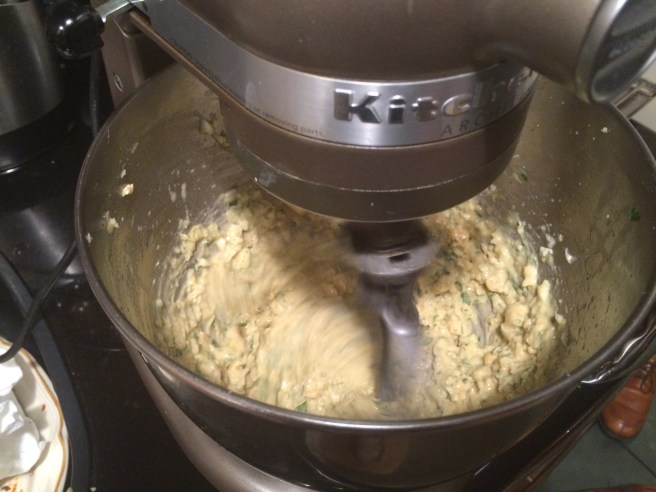
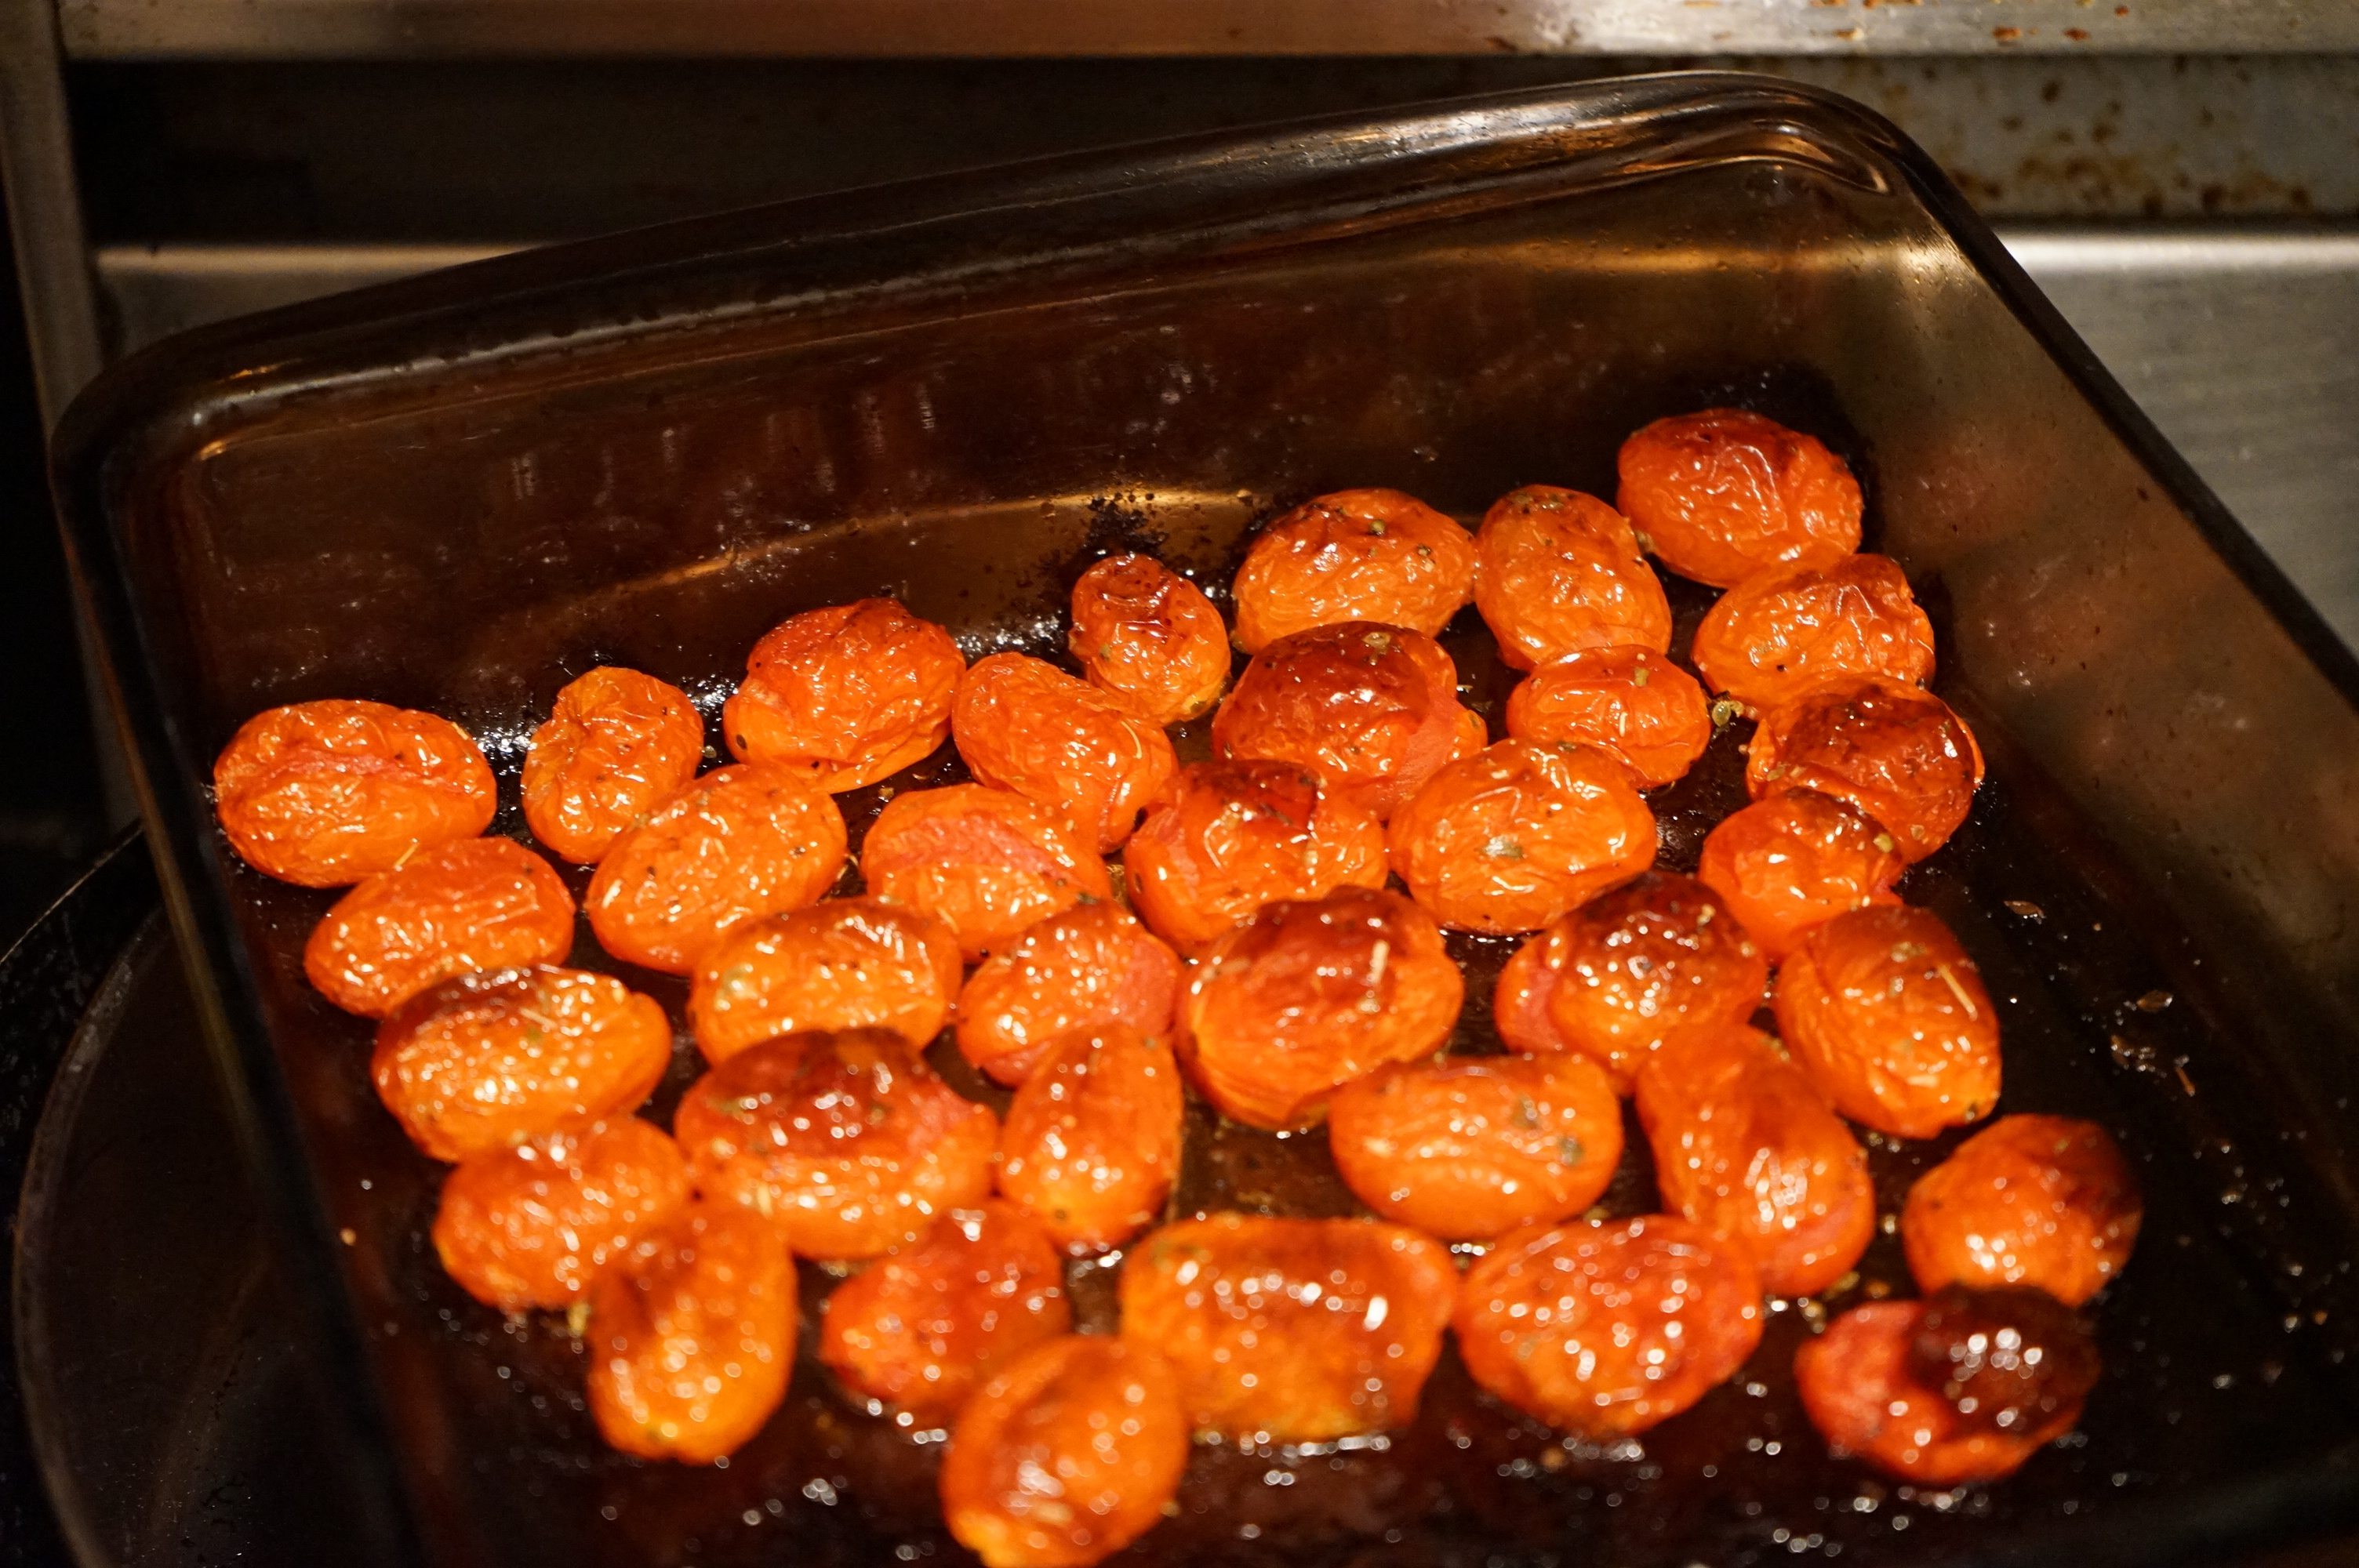
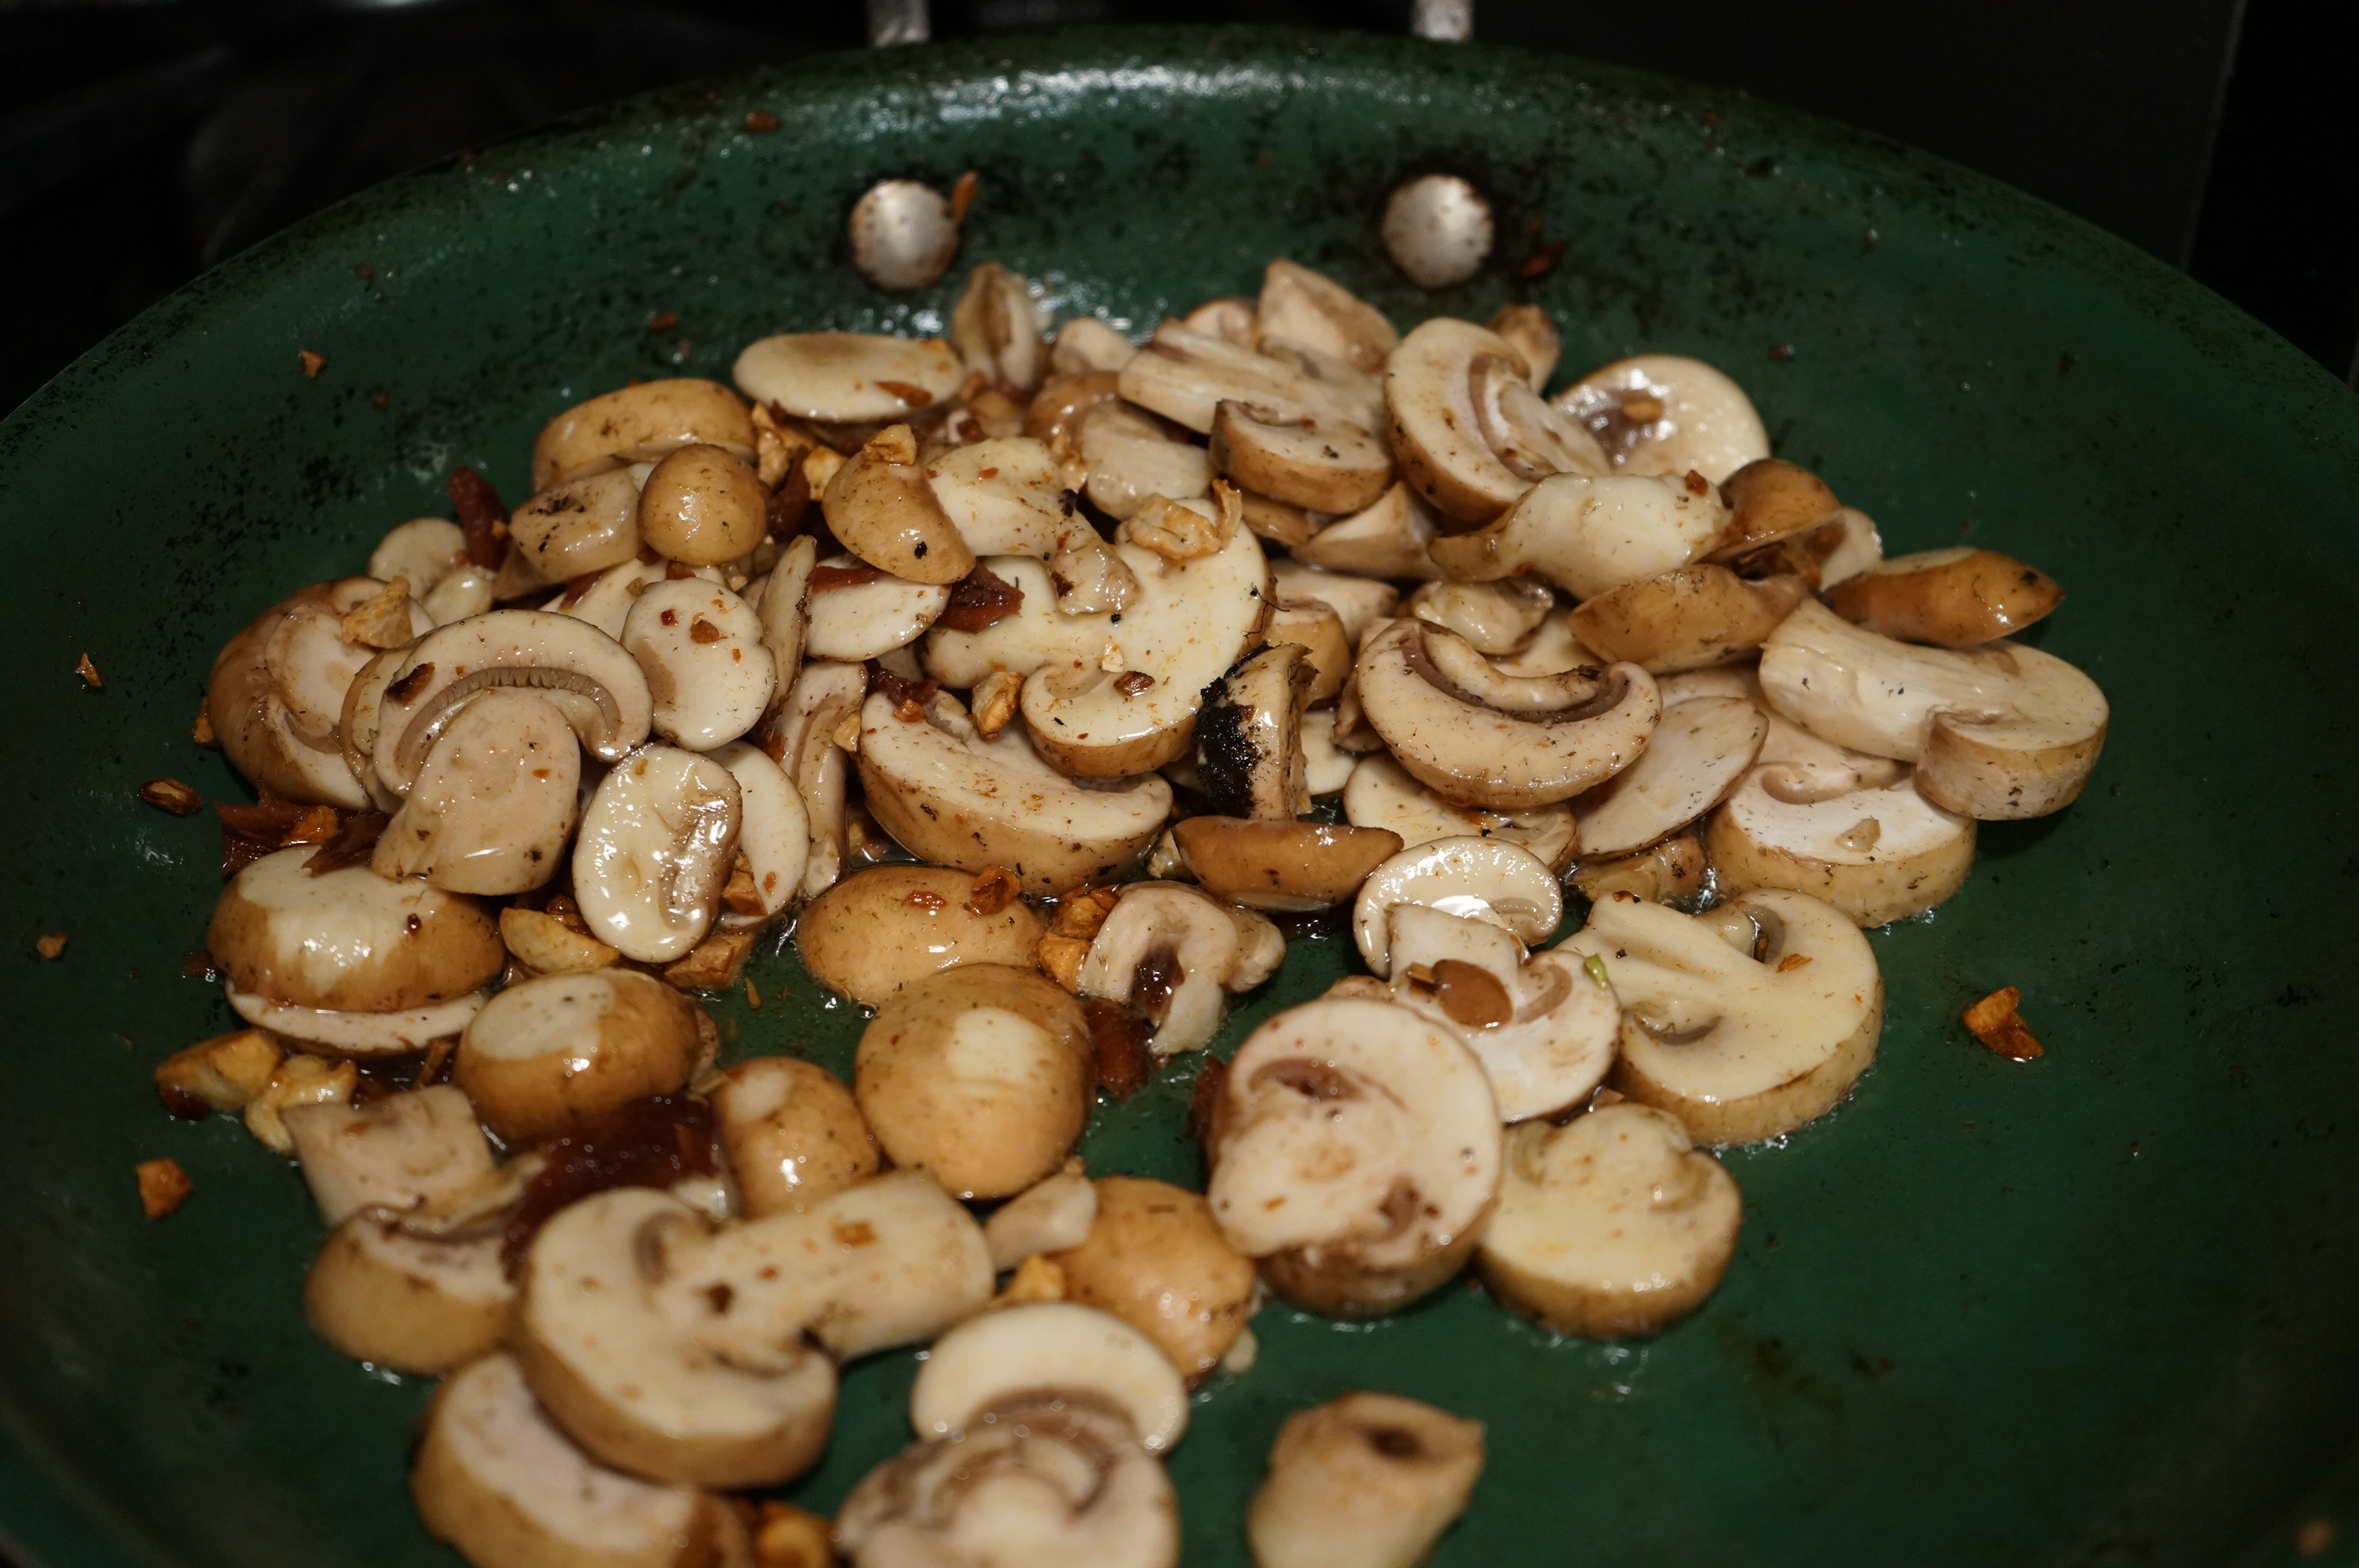
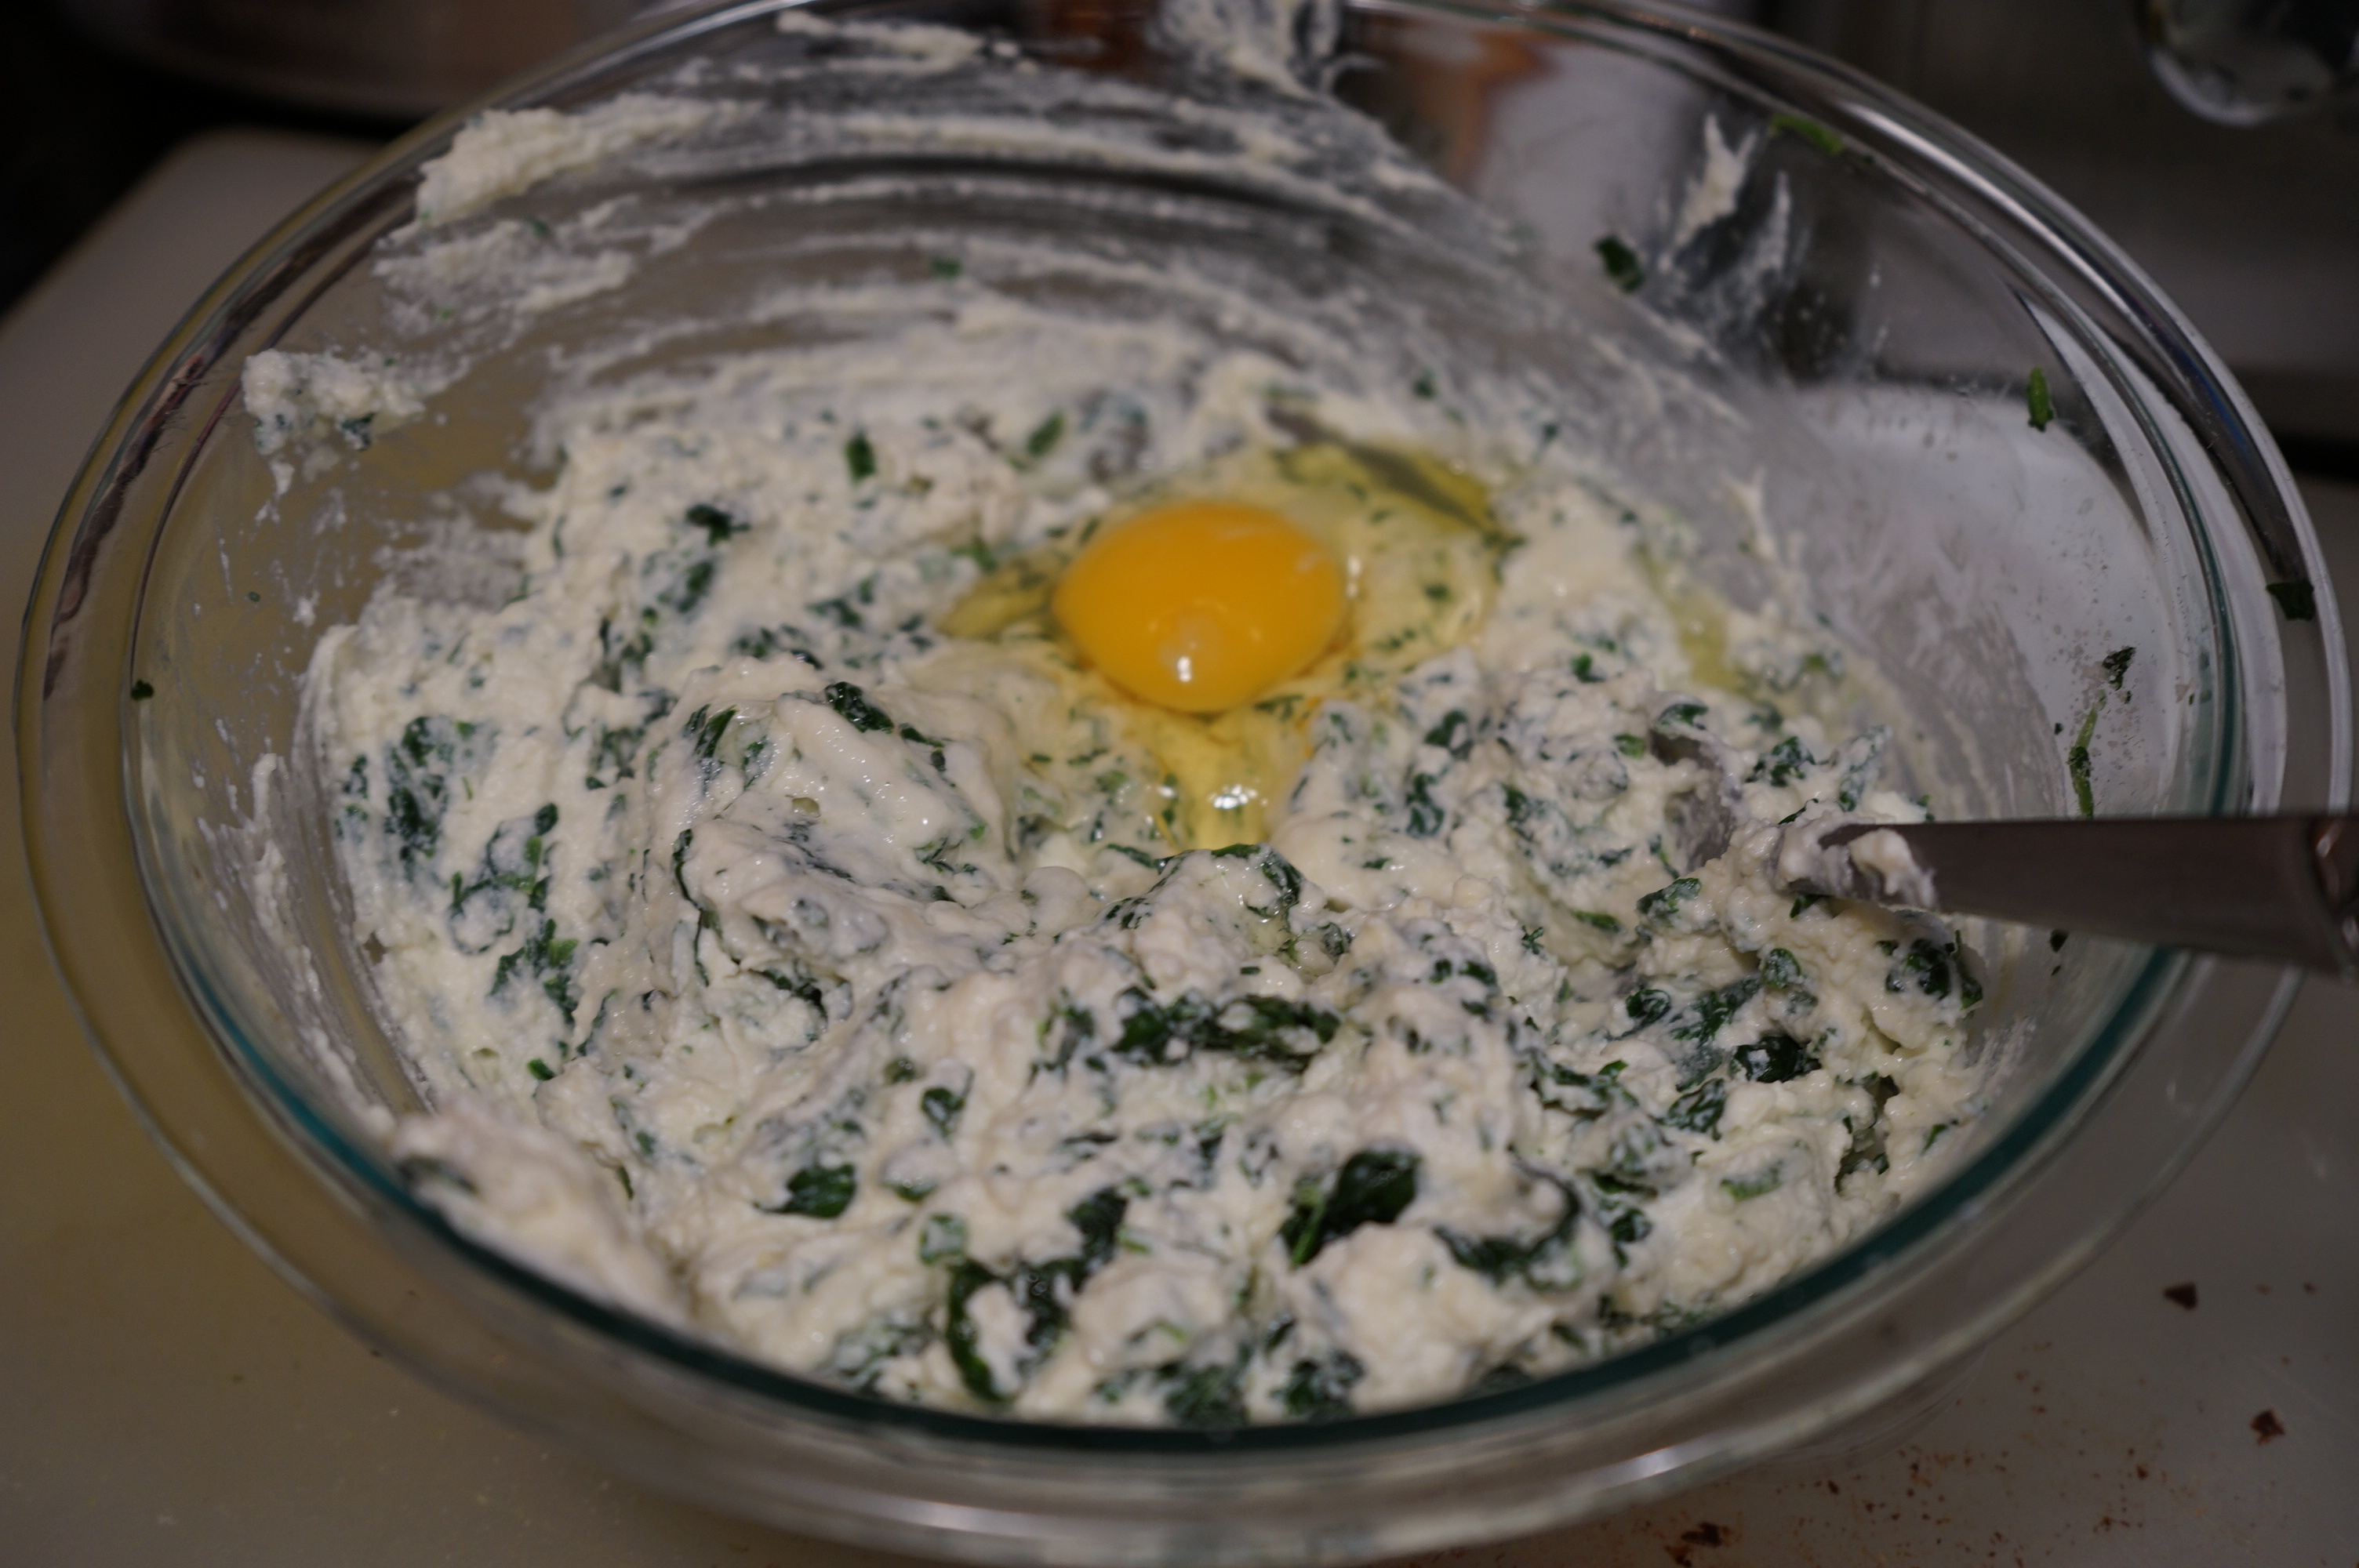
Sorry I’ve been away for a few weeks, but work’s been crazy! This recipe is actually inspired by all of the craziness. I wanted something that was not only delicious, but also comforting. This lasagna is packed full of roasted vegetables, so it’s also a healthy dinner to serve your family. This recipe might seem like it has a lot of steps, but all of them are simple and can be multitasked. So if you want to feed a crowd, or have a lot of leftovers–which are delicious!–try this recipe for Roasted Vegetable Lasagna.
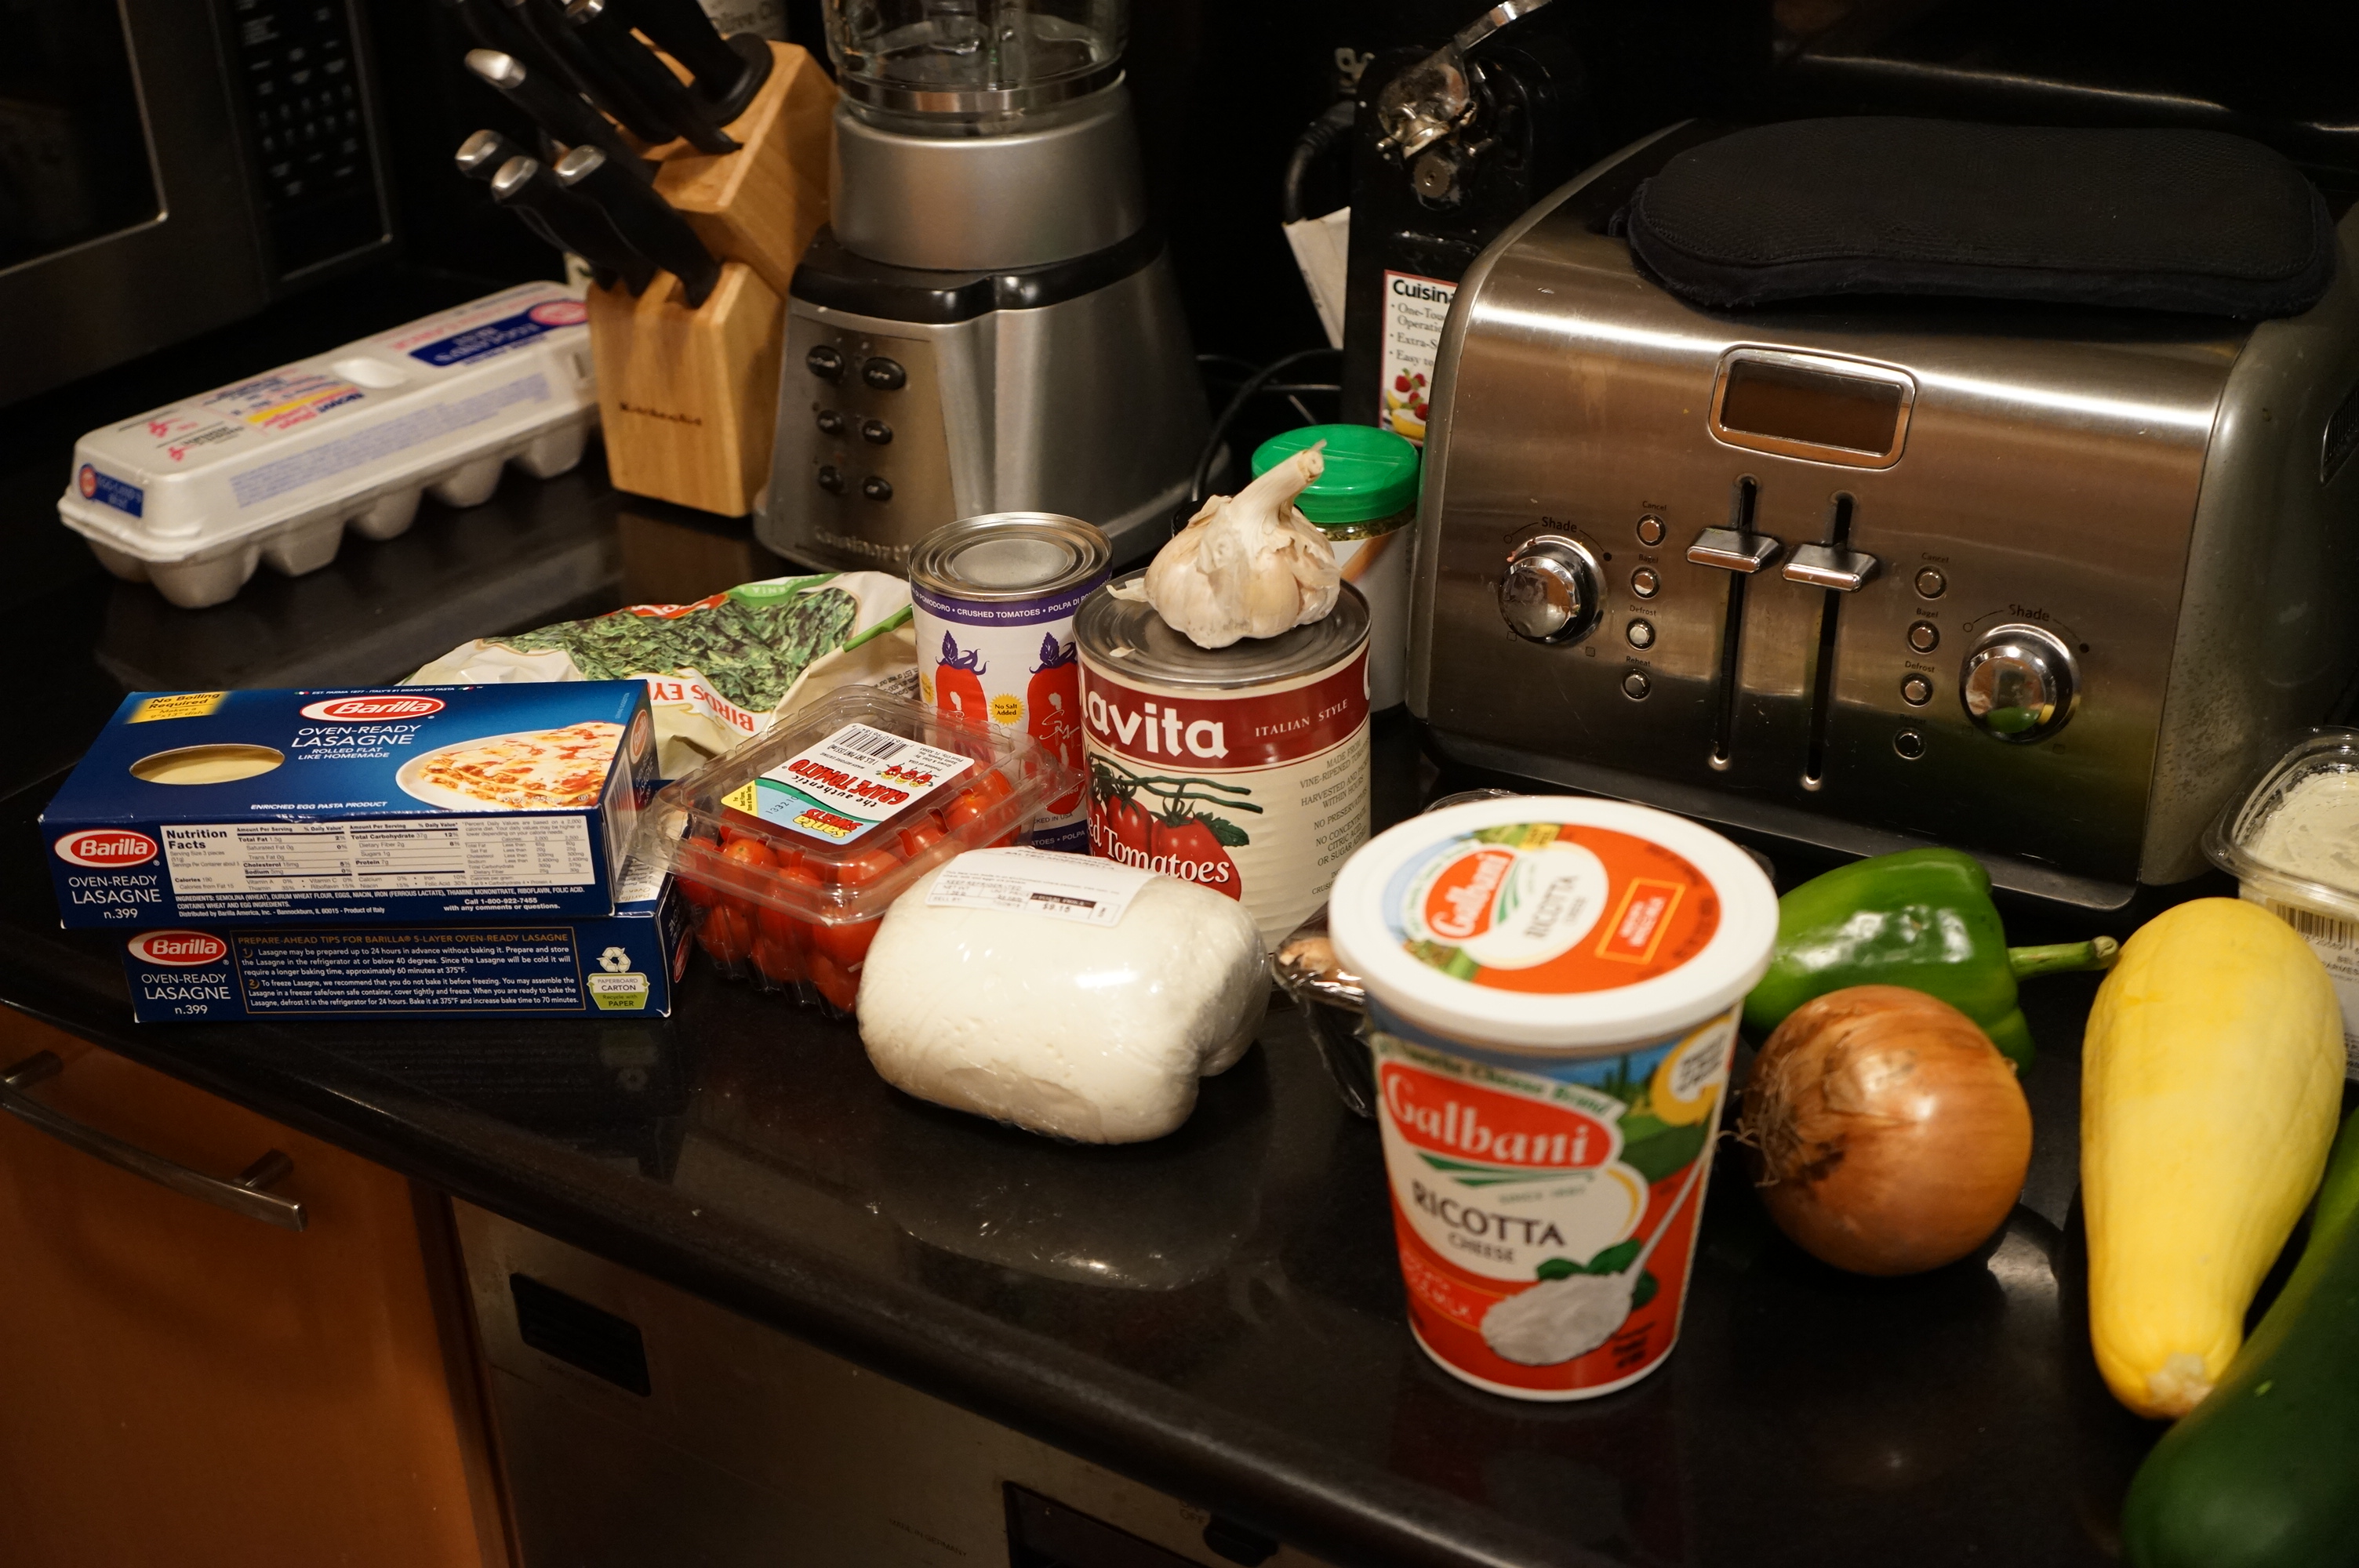
Ingredients:


To Cook:


 Let it cool for at least 5-10 minutes before you cut into it. In fact, lasagna is a great make-ahead dish that you can keep in the fridge for up to 2 days before heating it. If you plan to refrigerate, make sure you add an additional 10-12 minutes to the cooking time. Also, this makes for a pretty saucy lasagna, but if you want you can reserve some extra sauce and spoon it over the top of each piece as it’s served, and garnish with some extra parmesan. Now who wouldn’t want a piece of that beauty? Buon Appetito!

Shucker’s Oyster Bar
411 University Street
Seattle, WA 98101 
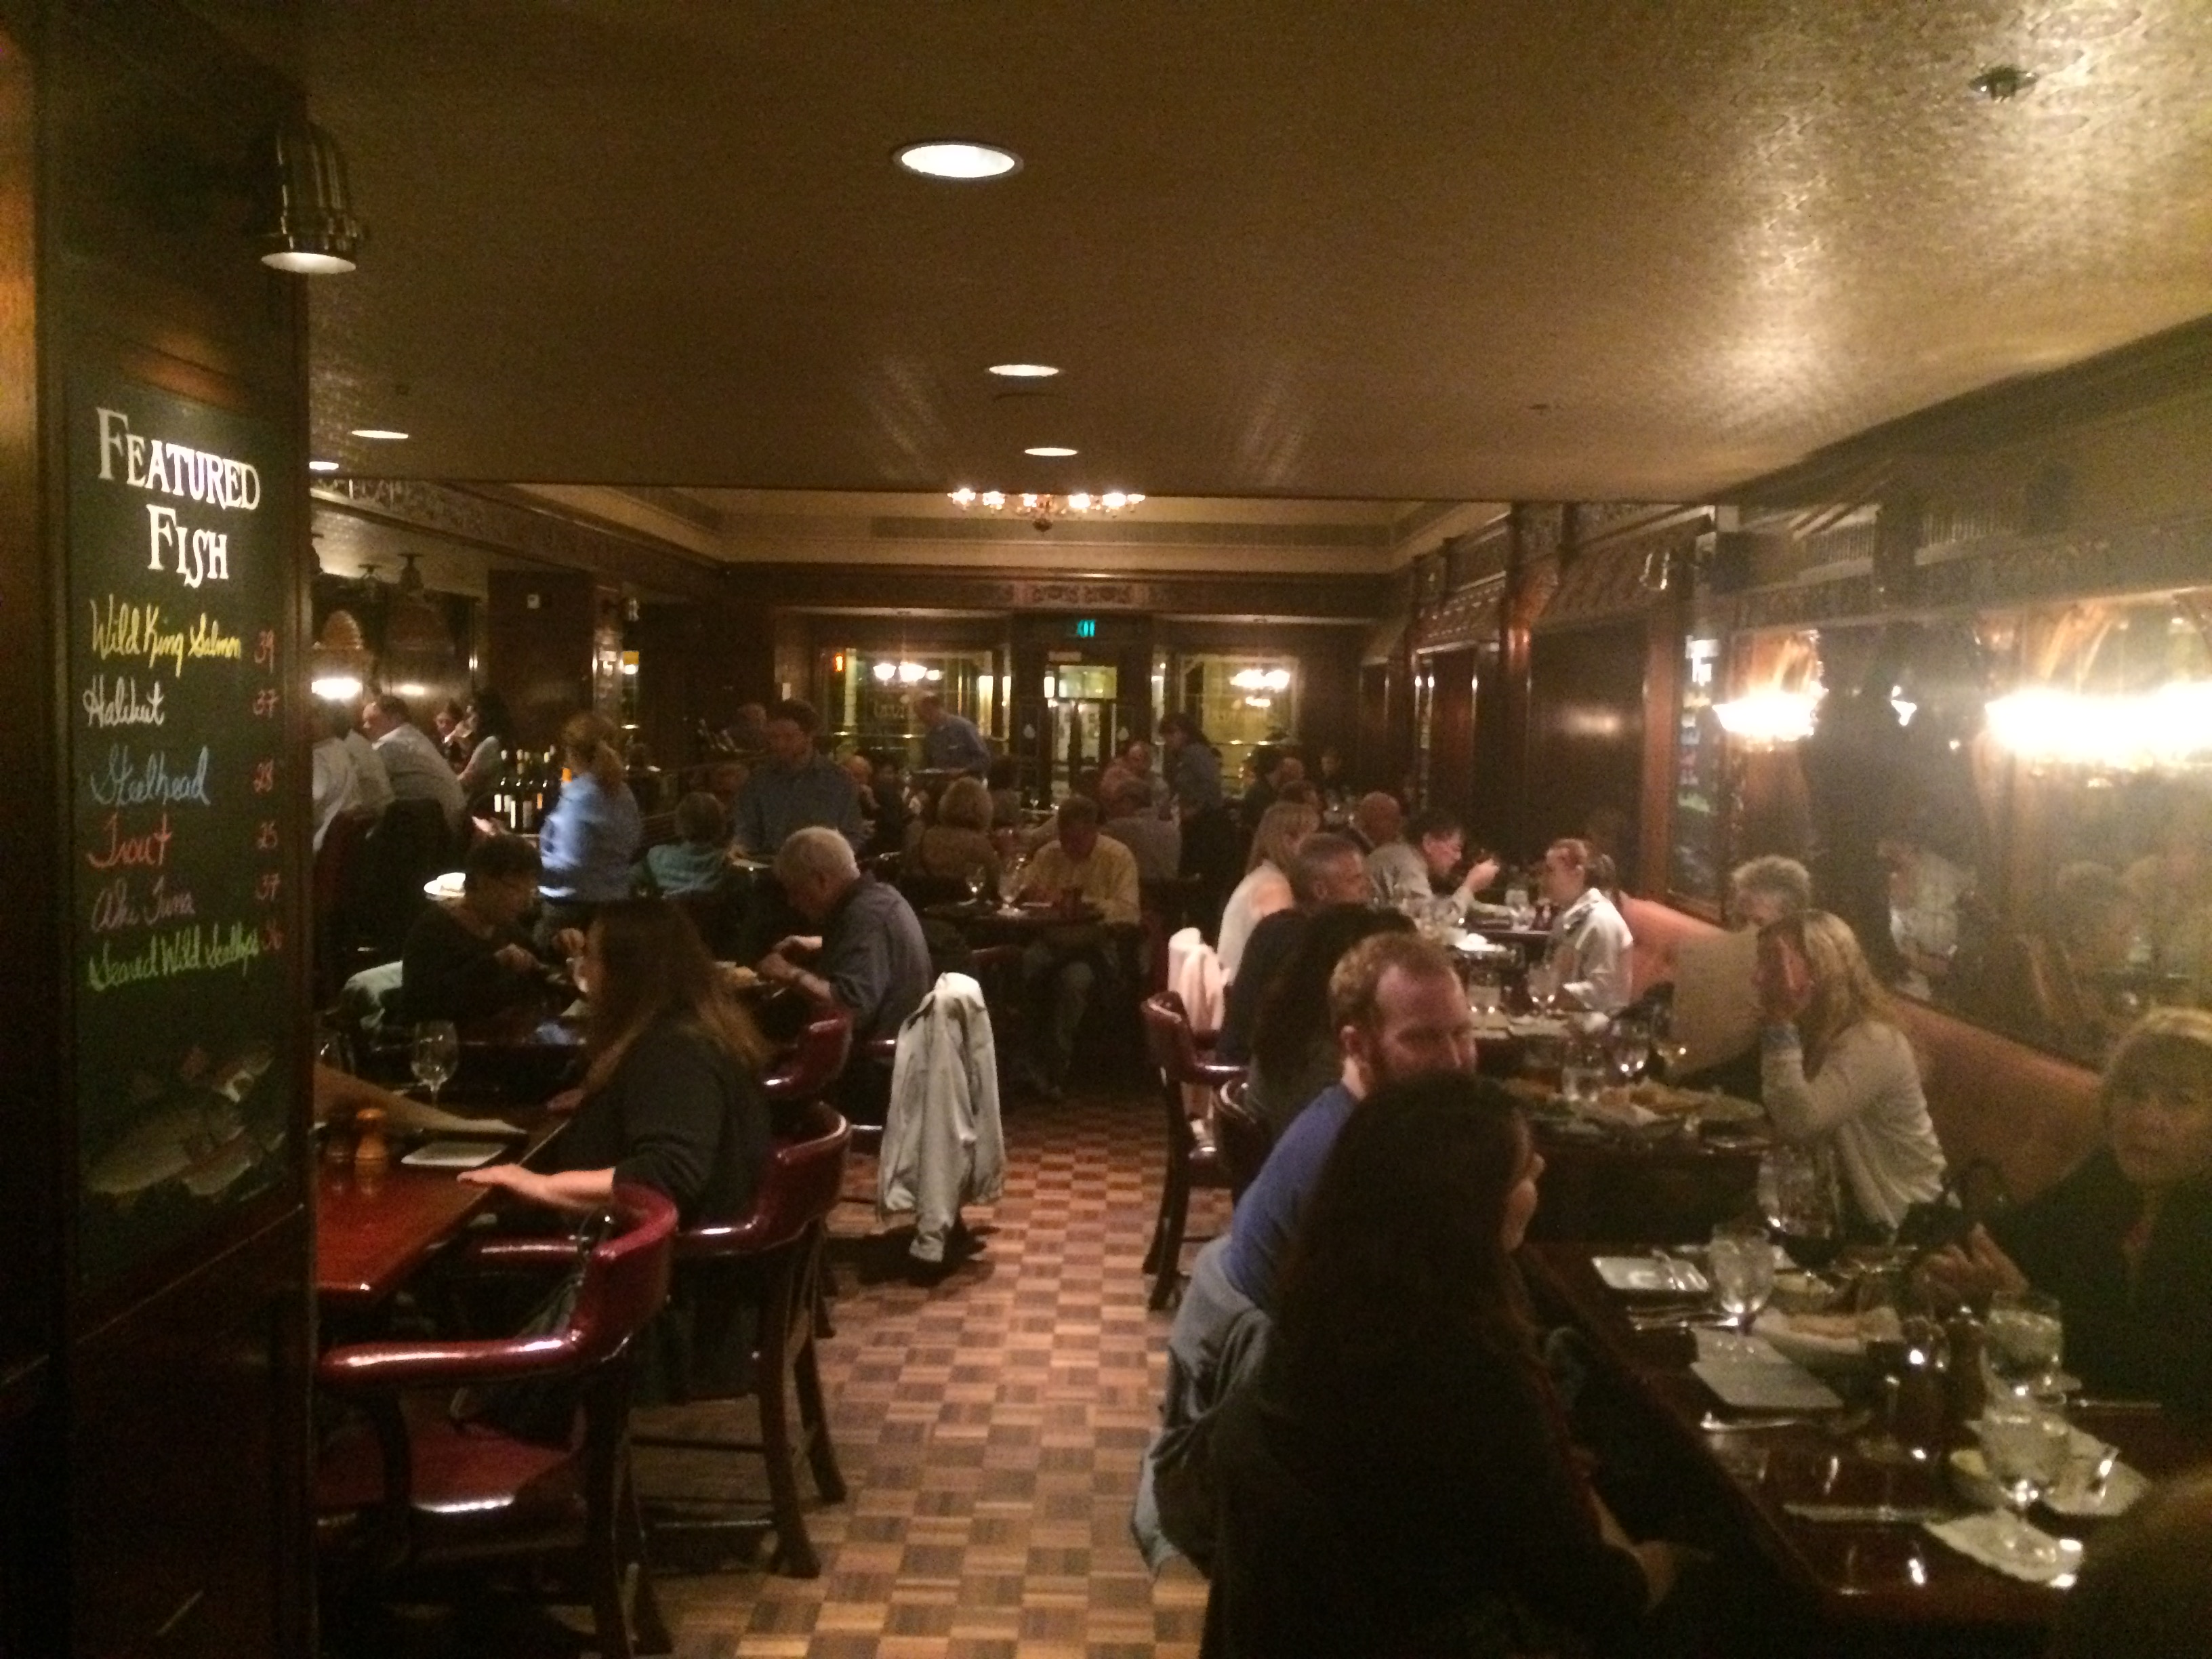 The Pacific Northwest is known for some of the freshest seafood in the world—it’s a fish lover’s paradise. In fact, at the famous Pike Place Market in downtown Seattle, many of the fish mongers will be happy to “throw the fish” for visitors, and I even got to sample some delicious and super fresh smoked salmon! Therefore, it was a no brainer on what kind of food I wanted on my first night of a foodie weekend in Seattle—seafood! At the same time, I wasn’t in the mood to walk very far and found Shucker’s, which had great reviews on both OpenTable and Yelp and was only a 5 minute walk—I was sold.
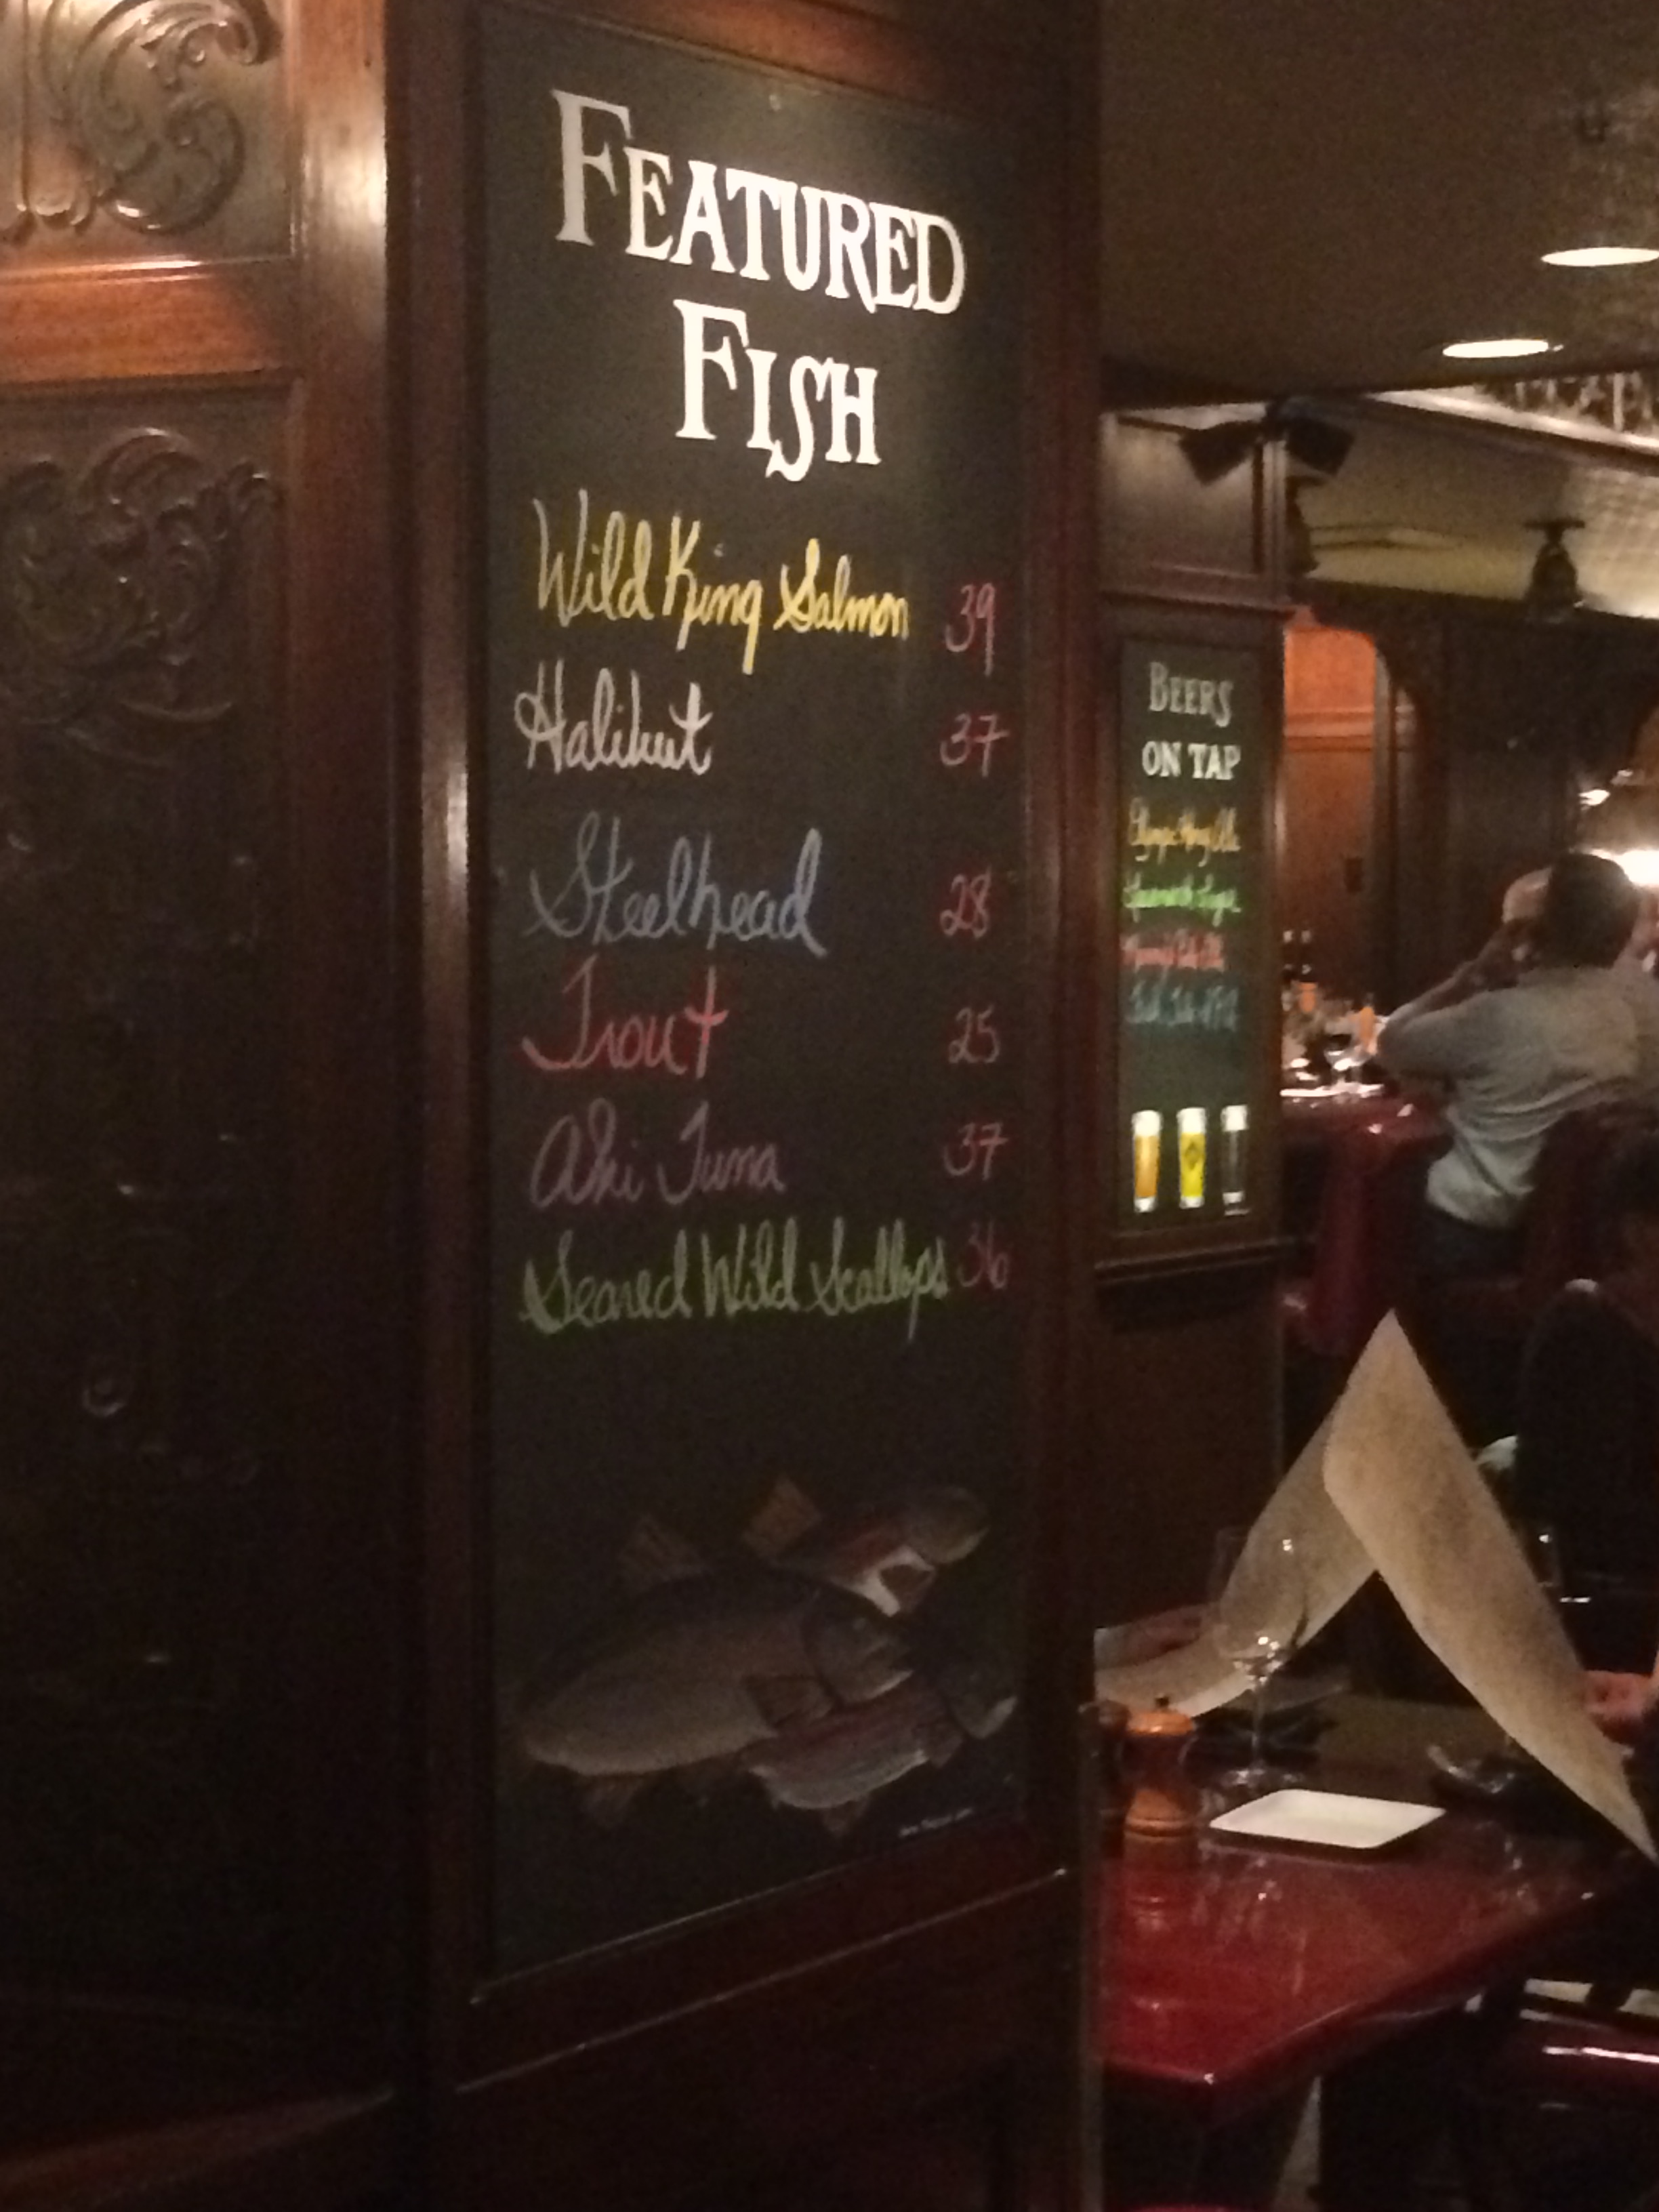 Located inside of the landmark Fairmont Olympic Hotel, Shucker’s seemed like an old school seafood joint with a heavy focus on fresh fish. The aroma of some sort of baked seafood dish—maybe Oysters Rockefeller?—hit me as I walked in the door with an amazing garlic smell. It was sweet, salty, briny and so tantalizing. As I sat at the table, I had a good view of the chalkboard where that day’s market pics were listed—another nod to old school seafood houses—and got comfy on my side of the booth.

 The bread basket was bountiful, though not the best bread I’ve ever had. The white sourdough had a subtle tang, the whole wheat was nice and fluffy, and the cracker had a good amount of black pepper baked in. The butter was delicious though, and super creamy. The breads were great for dipping in my huge bowl of Creamy Clam Chowder ($12). Accompanying the soup was a mid-sized beer mug of oyster crackers, which I thought was a nice touch, albeit a little weird. The soup itself was creamy with a nice velvety texture, and uber-filled with fresh, chunky clams. I think a lot of the creaminess came from the starchiness of the potatoes, as opposed to a super amount of cream, which kept it from being too heavy. The whole bowl had an undertone of seafood flavor from the clam juice and it was a great way to ease into a seafood dinner. The waiter’s designation of it as a house specialty was spot on. It was very filling with such well cooked clams, but I soldiered on to the next courses.

 Up next was the Dungeness Crab and Artichoke Gratin ($17). This dish seemed a little different from the oft-ordered shrimp cocktail or crispy calamari that are so common at fish restaurants. Compared to the chowder, this appetizer was much more petite, but with a beautiful presentation. The gratin had big chunks of chunky crabmeat juxtaposed with the salty and tangy artichoke hearts. The top crisped up under the broiler and gave it some nice texture. It was garnished with a long, thin focaccia crisp, which was tasty but I wish was slightly chewier. It was a great vehicle for shoveling more crab and artichoke creaminess into my mouth though—so mission accomplished!
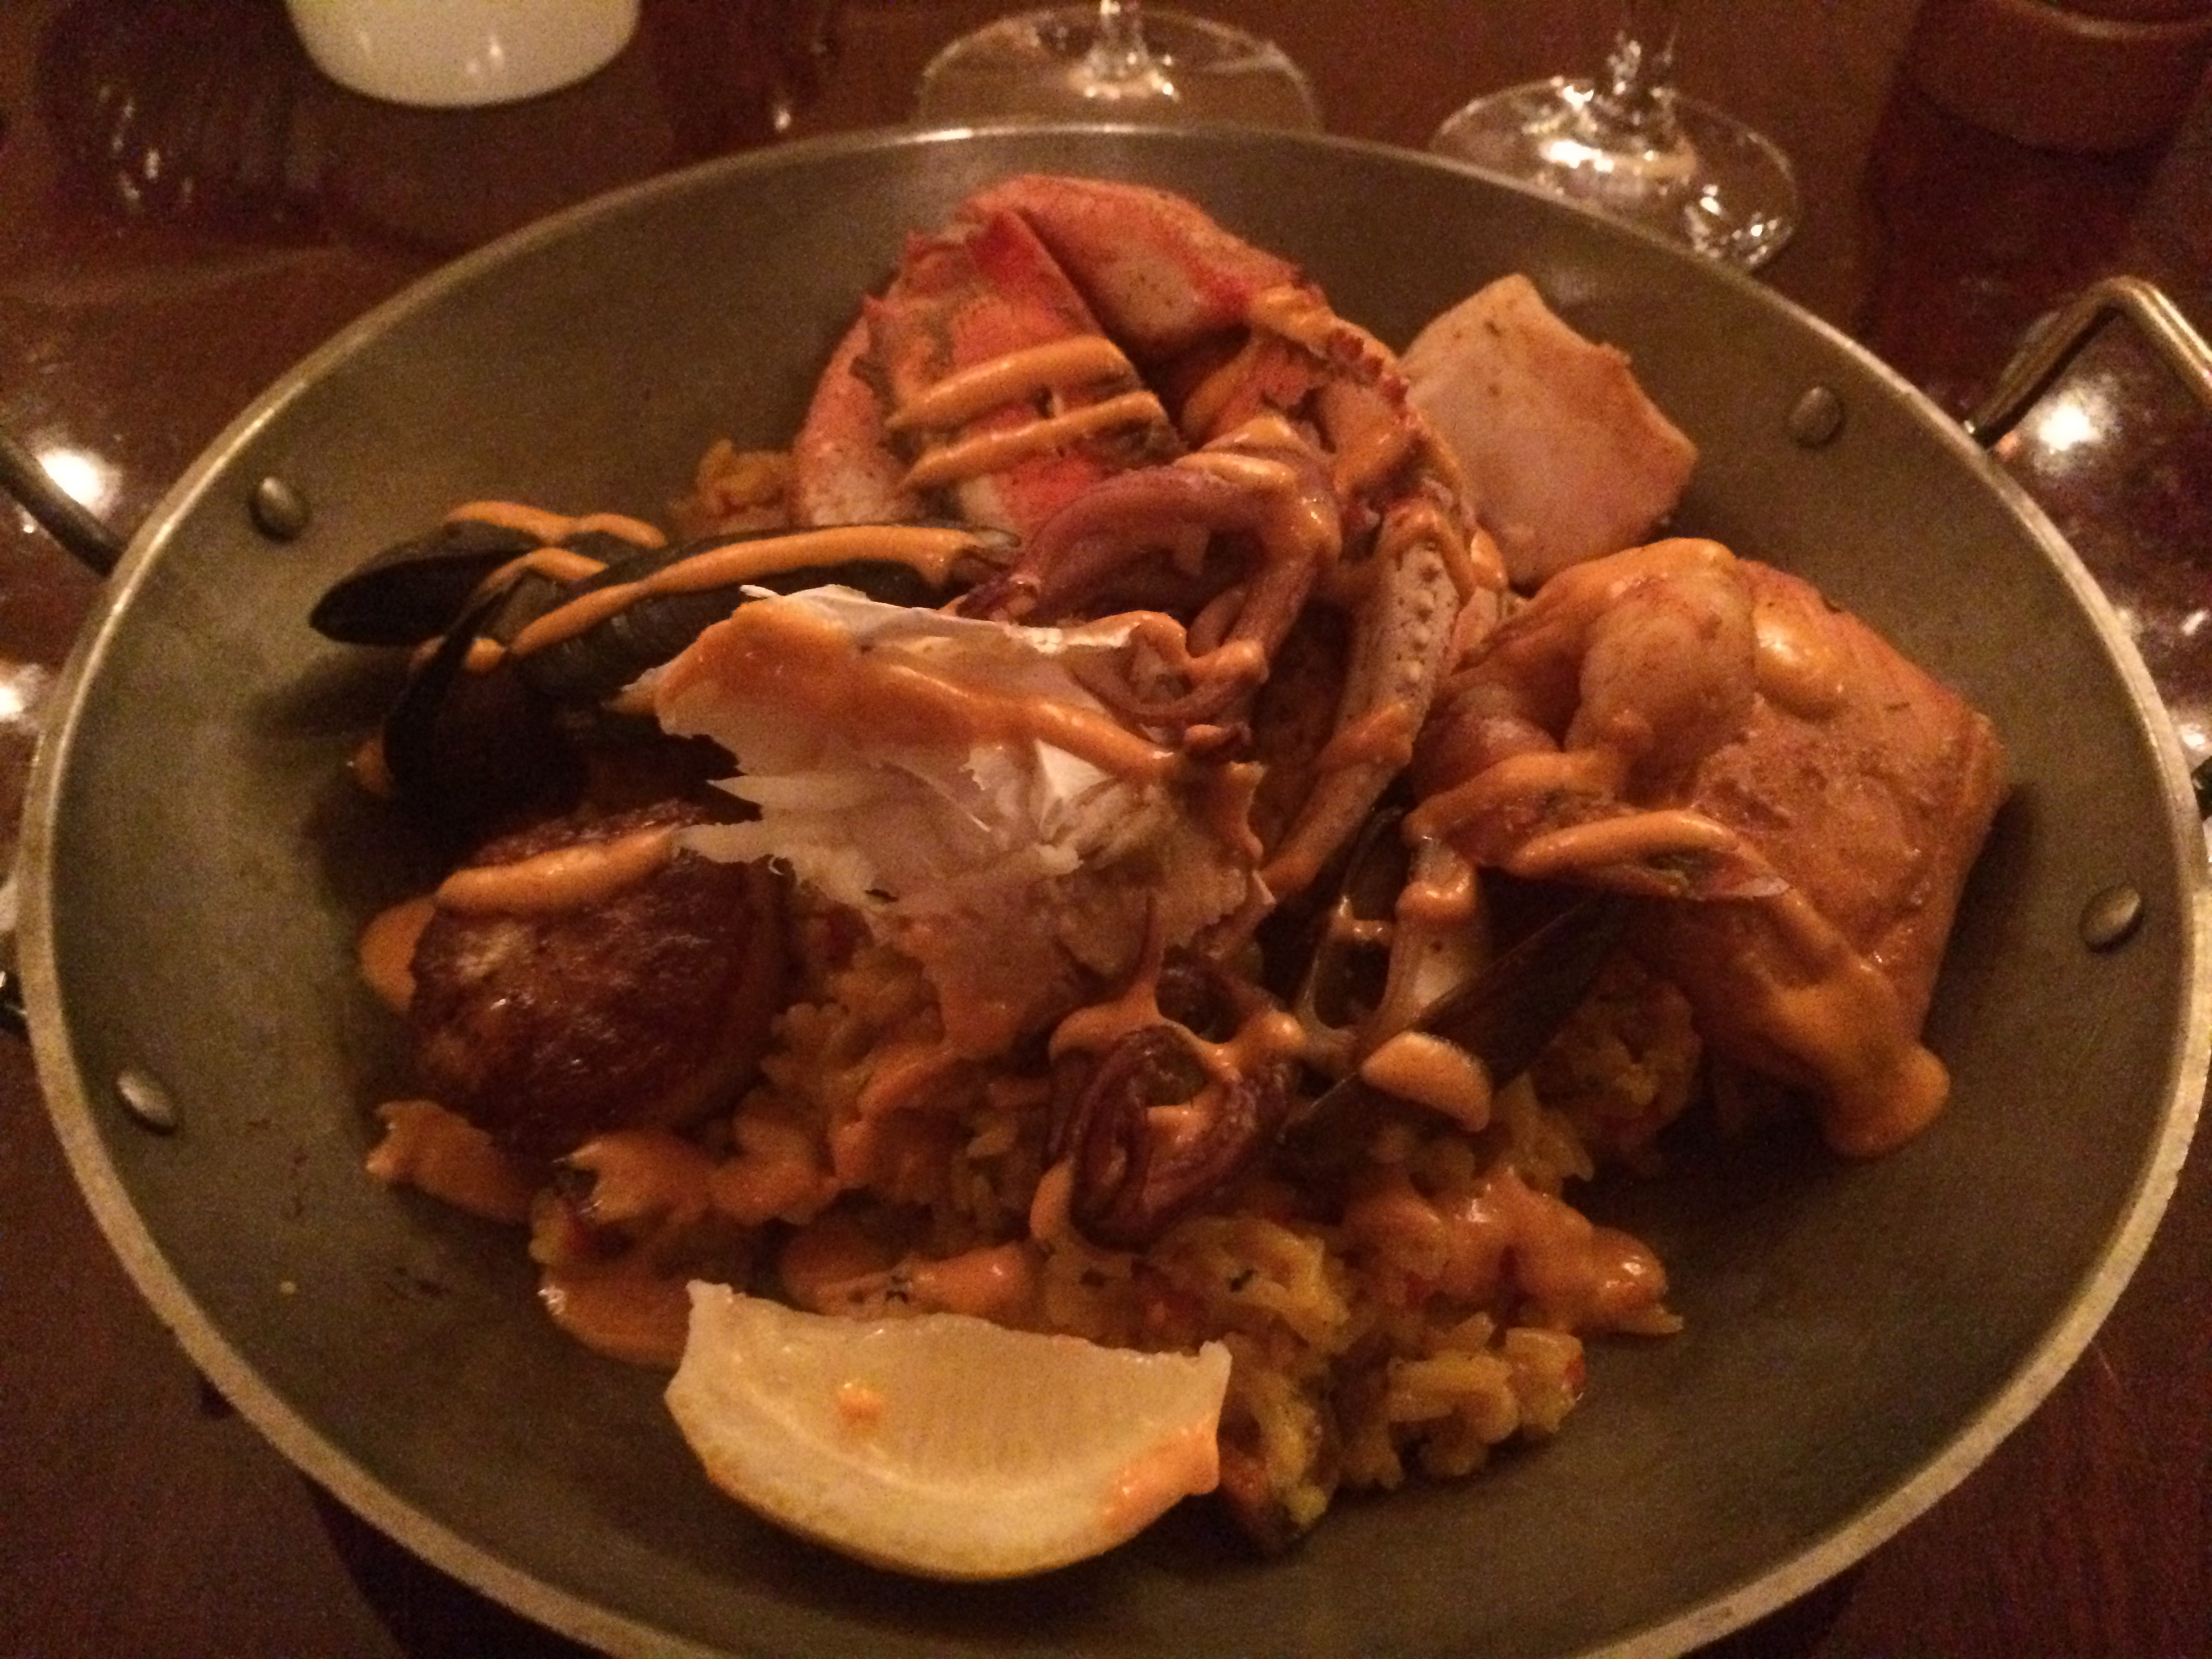
 Finally, was the main event that I had been waiting for—and salivating over—since I saw it on the menu: Shucker’s Seafood Paella ($41). Though it looks like a pretty steep price tag, there is so much seafood in this paella, and it was so delicious that it’s worth it. Plus, my waiter was so nice that he substituted a big scallop for me instead of clams in the paella, since I’m not a big fan of clams in their shell (plus already had clams in the soup). He didn’t even give me an up charge! To go through the long list of seafood in this dish, we can start with the huge quarter of a Dungeness crab atop the bowl, along with some crabmeat running throughout the rice. The crabmeat—after I used the seafood cracker to break the shell—was nice and sweet, and gave this dish such a level of elegance that many paella dishes are missing. The prawns and scallop were perfectly cooked—juicy and moist on the inside, with a slight acidic crust. The scallop specifically was gigantic with a wonderful, slightly acidic char on the outside. This dish also had plenty of meaty calamari flavor bombs and fresh, delicious mussels that absorbed flavor from the traditional saffron paella broth. The chorizo, chicken and andouille sausage were rendered down, and lent this dish a nice level of spice and bumped up the meatiness of the creamy rice. The saffron gave it not only a wonderful red-orange color but a depth of flavor that helped bridge the gap between the seafood and meats. Served in a mini-paella pan with a wedge of lemon to squeeze over the top, this dish was awesome, and such a great way to try a variety of fresh seafood in one dish.
 Unfortunately, at the end of this deliciously decadent and unbelievably rich meal, there was absolutely no room left for dessert, though they sounded delicious. Regardless, this dinner was absolutely amazing, and the perfect gateway to the plethora of fresh seafood available in Seattle, and a wonderful “stick to your ribs” meal. I also have to mention that the servers at Shucker’s were very knowledgeable about the menu and attentive throughout the night. So, next time you visit Seattle and want to sample the bounty of the Pacific ocean, I recommend a pitstop at Shucker’s Oyster Bar! And, if you want to make your own fish dinner at home, check out my recipe for Sesame Crusted Tuna with Peanut Noodles 🙂


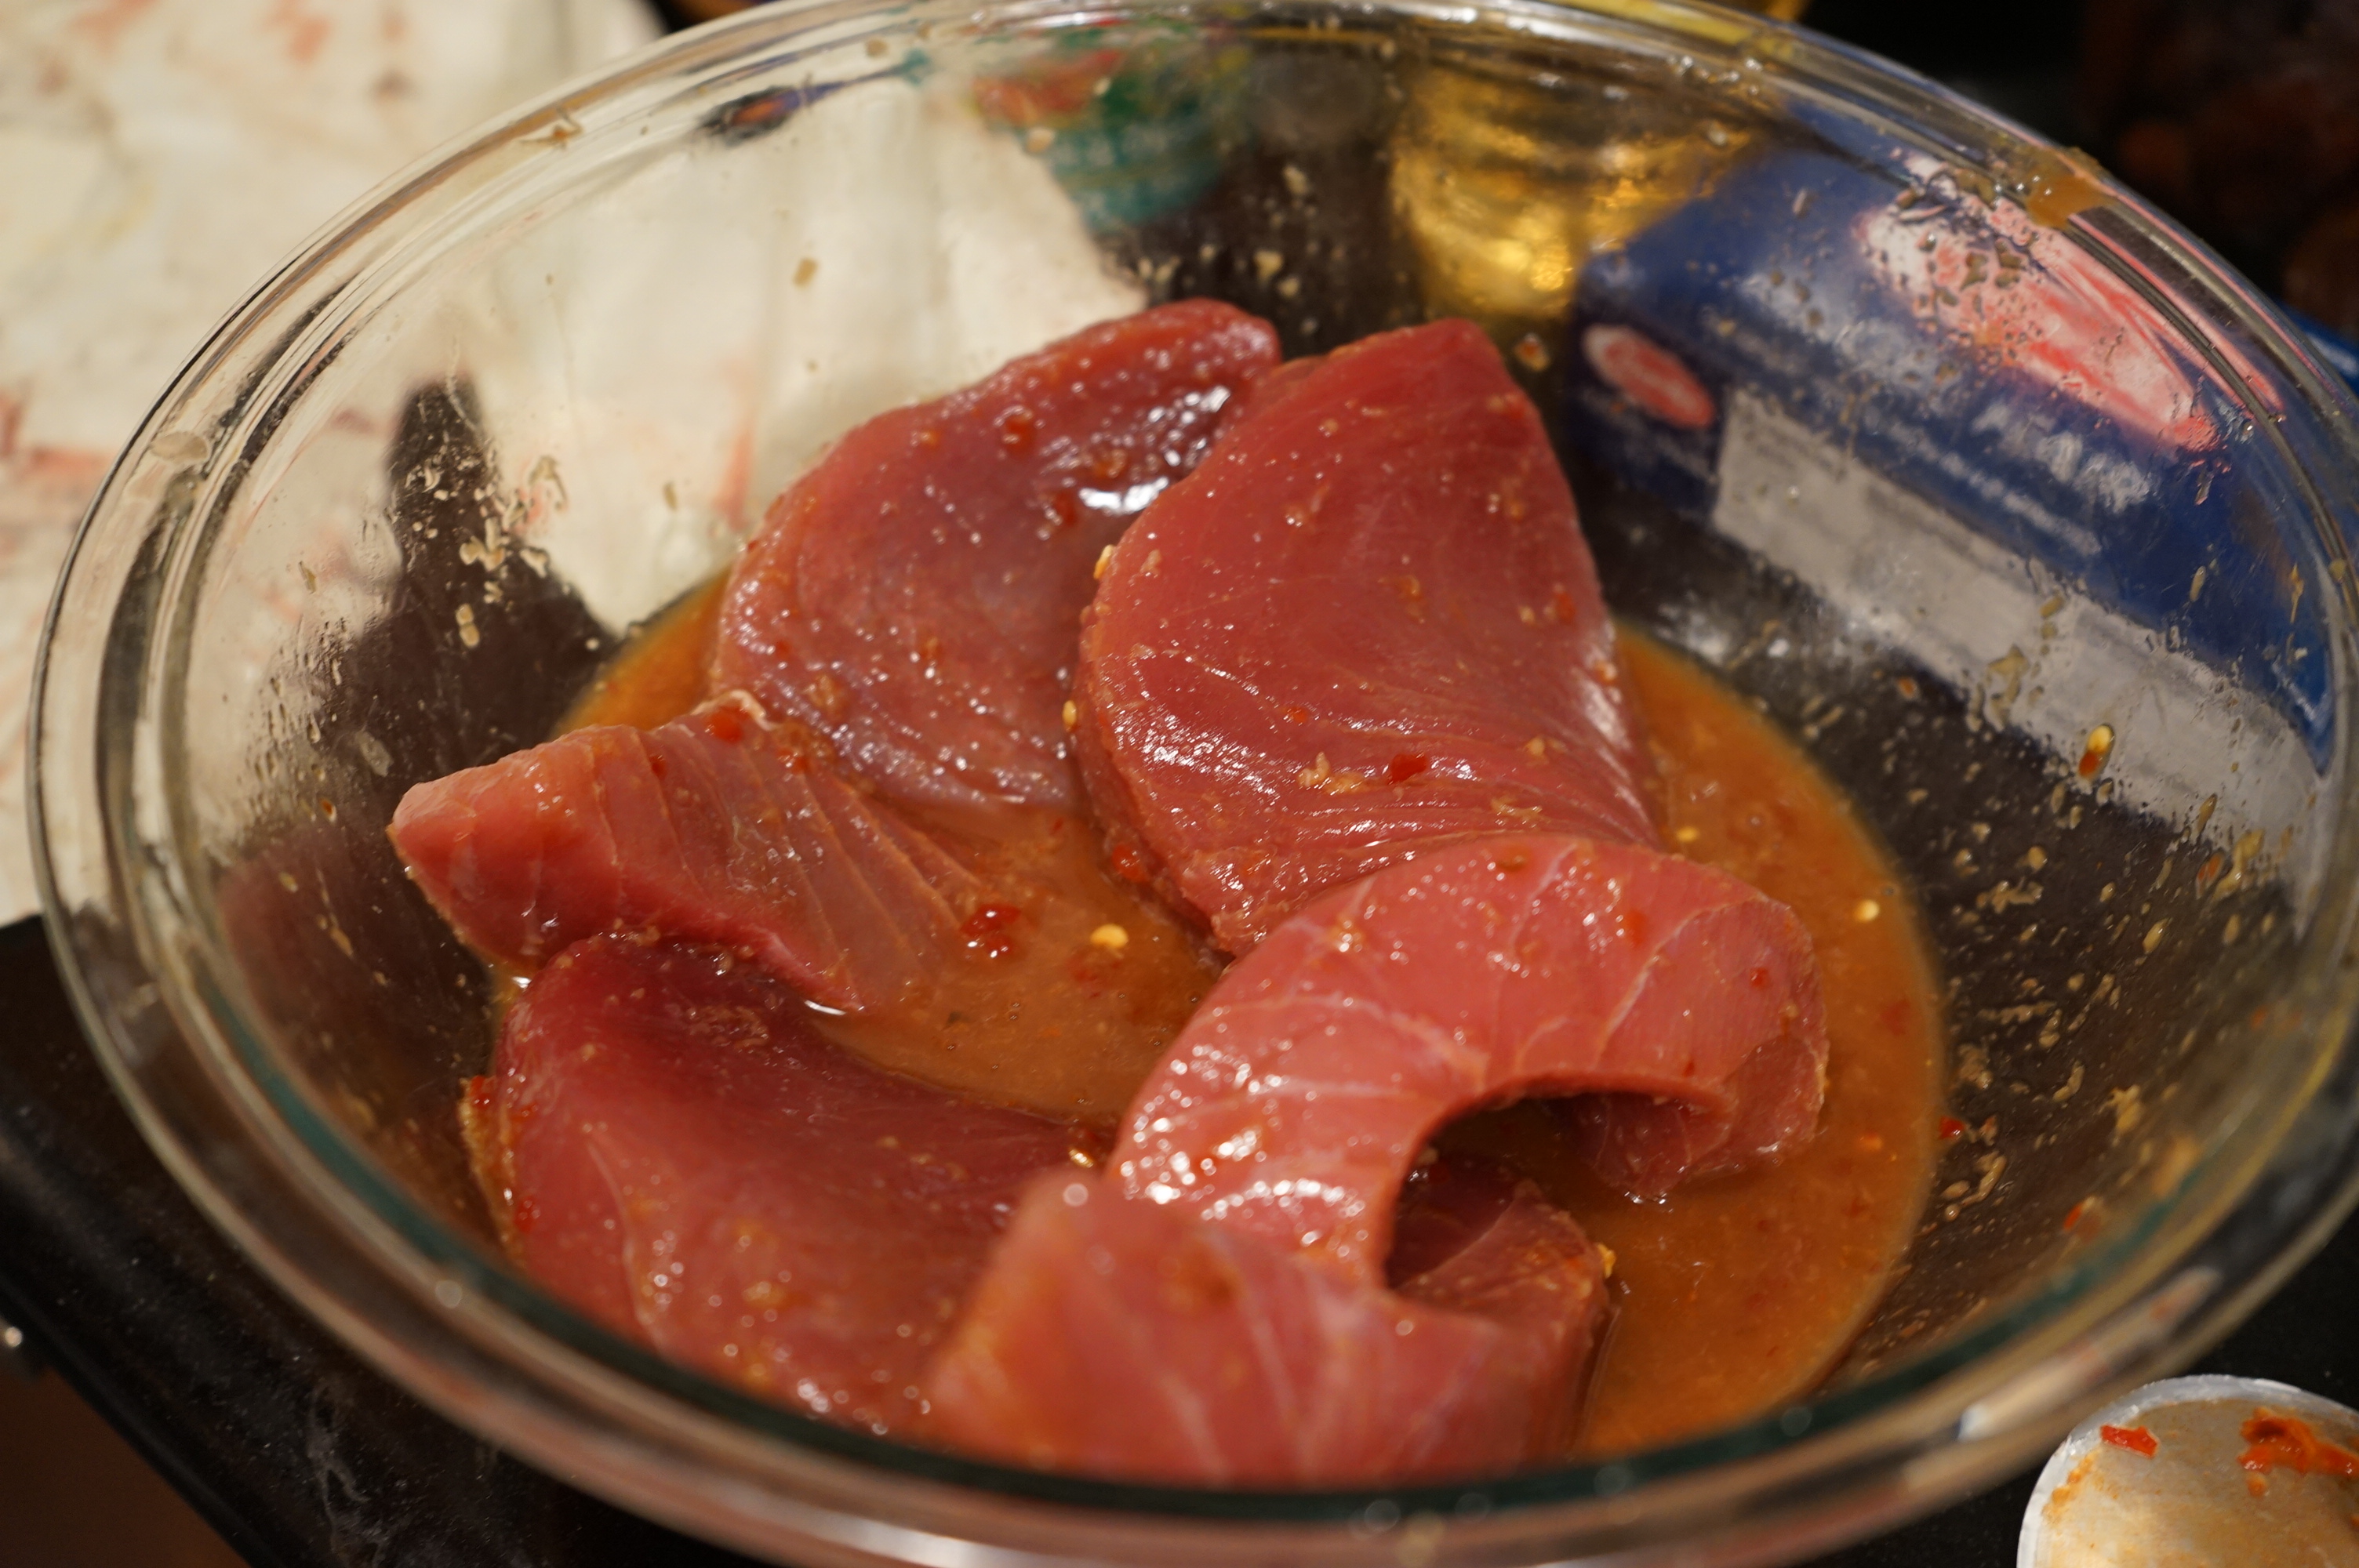
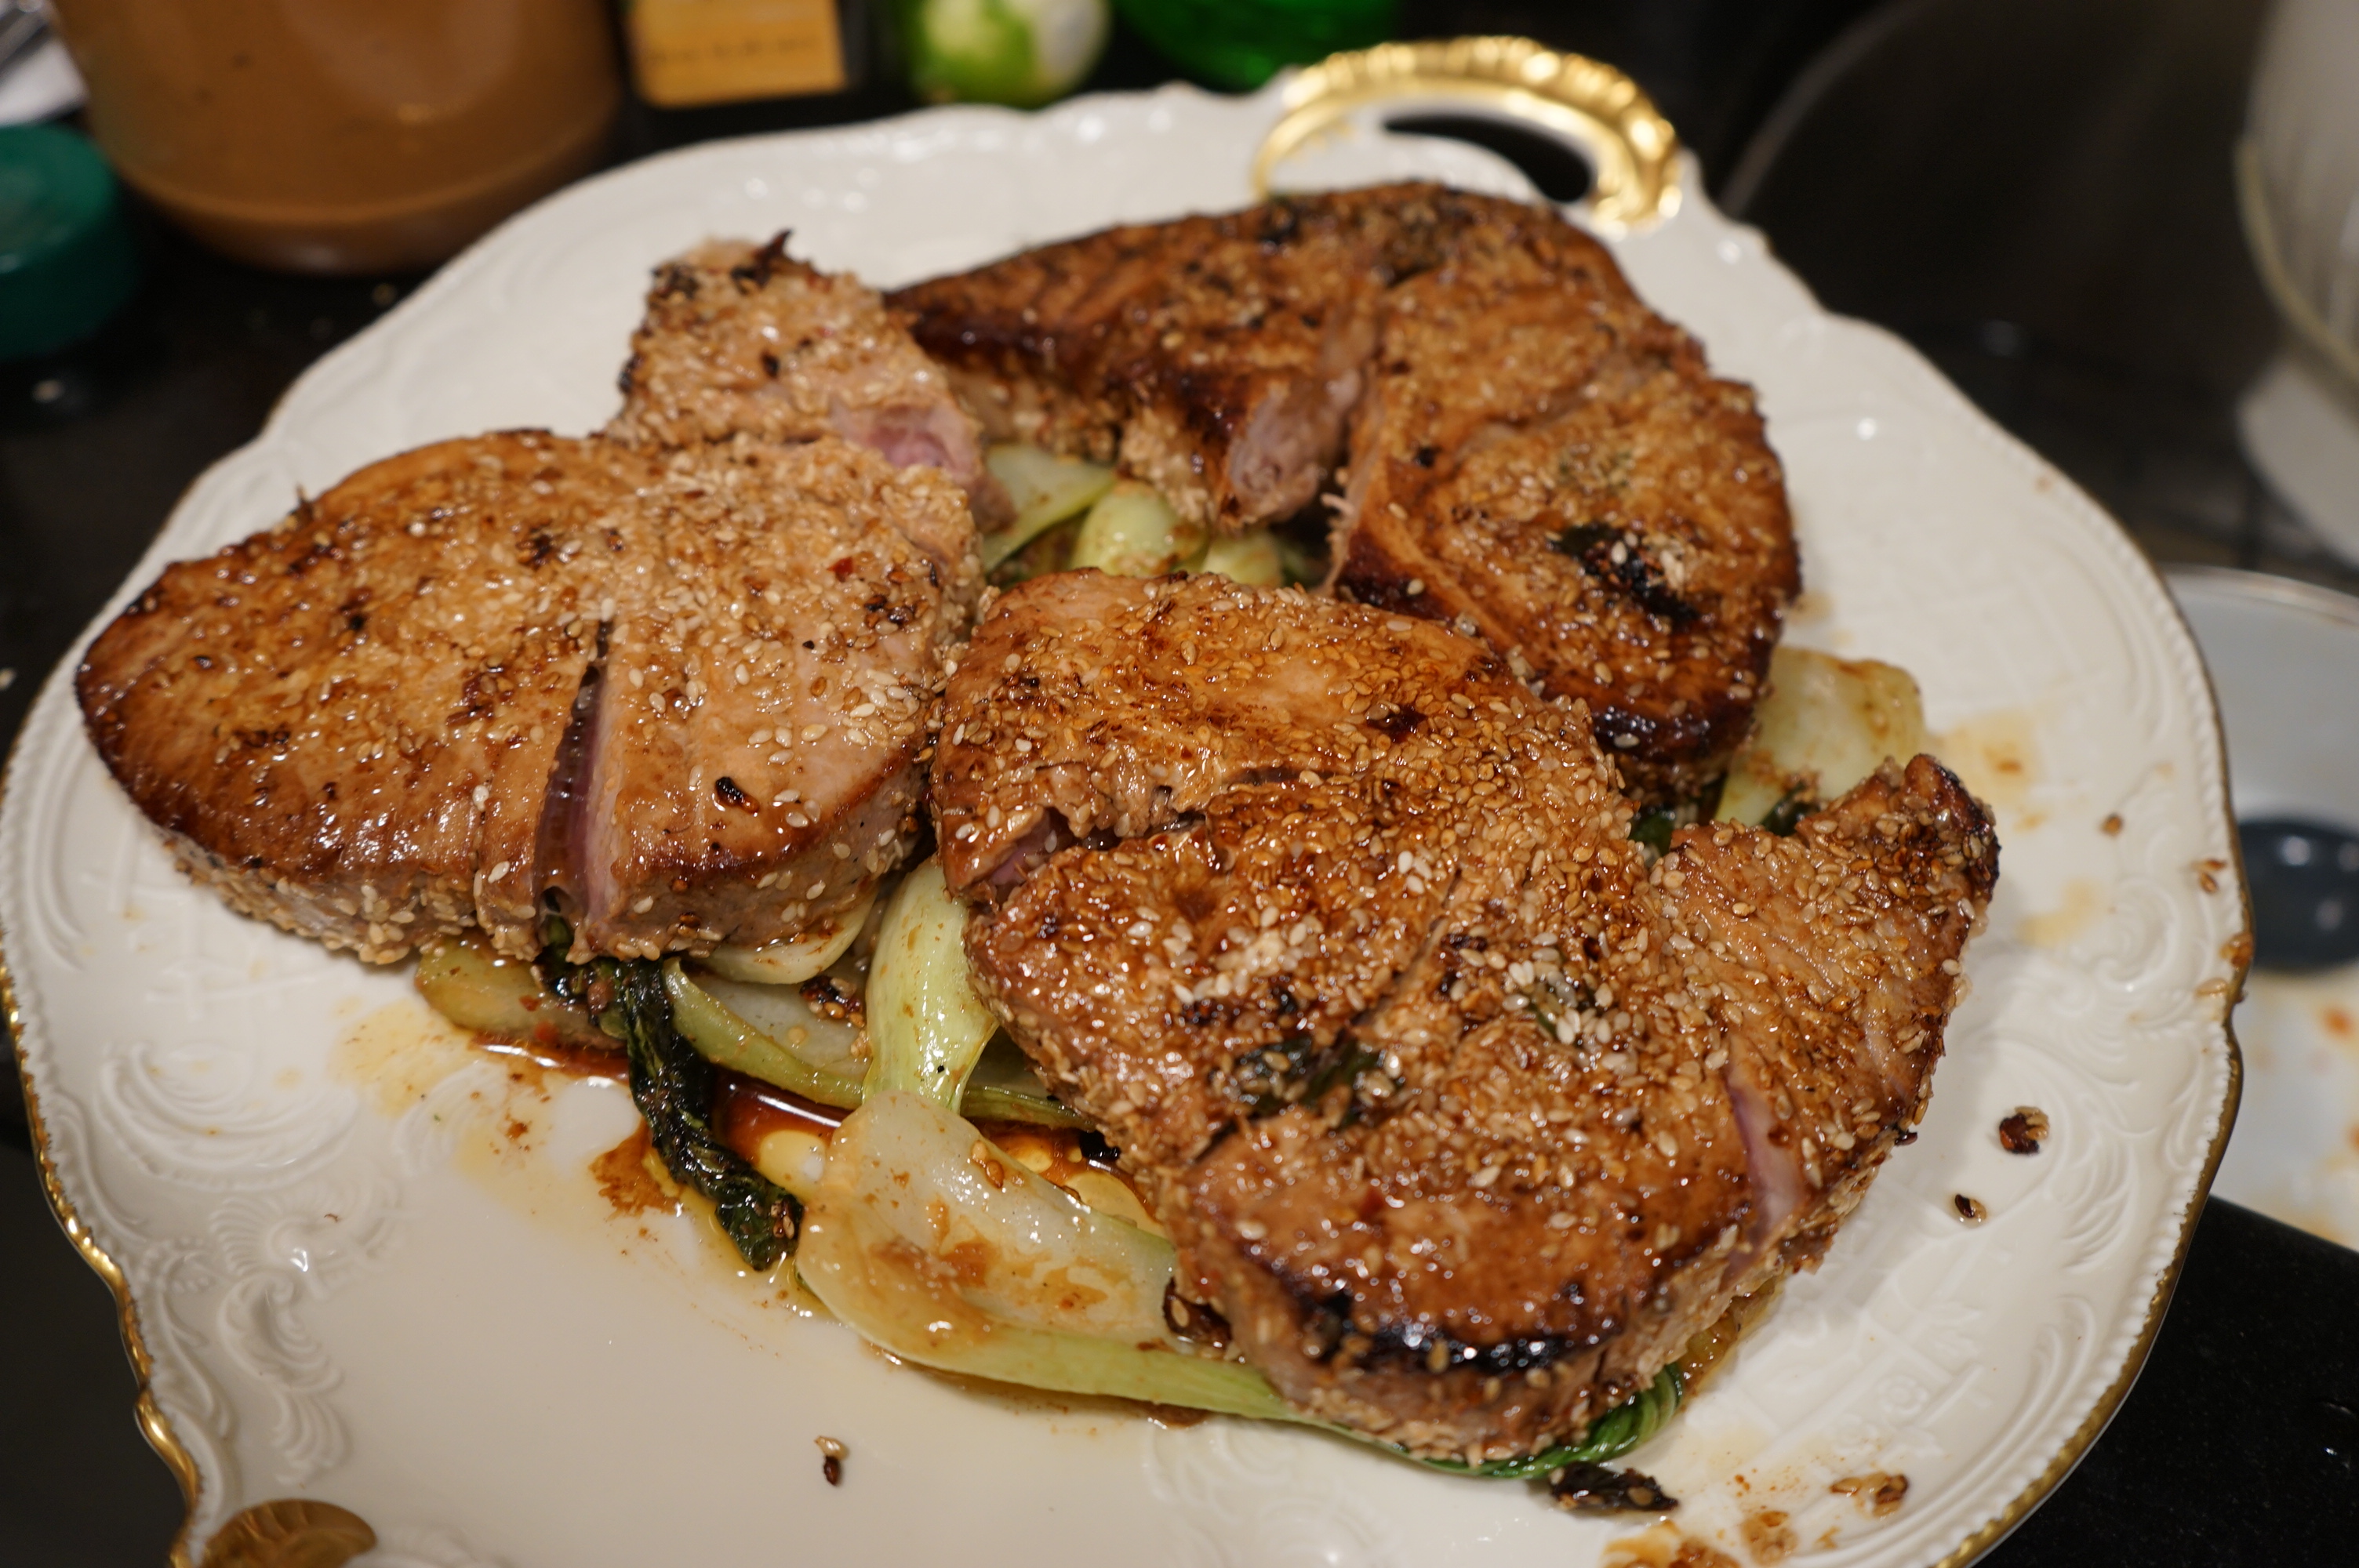
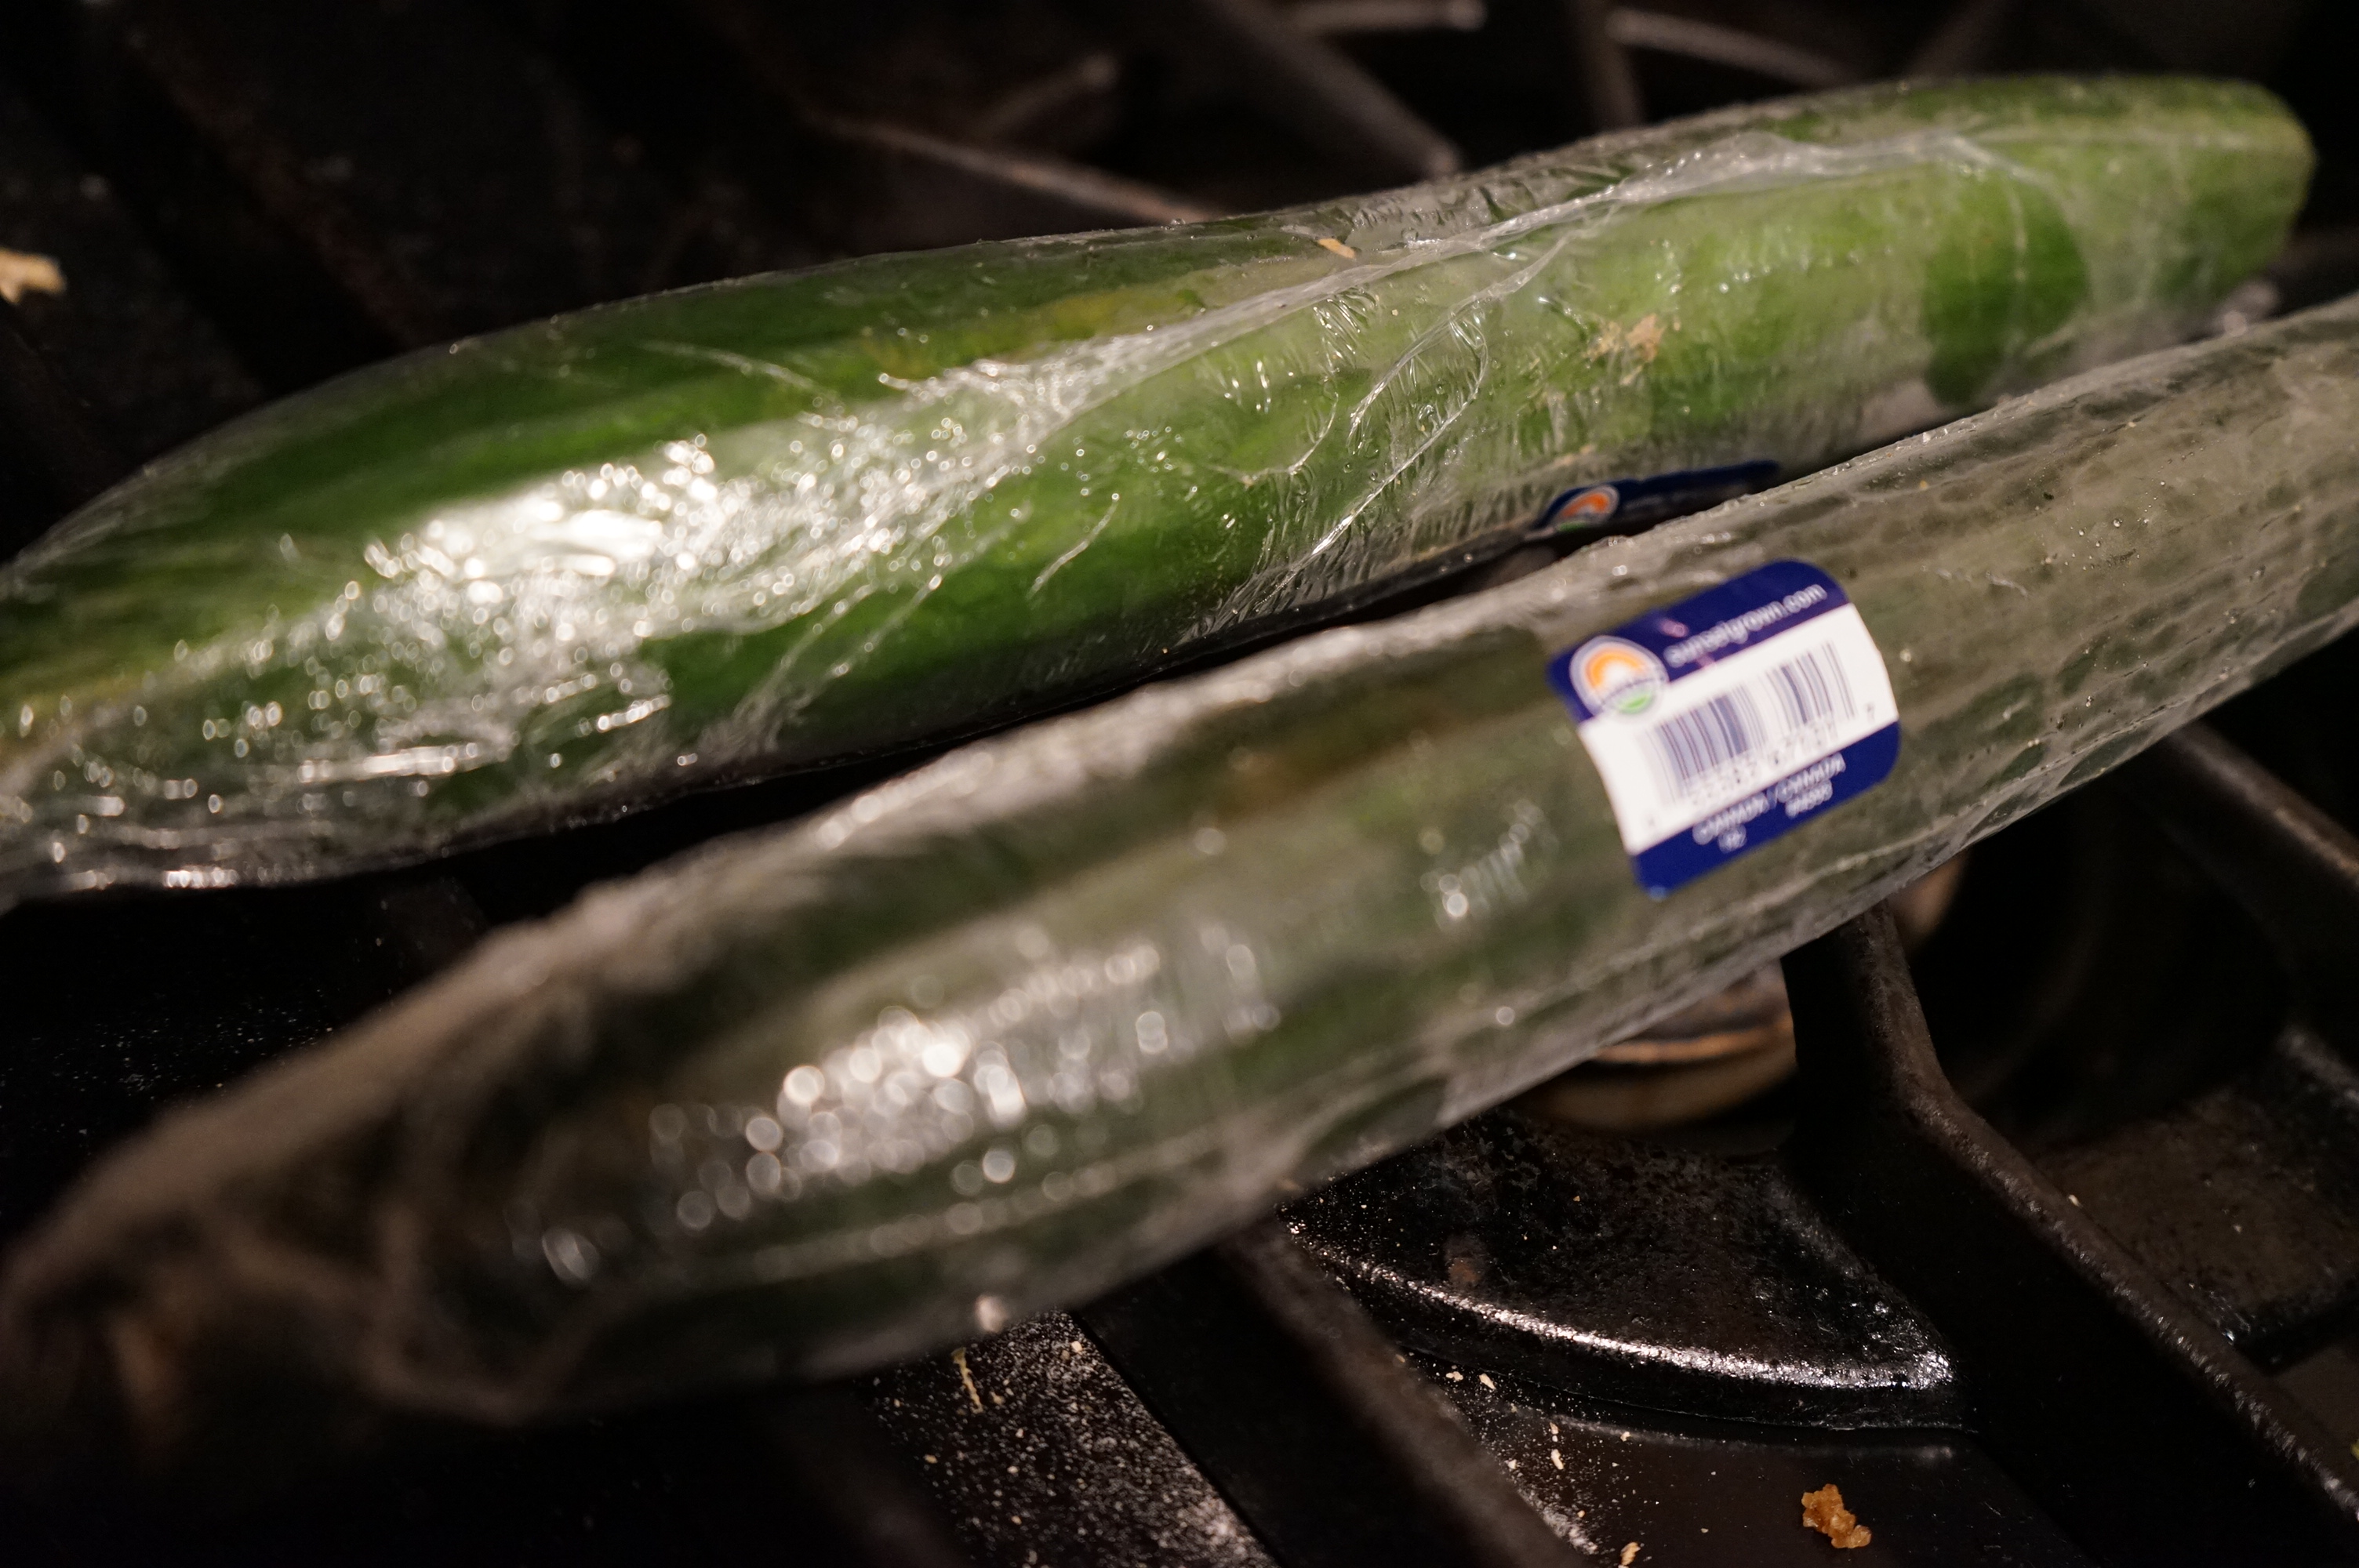
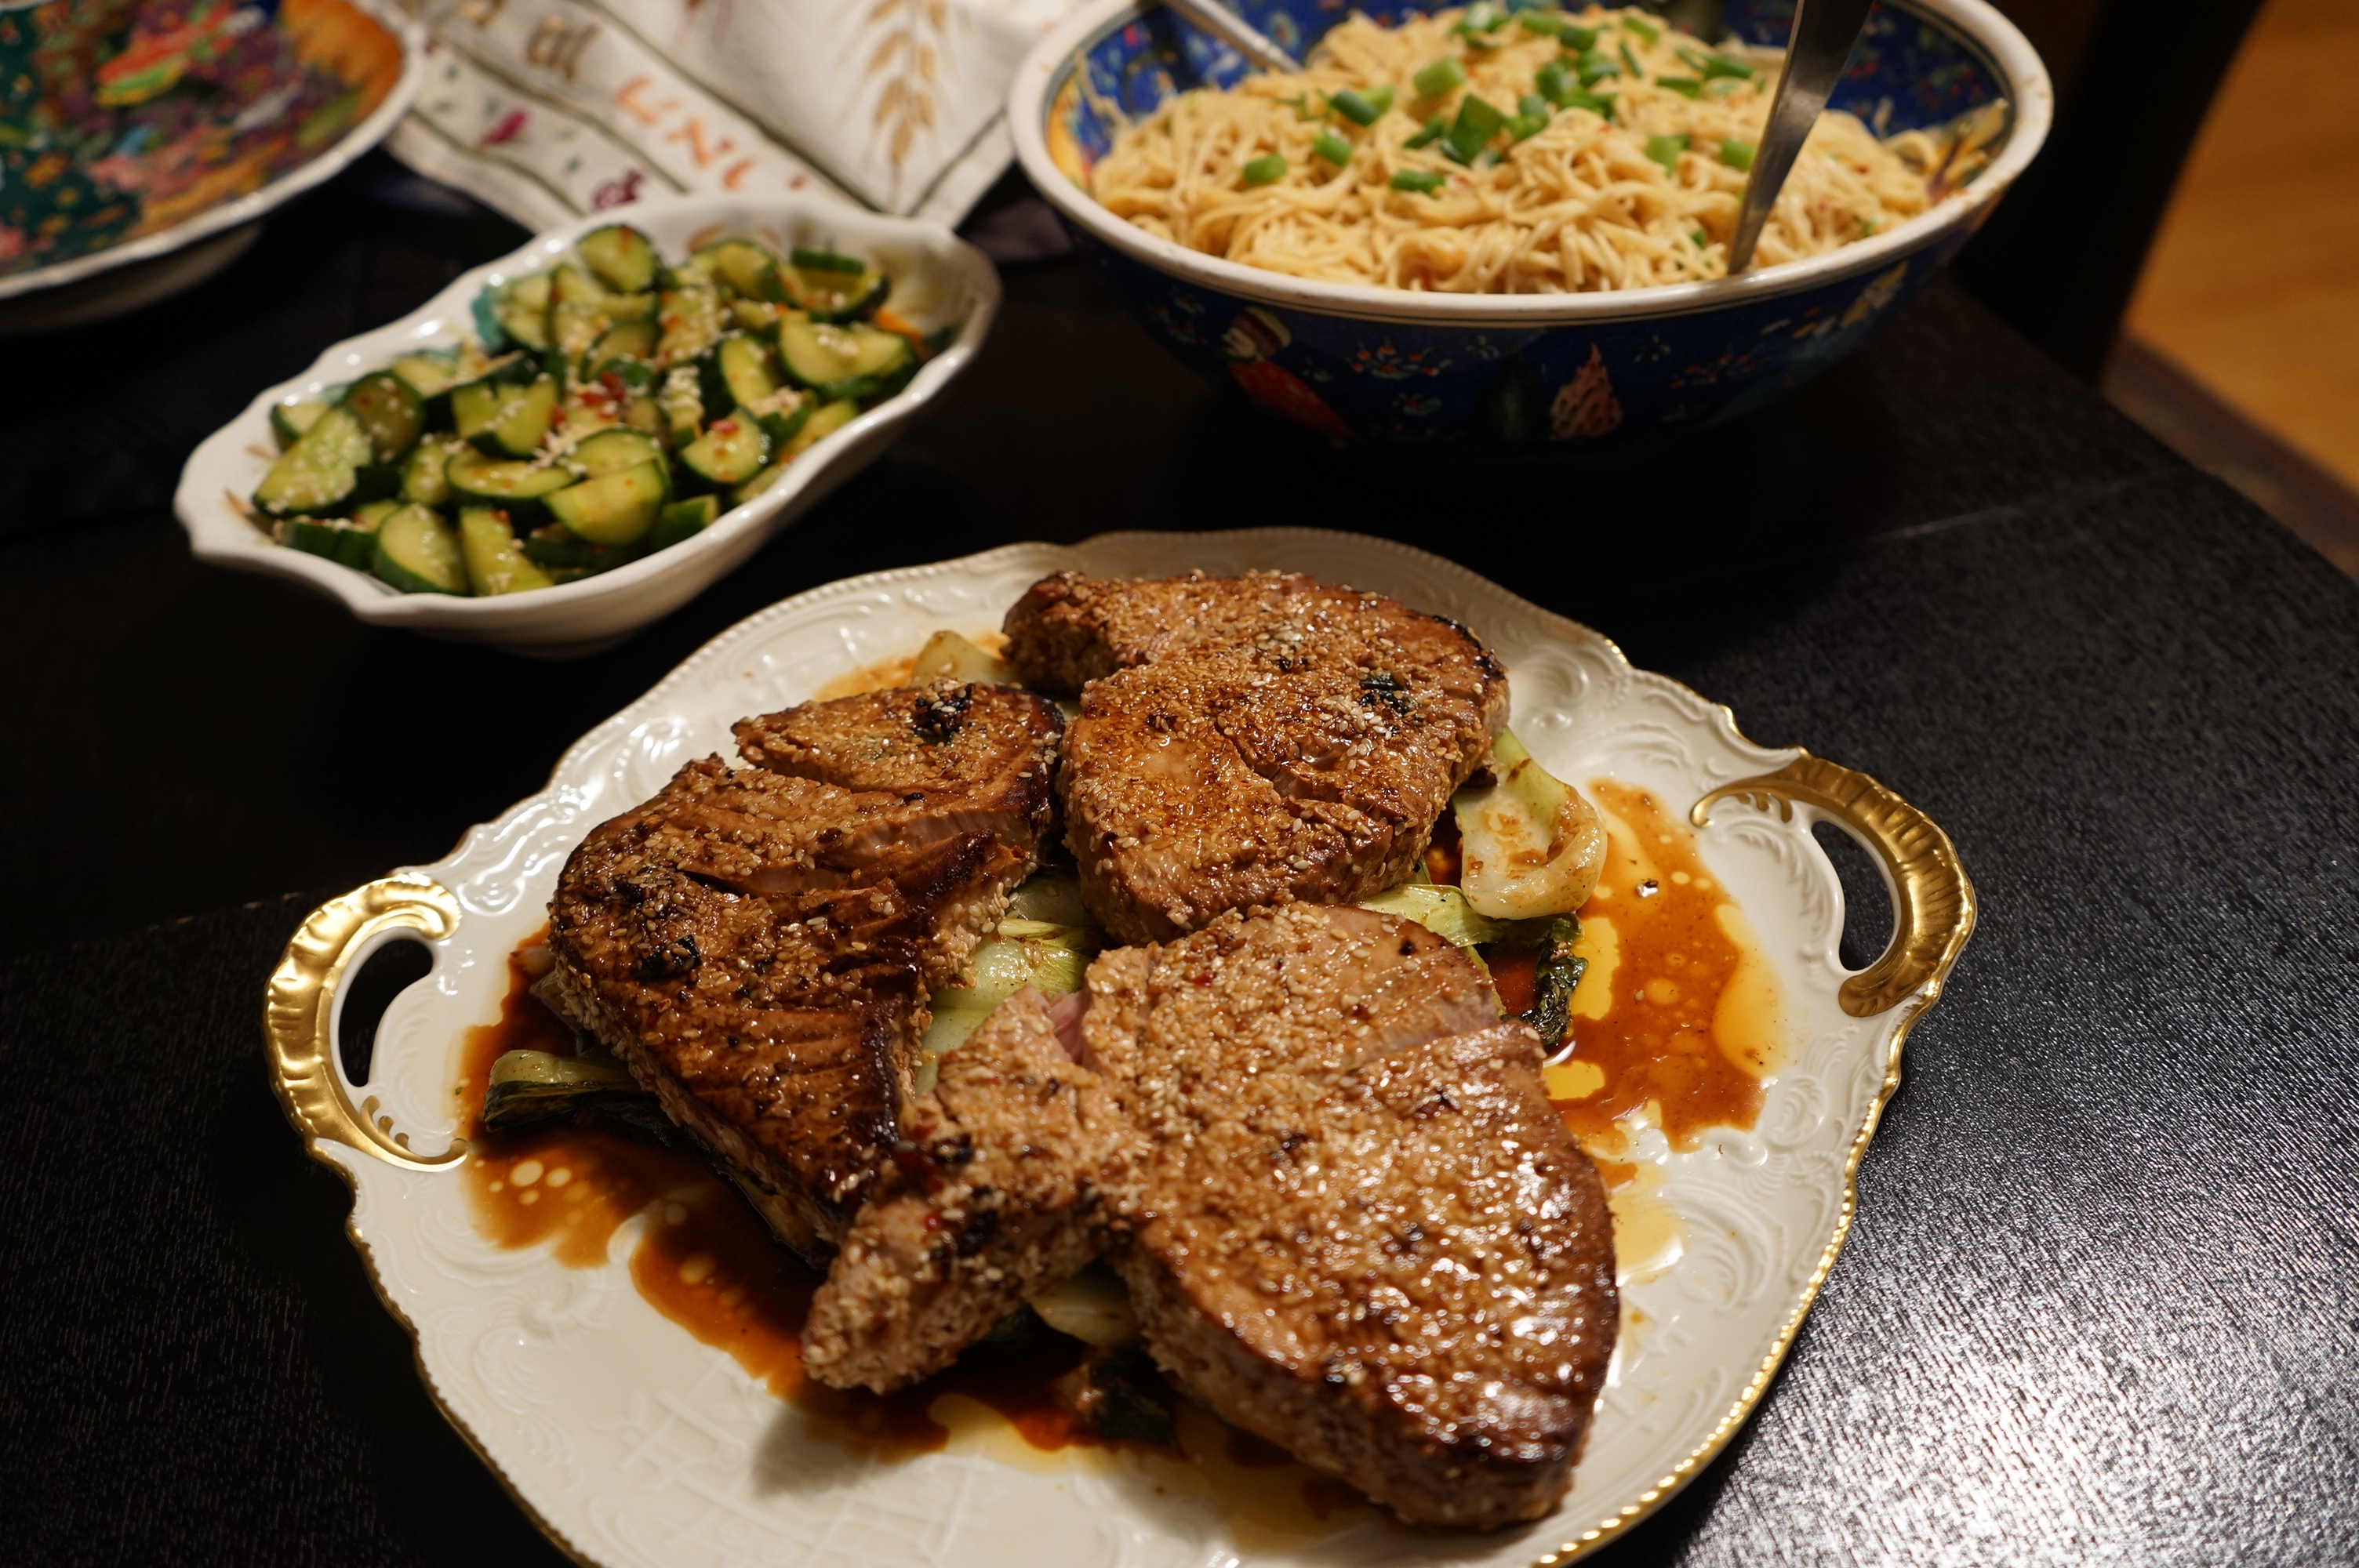
Having eaten such fresh and delicious seafood in Seattle a couple of weeks ago, especially at Shucker’s, I was inspired to make my work fish dinner at home. Everything that comes out of kg kitchen has a twist though, so here’s my idea of a delicious fish dinner for company or family. Sushi grade tuna is marinated in a salty, spicy mix of soy, ginger and chili, then crusted in sesame and seared. To go with the tuna is a spicy cucumber salad, and peanut noodles that are so easy to make, you’ll be wondering why you’ve ordered them from takeout all these years.
Sesame Crusted Tuna:


Peanut Noodles:


Spicy Cucumber Salad


This is a wonderful meal to serve for dinner to your family–like I did–or use it to wow your dinner guests as you take them on a culinary tour of Asia. Leftovers from all three of these dishes will taste even better the next day!

Stateside
300 East Pike Street
Seattle, WA 98122
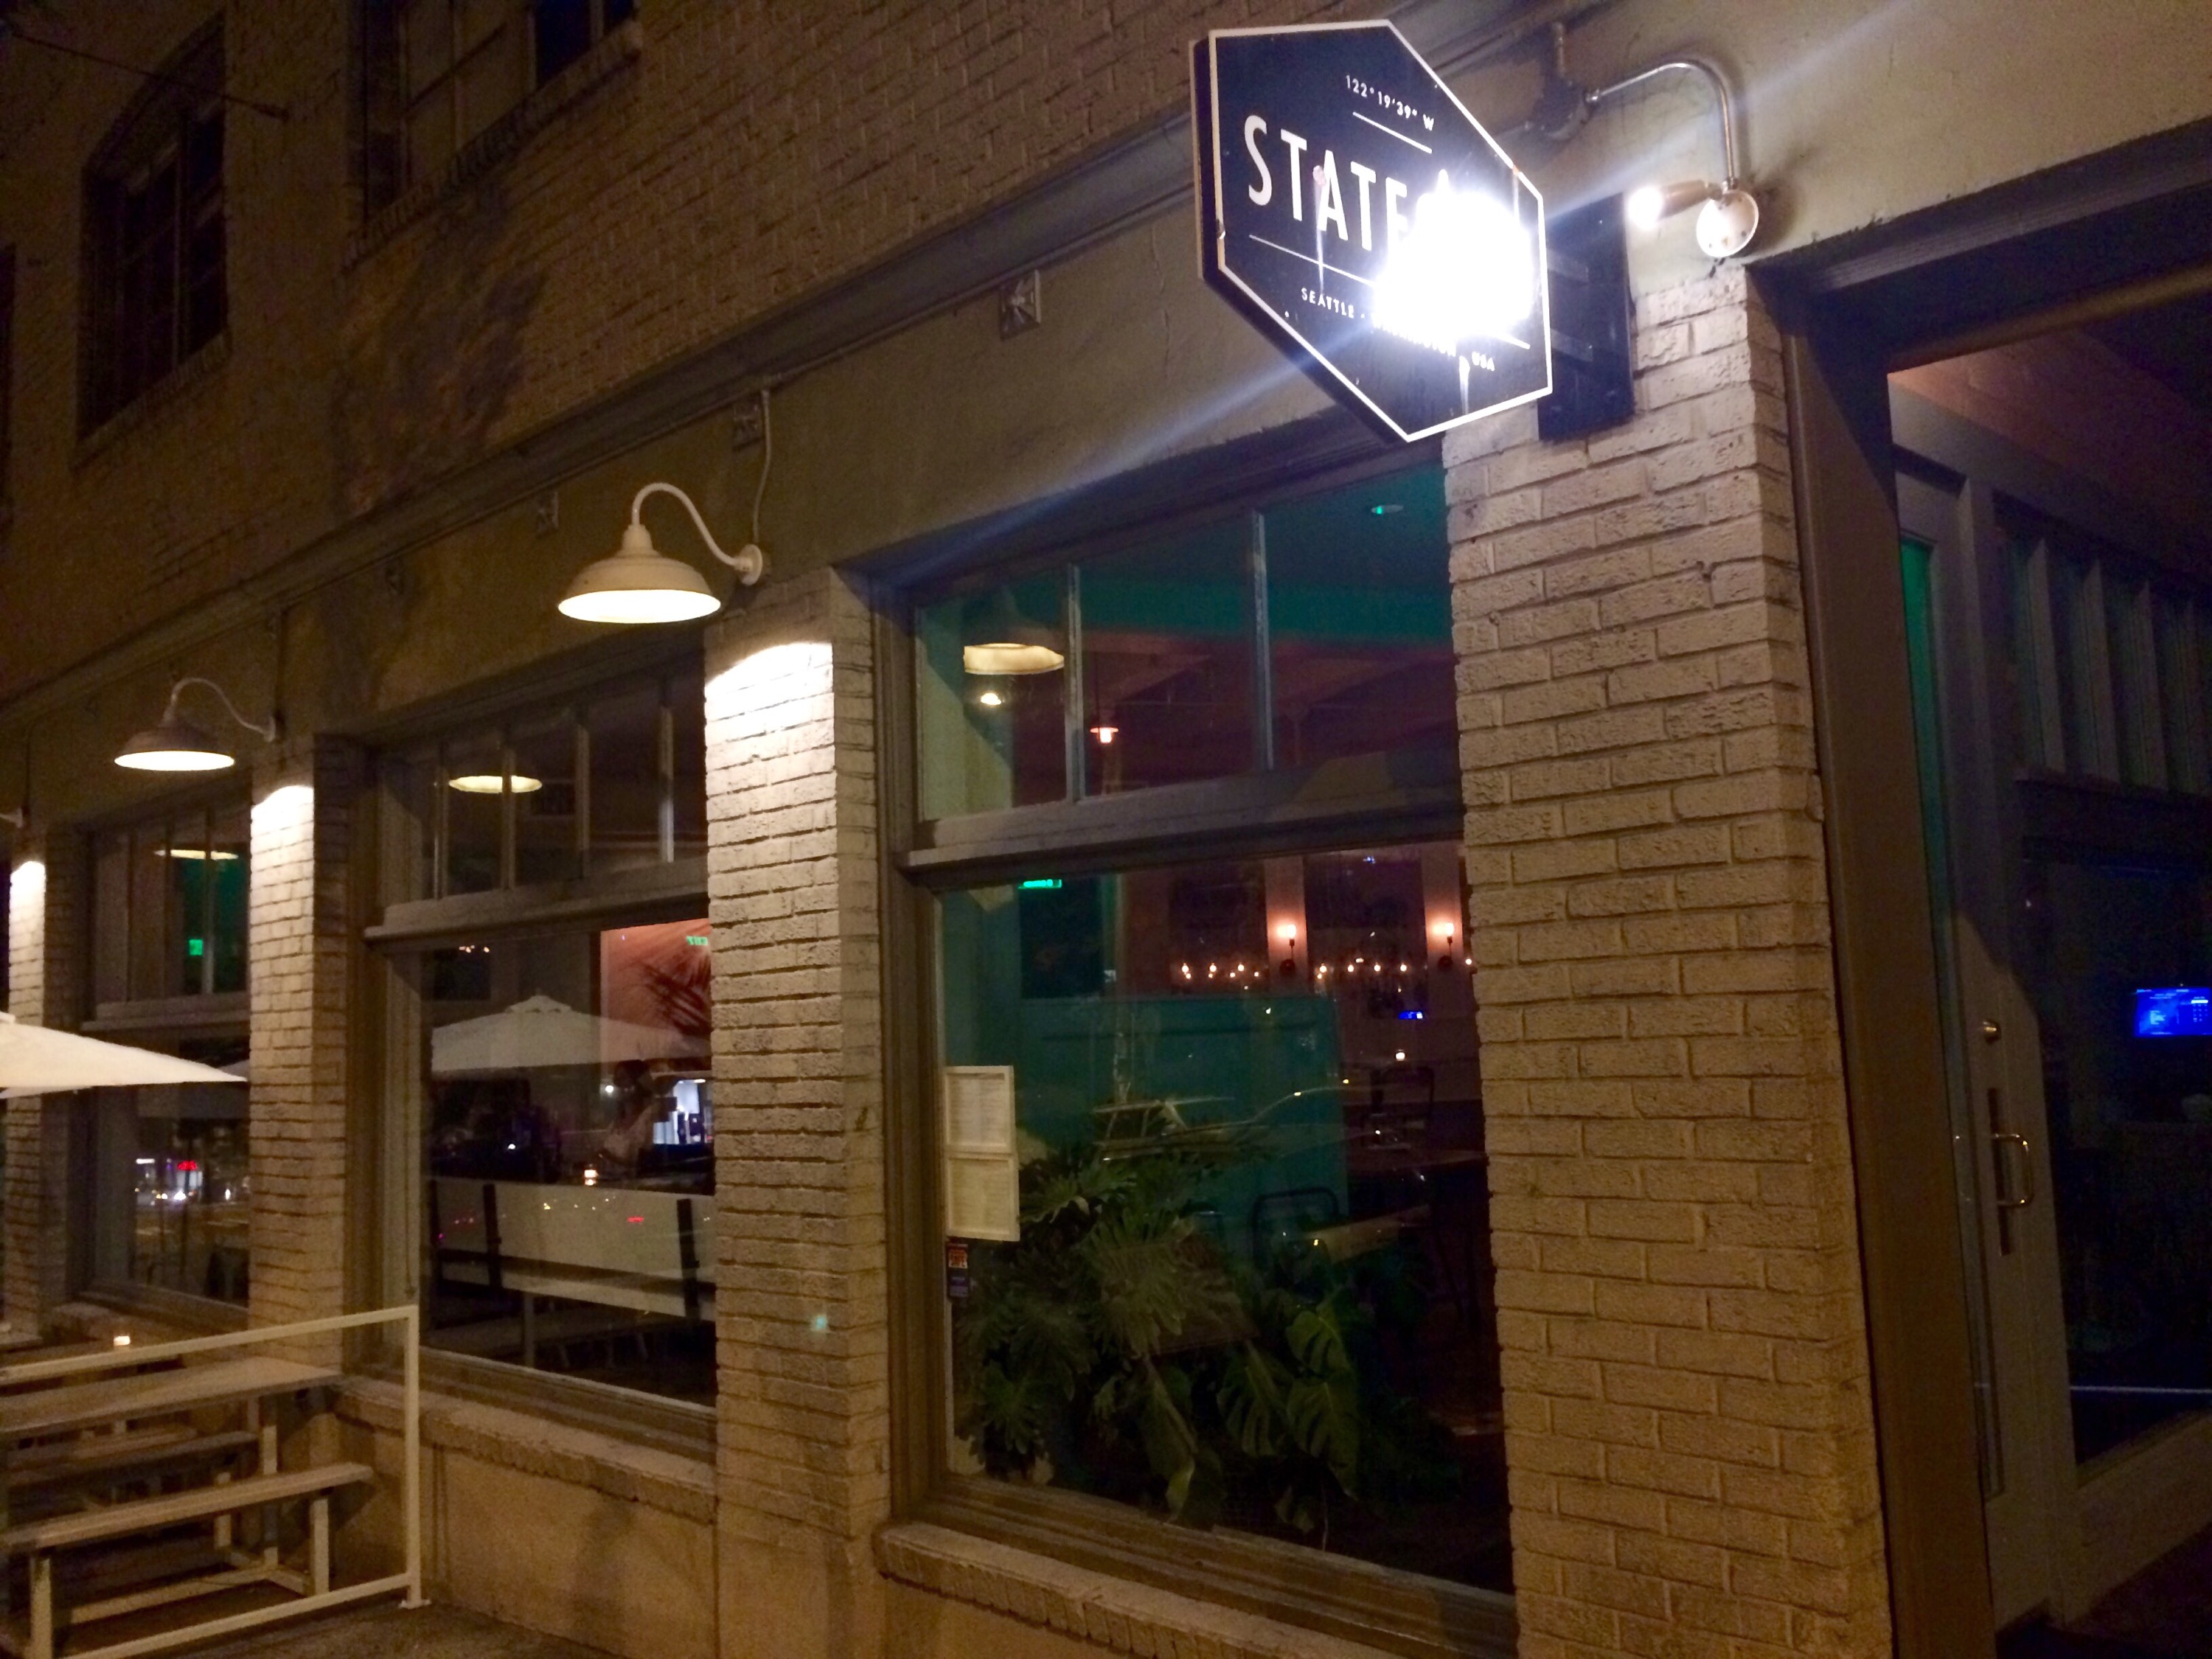
 It was the end of my first official day at the International Food Bloggers’ Conference in Seattle, and I was too lazy to walk very far from the hotel or cab it to the international district, and needed a break from the rich and heavy seafood that Pacific Northwest is known for—though it was delicious! I found Stateside, which had great reviews on both OpenTable and Yelp and made a reservation for later that night. I was seated at a high top table with bench seating on one side and a view of the rest of the restaurant, and look out onto Pike Street through he large glass windows. The space was very hip with a great downtown location, and you would never know this was a Vietnamese restaurant without looking at the menu. Stateside is known for its unique and modern fusion approach to traditional Vietnamese flavors, while also incorporating bits and pieces from Chinese and French cuisines. You won’t find any pho here, but rather dishes like crispy duck or mushroom fresh rolls bursting with fresh herbs, chili cumin crusted pork ribs that melt in your mouth, heirloom tomato salad dressed with rice wine and black garlic, and more. The place was crowded and hopping, and I’m glad I thought to make a reservation ahead of time. The uphill walk built up my appetite, and the smells of fish sauce and lemongrass as I walked through the door made my mouth water.
 I started out by ordering a cocktail because that’s just what I do on vacation. No judging! The Viet Milk Punch ($11), which had recently moved to the dessert instead of cocktail menu is a modern twist on the classic sweet iced coffee drink available at many Vietnamese and Thai restaurants. It features cold brewed coffee—it’s Seattle, isn’t coffee appropriate?—condensed milk, egg white and dark rum. The condensed milk made the drink sweet, but not over the top, and the rum helped mellow our the sweetness and the egg white gives it a lovely frothiness. It was served in a pretty petite wine glass, and definitely fits on the dessert menu. Either way, it was delicious and a refreshing way to start the meal.
 The Chili Cumin Pork Ribs ($13) seemed to be very popular on Yelp, and came highly recommended by the waiter, so made an appearance for the appetizer course. The ribs, of course, came with wet naps—how classy! lol—which just added to the charm of the place. Right away, the smell of chili came wafting from the ribs. The meat itself was practically falling off the bone, and had an intense smoky flavor from the almost whole cumin seeds. The slightly charred meat was garnished with scallions and herbs with a nice spice level—didn’t even have to ask for it to be spicier—and they were surprisingly meaty. These are not your mama’s spare ribs! Towards the bottom end of the rib is a fat cap that basted the rest of the meat—it made it so succulent and delicious.
 Along with the ribs I had the Crispy Duck Fresh Rolls ($9)—a twisted mashup between a fresh summer roll and a crispy spring roll. The rolls were served with a mild dipping sauce made from a blend of oyster sauce, soy sauce and scallion oil. The rolls were filled with shiso leaves, Thai basil, spearmint, vermicelli noodles, and crispy duck. The roll is then flash-fried. As you bite into it you get the crunch of the duck skin, the chewiness of the fresh roll wrapper and noodles, the sweet herbaceousness of the basil, and the refreshing many flavor fo the shiso leaves. The sauce wasn’t too salty and balanced from the sweet oyster sauce and spicy scallion oil.
 For the main event, I had my eye on one dish and with another recommendation of the waiter, I got the Bun Cha Hanoi ($19). This dish took a classic Vietnamese noodle bowl to the next level. It came in three separate bowls that I was encouraged to mix together and enjoy. Pork sausage patties that were super moist with great grill marks were served in a delicious broth made with caramelized fish sauce that flavored and tenderized the meat. The broth had an amazing umami flavor—I could drink it. Throughout the sauce there were small pieces of pork belly that provided a nice texture contrast with slight crisp on outside corners of the pork. The lemongrass shavings and palm sugar in the sauce also helped soak up fish sauce caramel so it wasn’t too salty, but there were plenty of “salt bombs” in the best way. The noodles were garnished with scallion oil and a ton of fresh herbs that perfumed the whole dish. The third dish was a plate of pork and shrimp imperial rolls that were crispy on the outside and meaty inside. I tossed a couple of these with the sauce and noodles, and the rest I dipped into the broth. The waiter was very knowledgeable about the menu and very nice. He brought me a Fresno chili sauce (made from Fresno chili peppers, water, oil, vinegar, garlic, ginger, scallion and a bit of sugar) to go with the imperial rolls that really made them pop. This dish was not only filling, but also so creative. Yum yum!
 After an already filling two courses, the question was this: dare I go for dessert? I was on vacation, so the answer was of course: yes. The Vanilla Goose Egg Custard ($8) had an aroma of Jackfruit when I lifted bowl to my nose, which might have come from the inner layer of the fruit inside the dessert. The top layer of the bowl was a tuile cookie in the shape of a Thai flower. A tuile is a thin, crispy wafer like cookie that’s originally from France and named after the shape of a tile. The cookie has a very slight sweetness to it that reminded me of a fortune cookie. I used my spoon to crack down through the crunchy layer and encountered a layer of Jackfruit, which is prevalent in Southeast Asia, and has a mild taste between a melon and a peach. Underneath the fruit was a layer of the goose egg custard, which was soft with an almost yogurt-like consistency, but slightly richer than everyday custard or pudding. It was nice to end the meal with a light dessert, since the rest of it was so heavy. It actually reminded me of a breakfast parfait that I’d order with yogurt, fruit and vanilla. Some of the other desserts like the Vietnamese Coffee or Tea with Condensed Milk Creamsicles sounded delicious and uber-creative, but I had already had my Viet Milk Punch. Next time I’ll definitely try them though.


I learned pretty late in the day that people were coming over for offer and dessert after dinner. I didn’t want to just serve them fruit or store bought cookies, and decided on one of my favorite pies–key lime pie. This recipe is derivative of many other basic key lime pie recipes, so I can’t take credit for the idea. Sometimes you just don’t want to mess with a classic. I made 2 pies, so the ingredient amounts were doubled, but I’m listing it as a single pie recipe. This dessert is delicious all on its own, but tastes even better with a big dollop of homemade whipped cream!

Graham Cracker Crust:
Filling:
To Make the Pie:


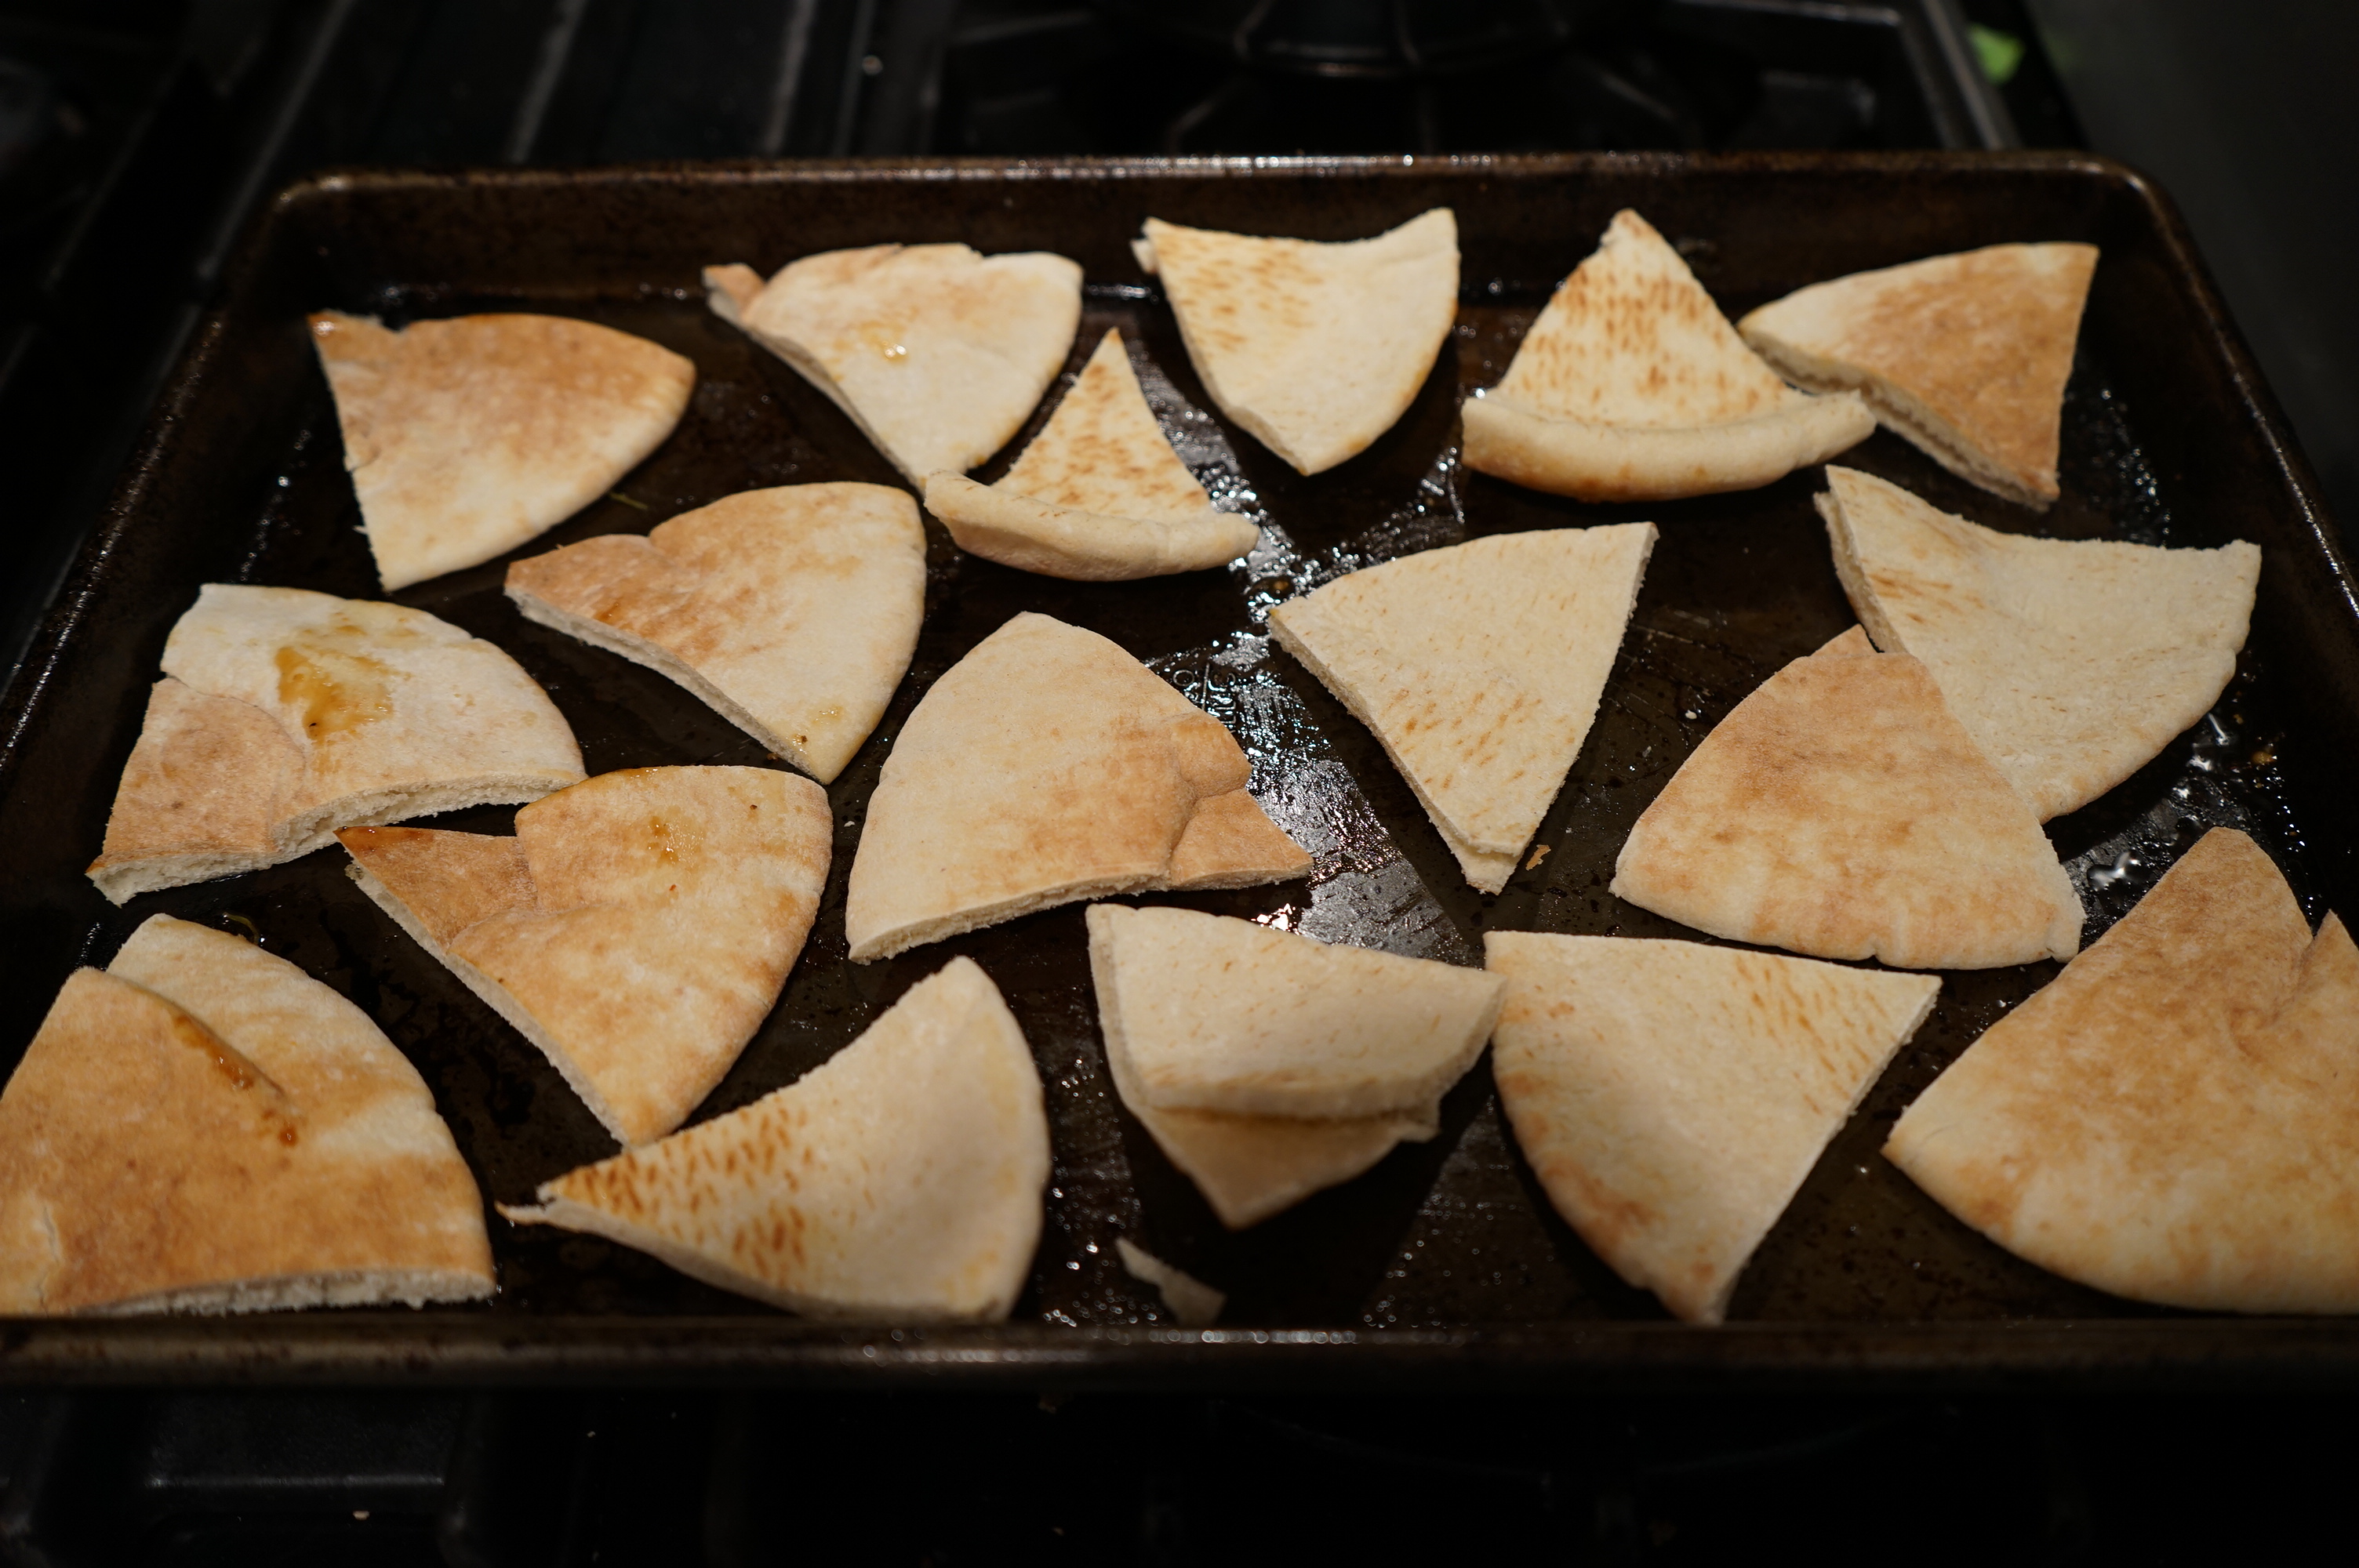
One of my favorite things to do in the kitchen is to experiment, and, of course, make my own version of restaurant dishes at home. Earlier in the day, I had gotten some Indian food for lunch, and of course eaten some fluffy, warm naan bread. The best part of naan—for me at least—is that you can use it to mop up the delicious curries and sauces. So, I asked myself, “What can I dip into my leftover lamb sauce?” Then it hit me—pita! But, plain pita is boring, so what about pita chips? These were so easy to make it’s ridiculous. Make these pita chips at home, and you’ll never feel like buying them at the store again. This recipe yields 18 chips, but feel free to make much, much more!


I recently attended the 2015 International Food Bloggers’ Conference in Seattle, organized by Foodista. Until I actually got on the plane, I was waffling back and forth on whether to actually go. I kept thinking to myself—will they like me? Does my blog have a relevant and unique voice? Will I learn anything? As a matter of fact, I had an amazing time and learned so much. So much so, that you should expect to see a major uptick in the frequency of blog posts 🙂
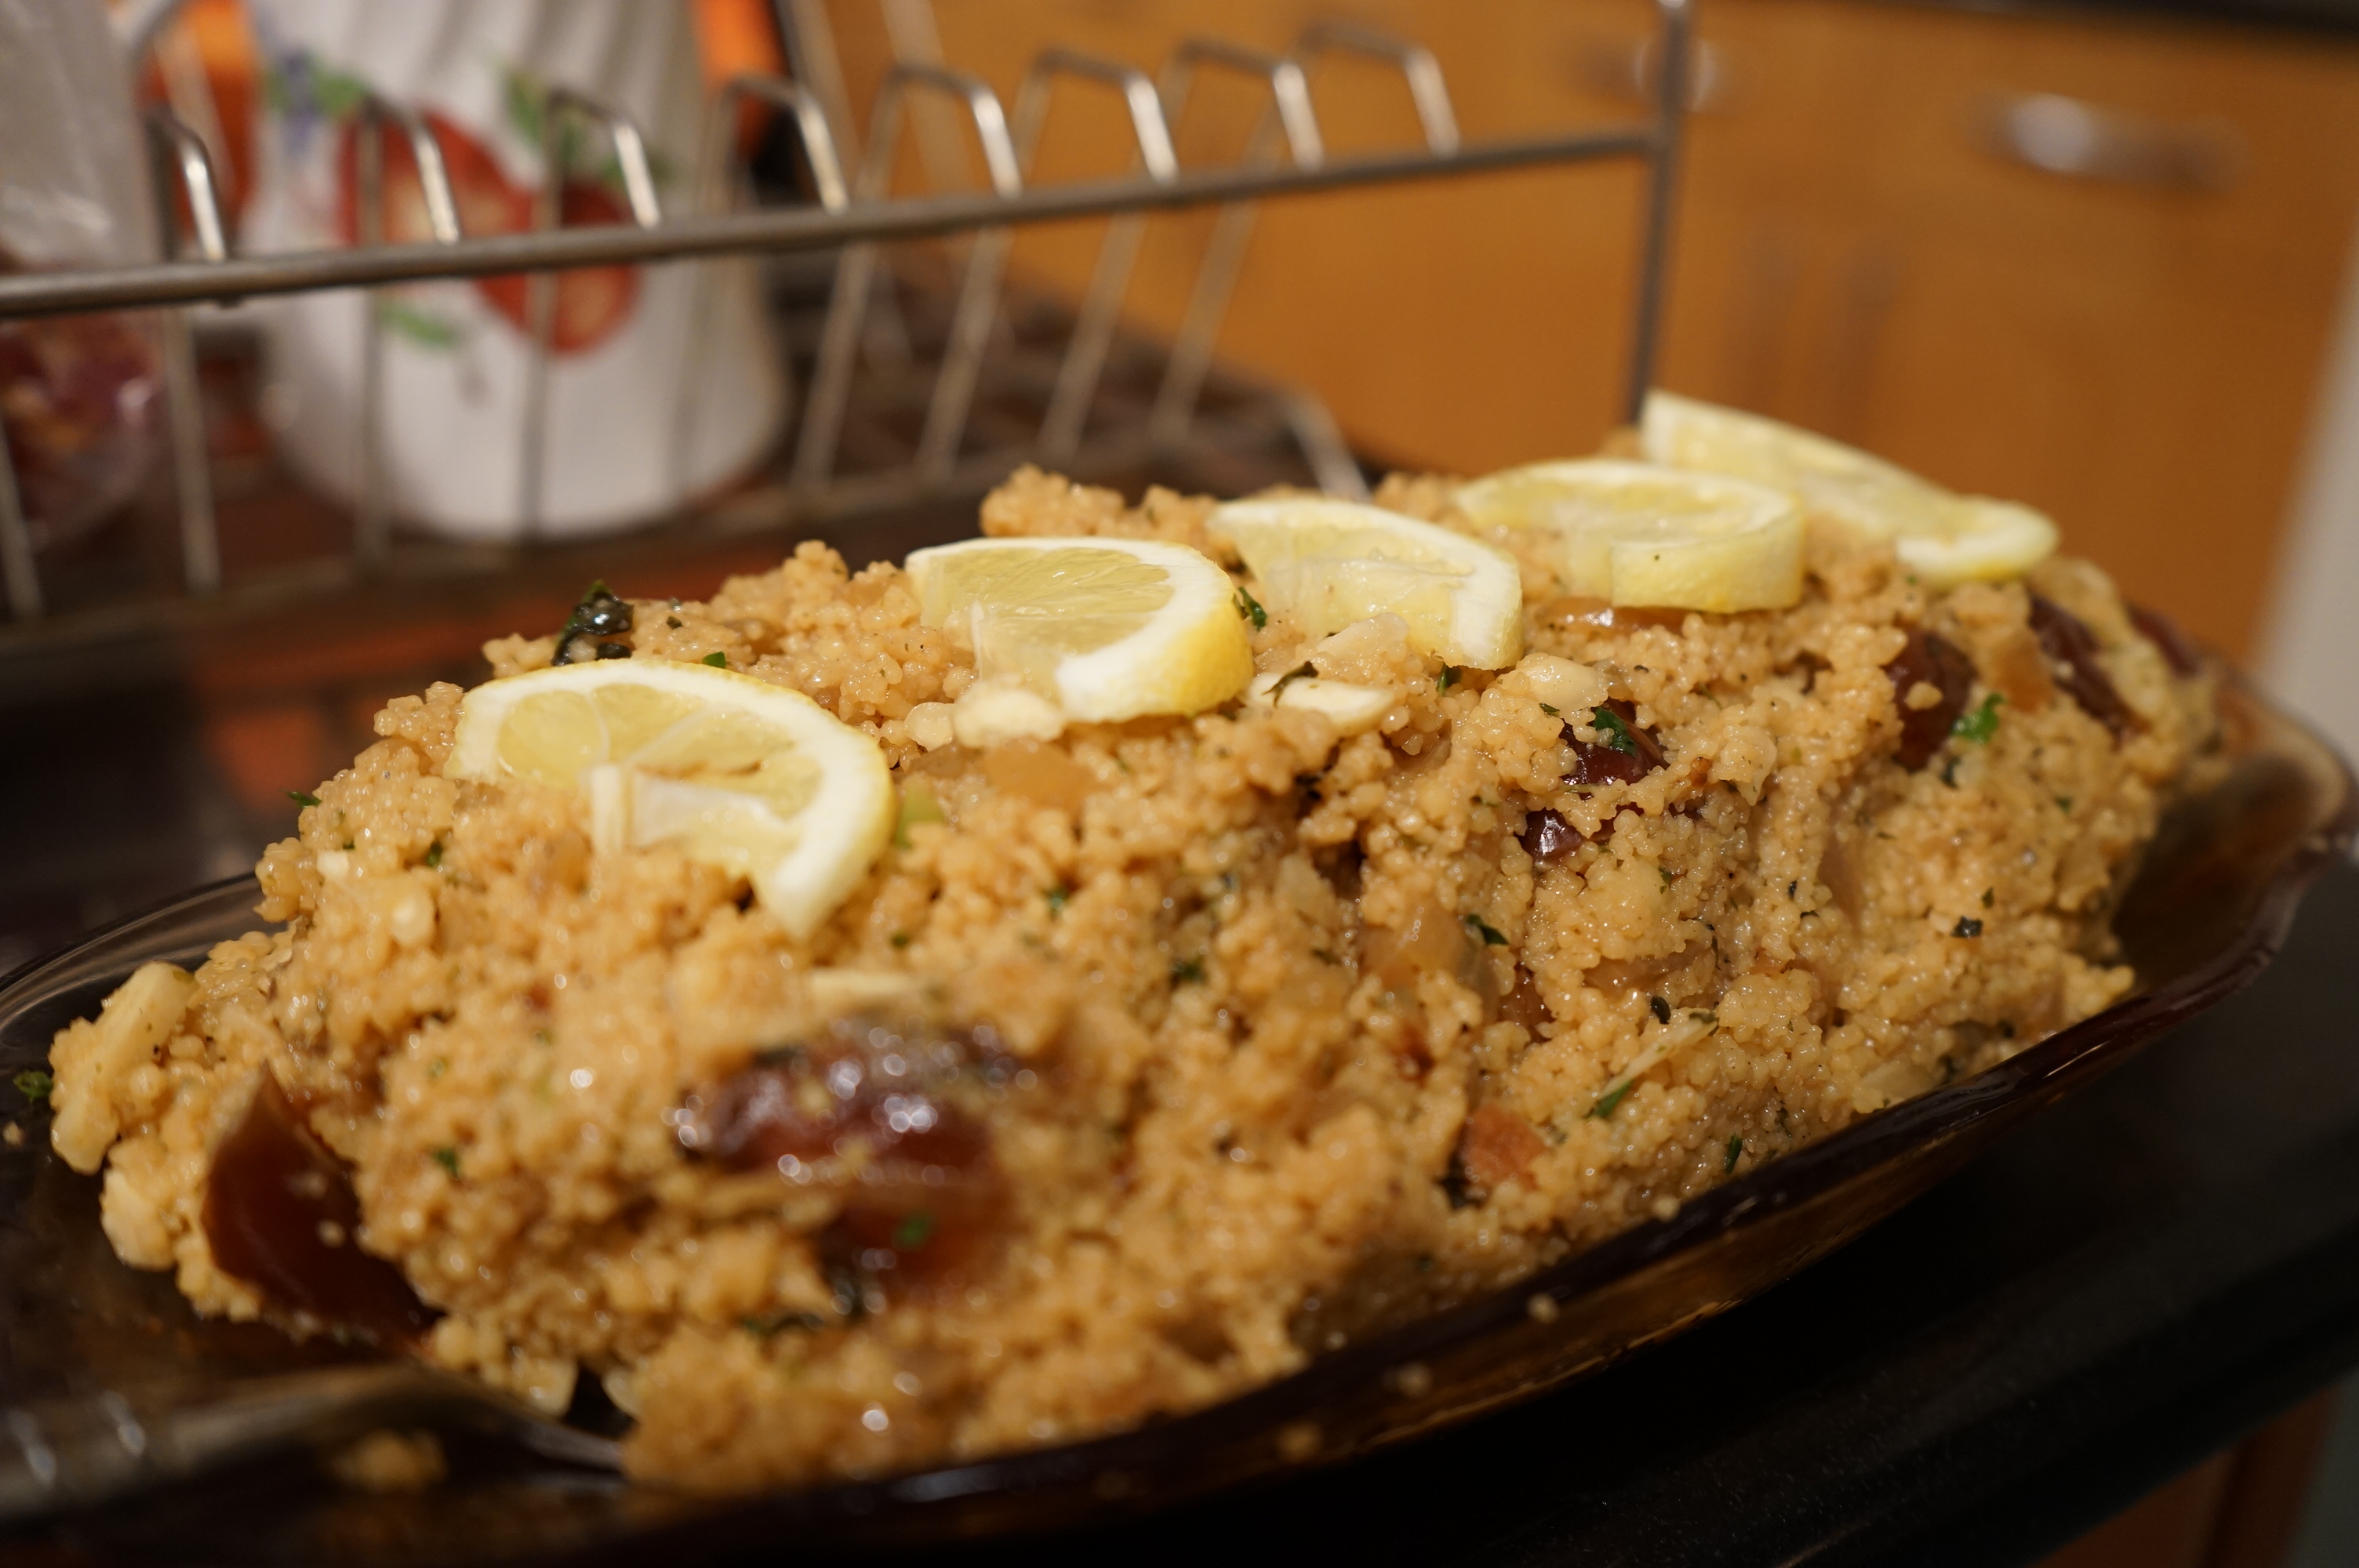
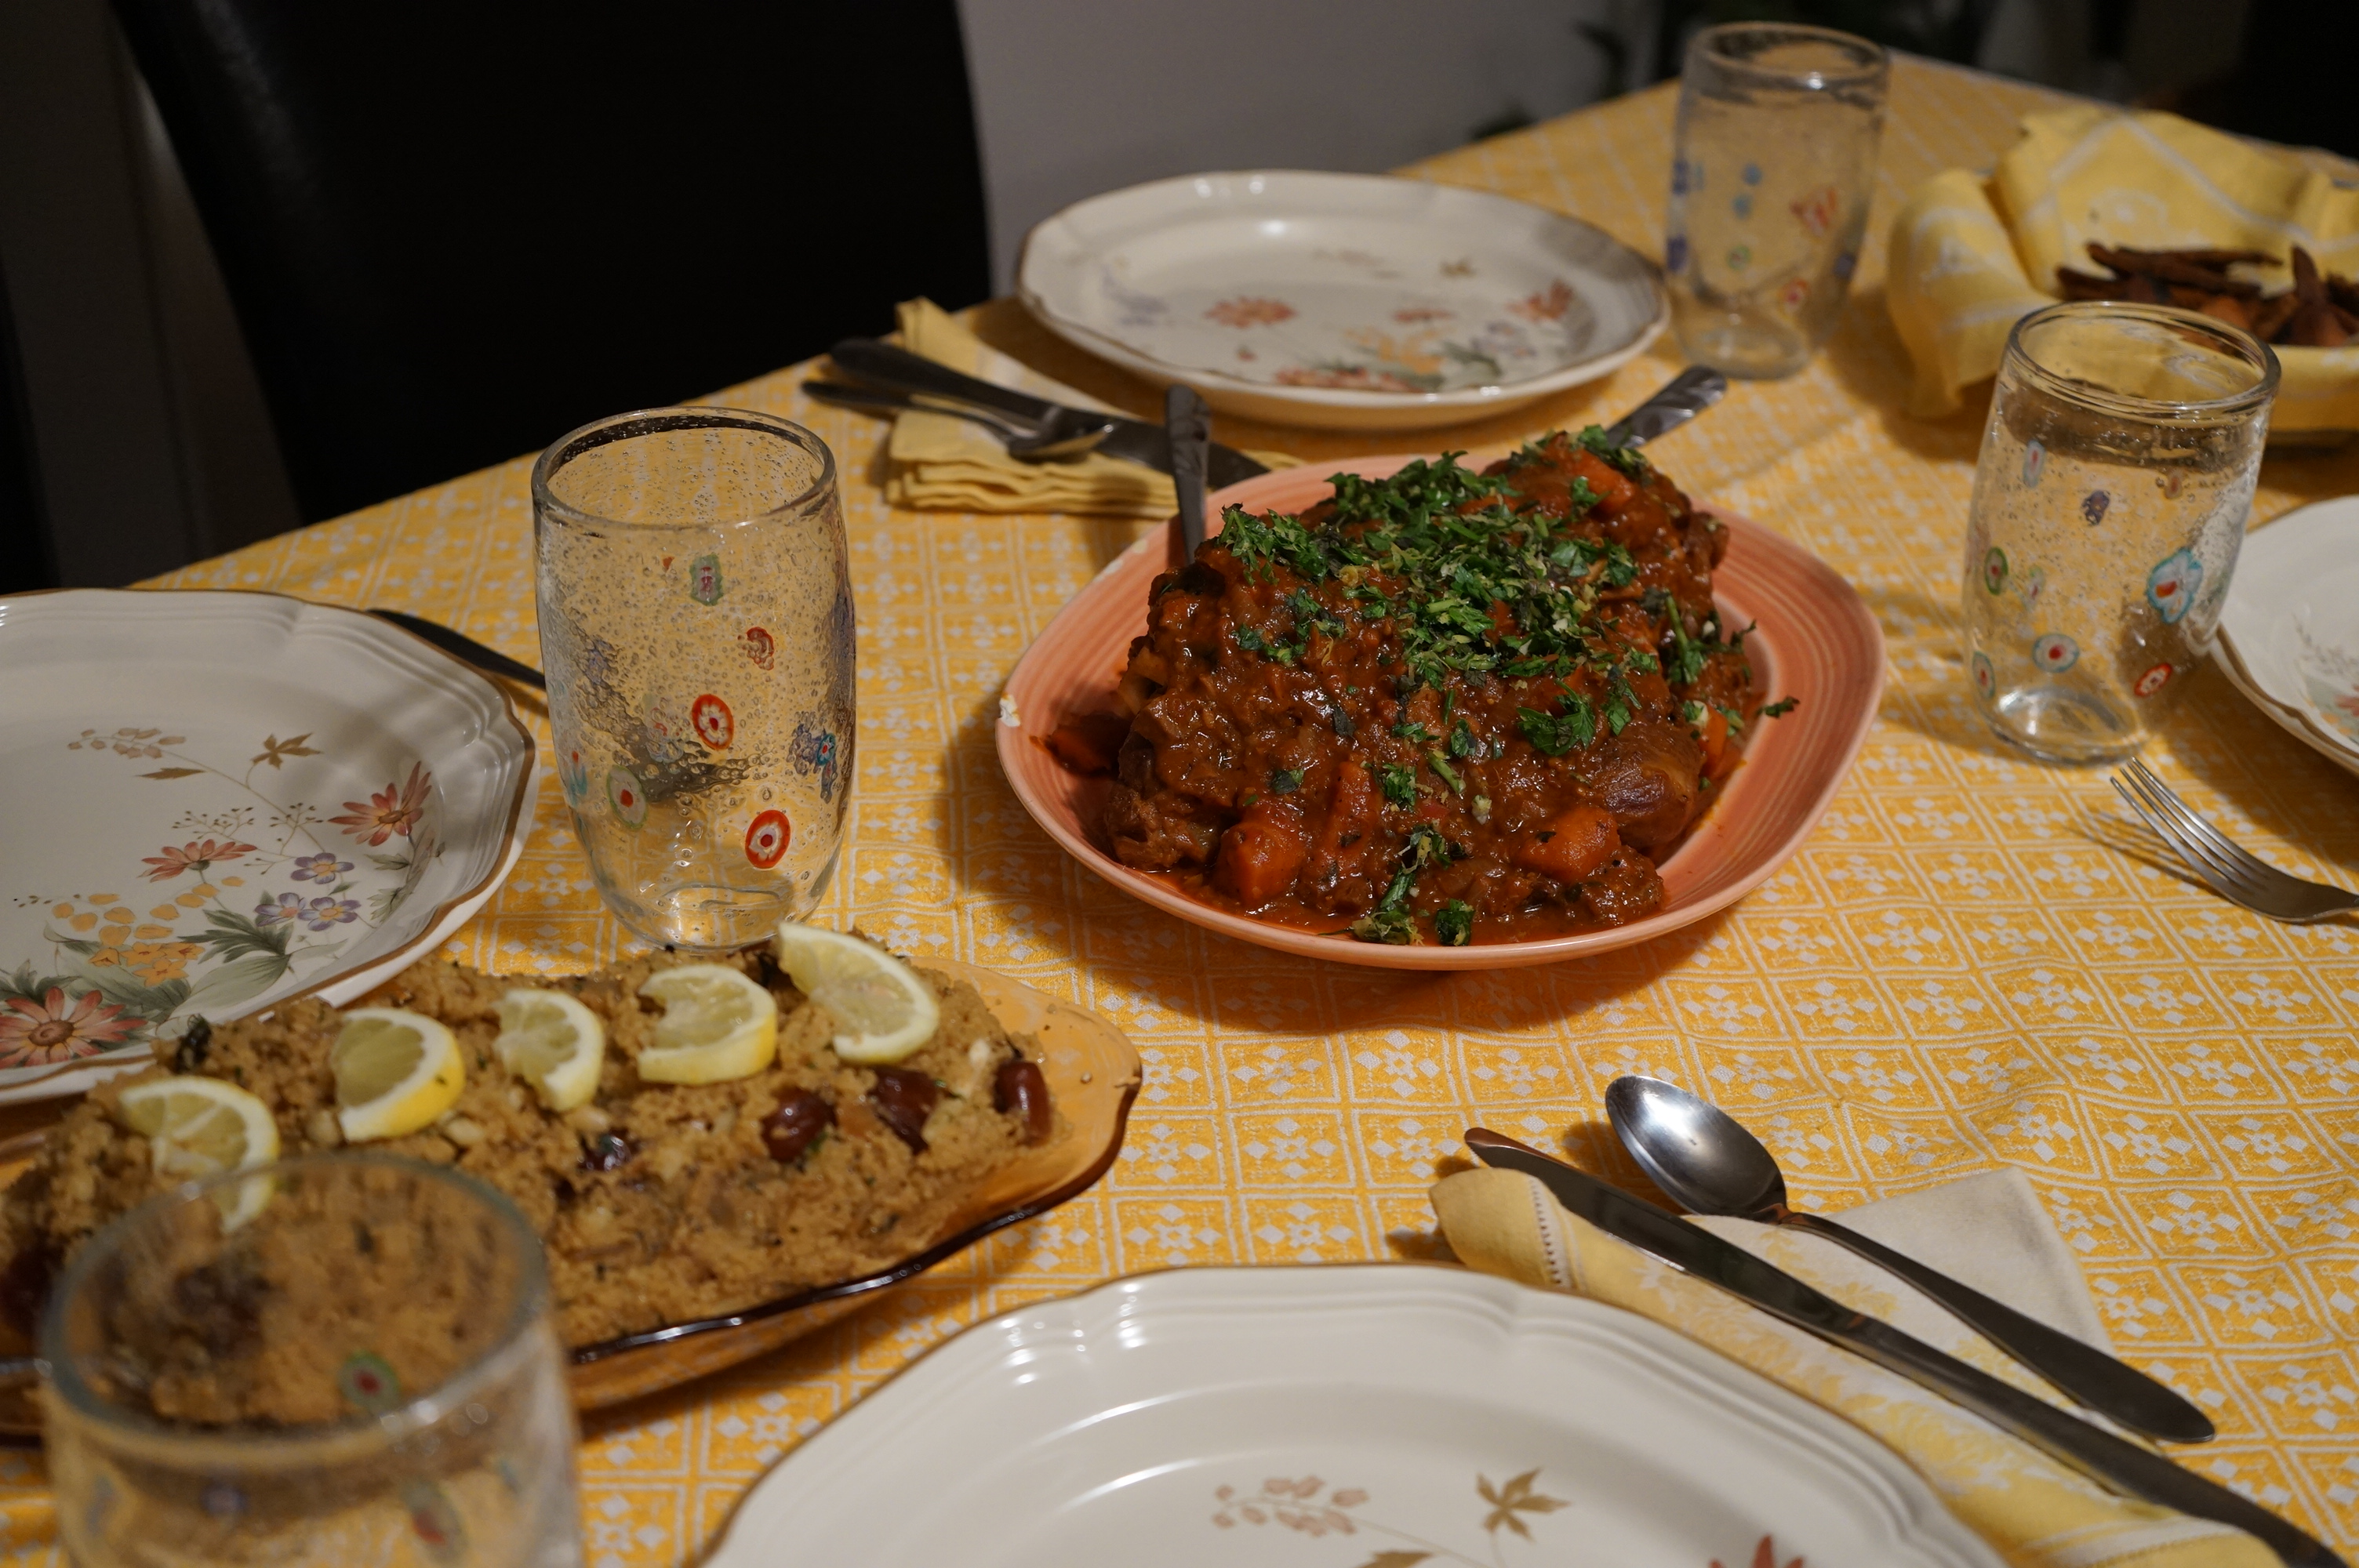
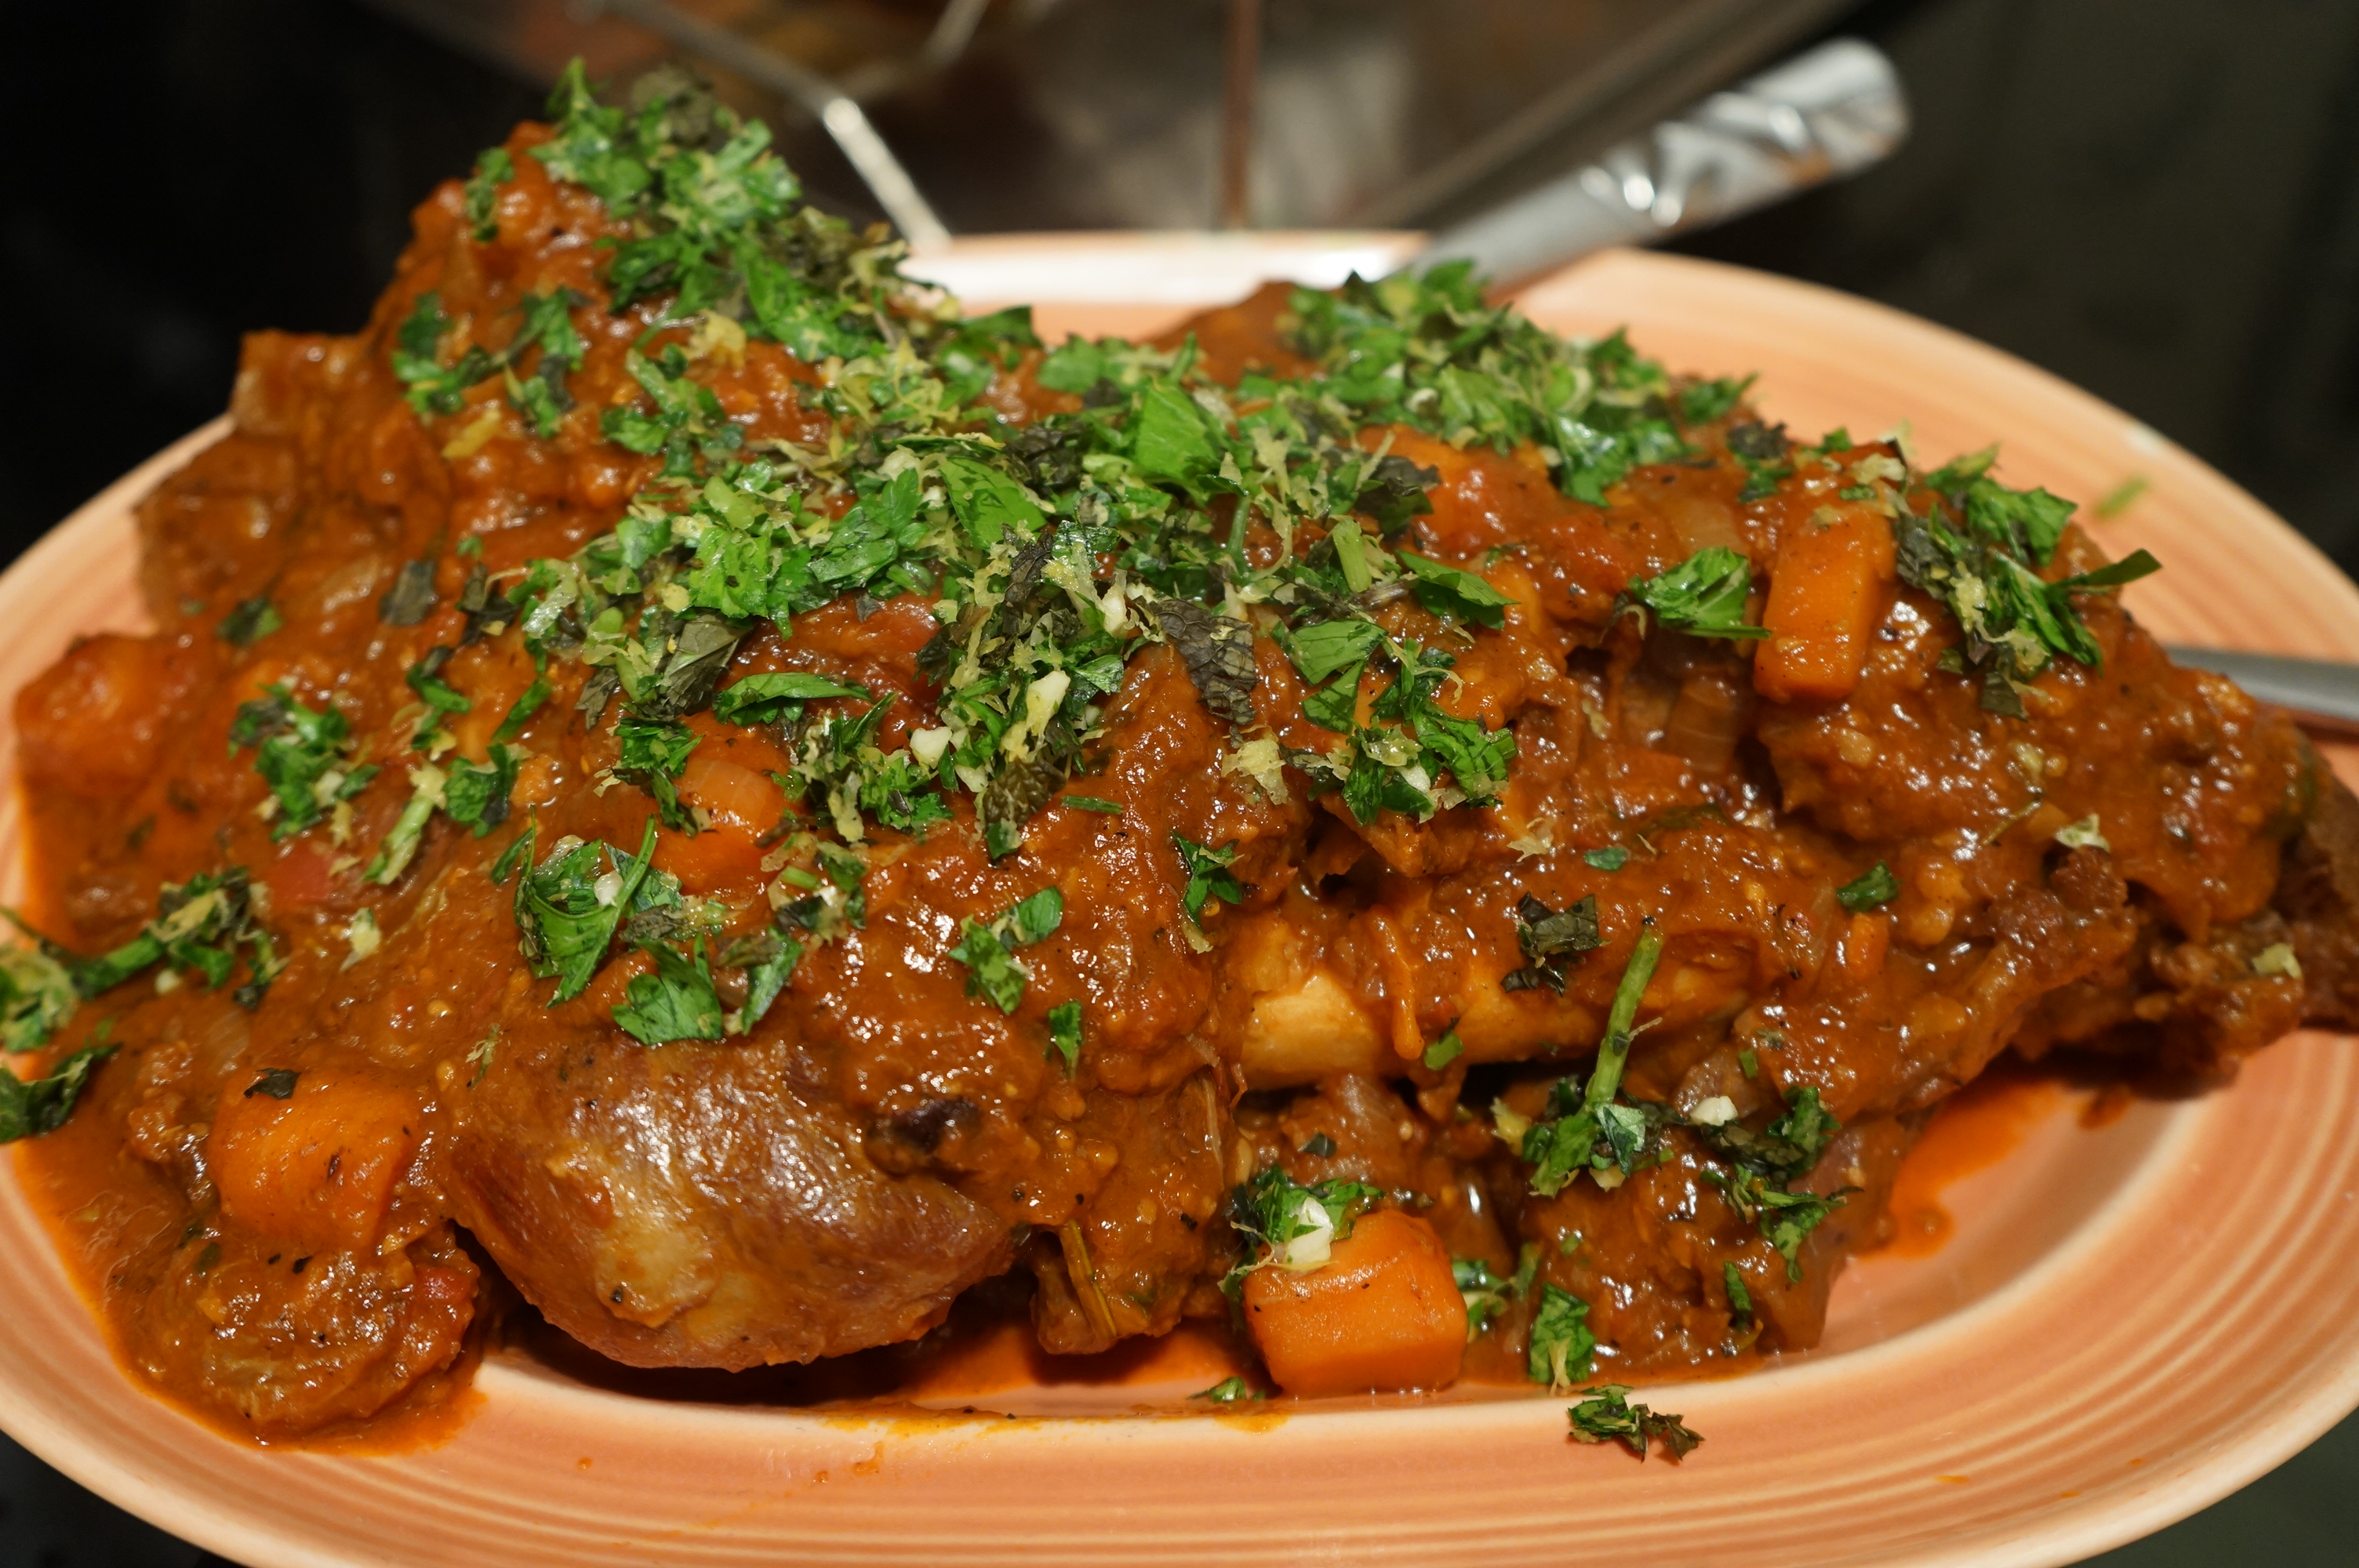
 One of my favorite sessions was all about lamb. We got to hear all about the versatility of lamb, the variety of cuts available, insider cooking and butchery tips, and even got to sample some delicious lamb pate, lamb’s cheese and cold smoked lamb loin. Yum! So, when I got home, I was inspired to put my own spin on a lamb dinner. While lamb chops and rack of lamb might be more prevalent, and often seen on your favorite steakhouse’s menu, lamb shanks are the unsung hero of the lamb family. All they need is a little TLC and time, and they become tender, succulent and out of this world delicious. My version of braised lamb shanks is great for entertaining guests at an elegant dinner party, impressing that special someone, or even cooking for your family—perfect for the slow cooker! I serve mine with Moroccan inspired, lemon couscous and homemade pita chips (see recipe here), but feel free to substitute mashed potatoes, creamy polenta or any number of sides. Enjoy!
 Ingredients:
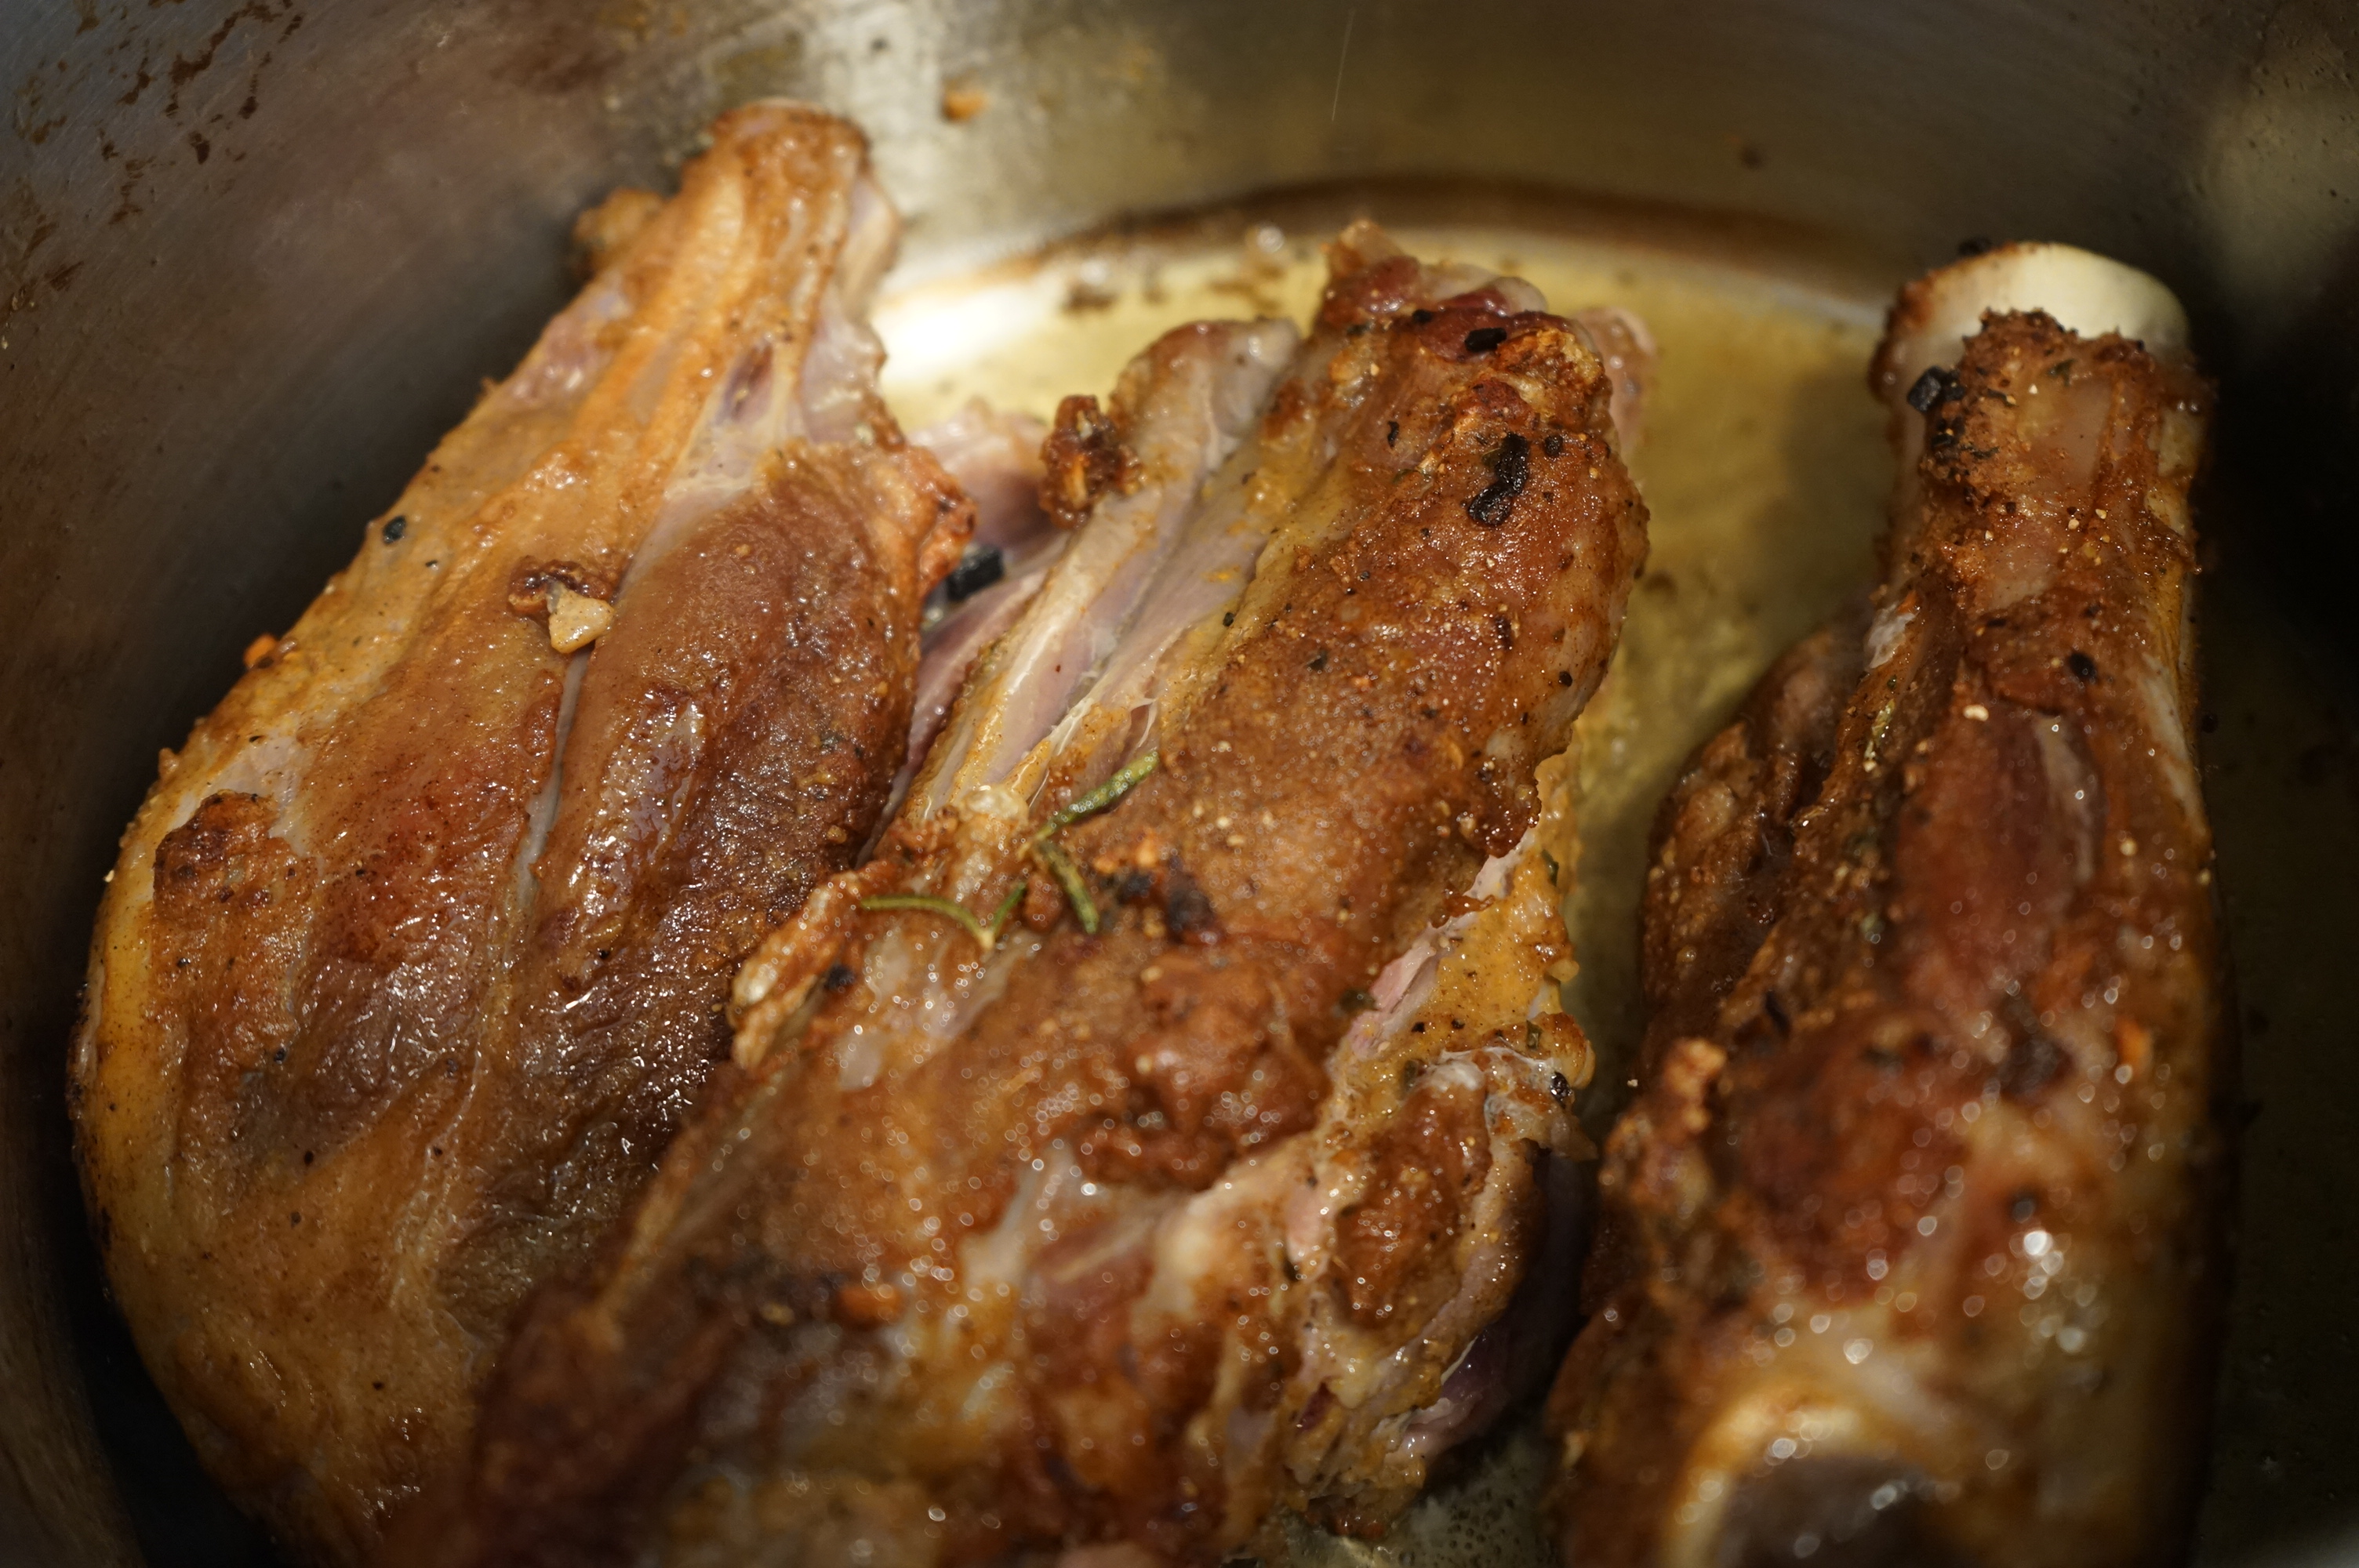
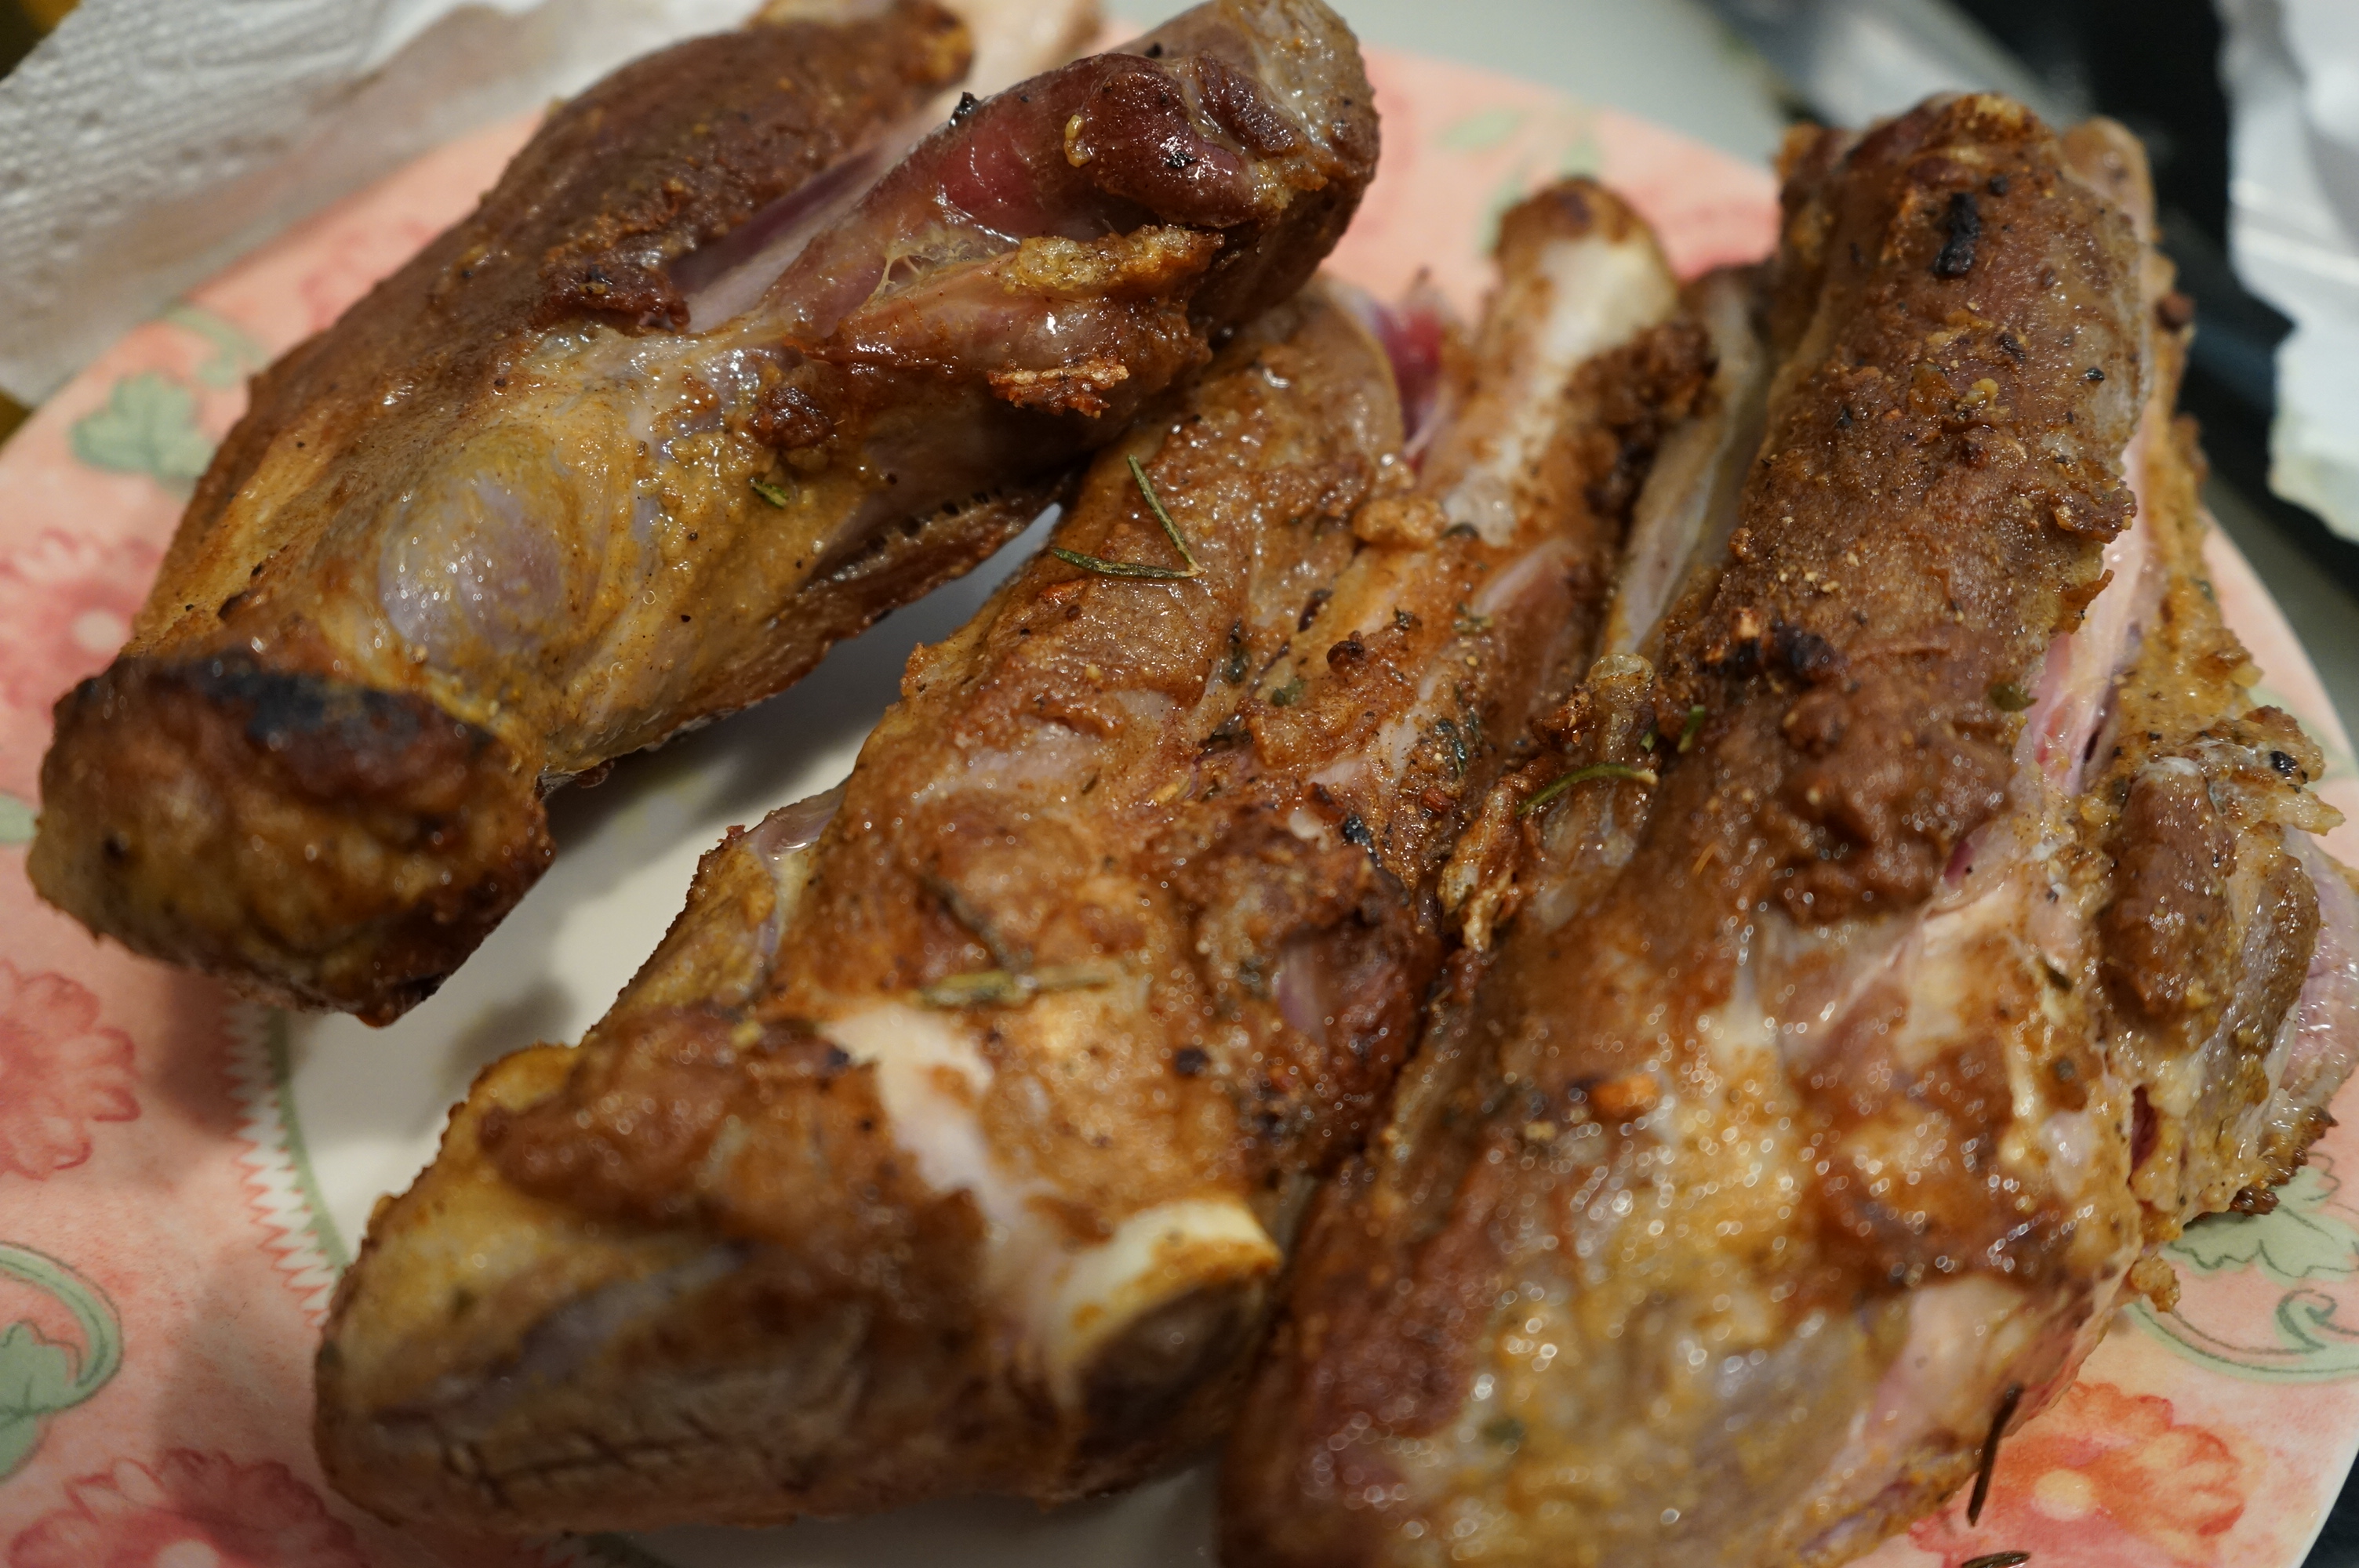
Lamb Shanks:


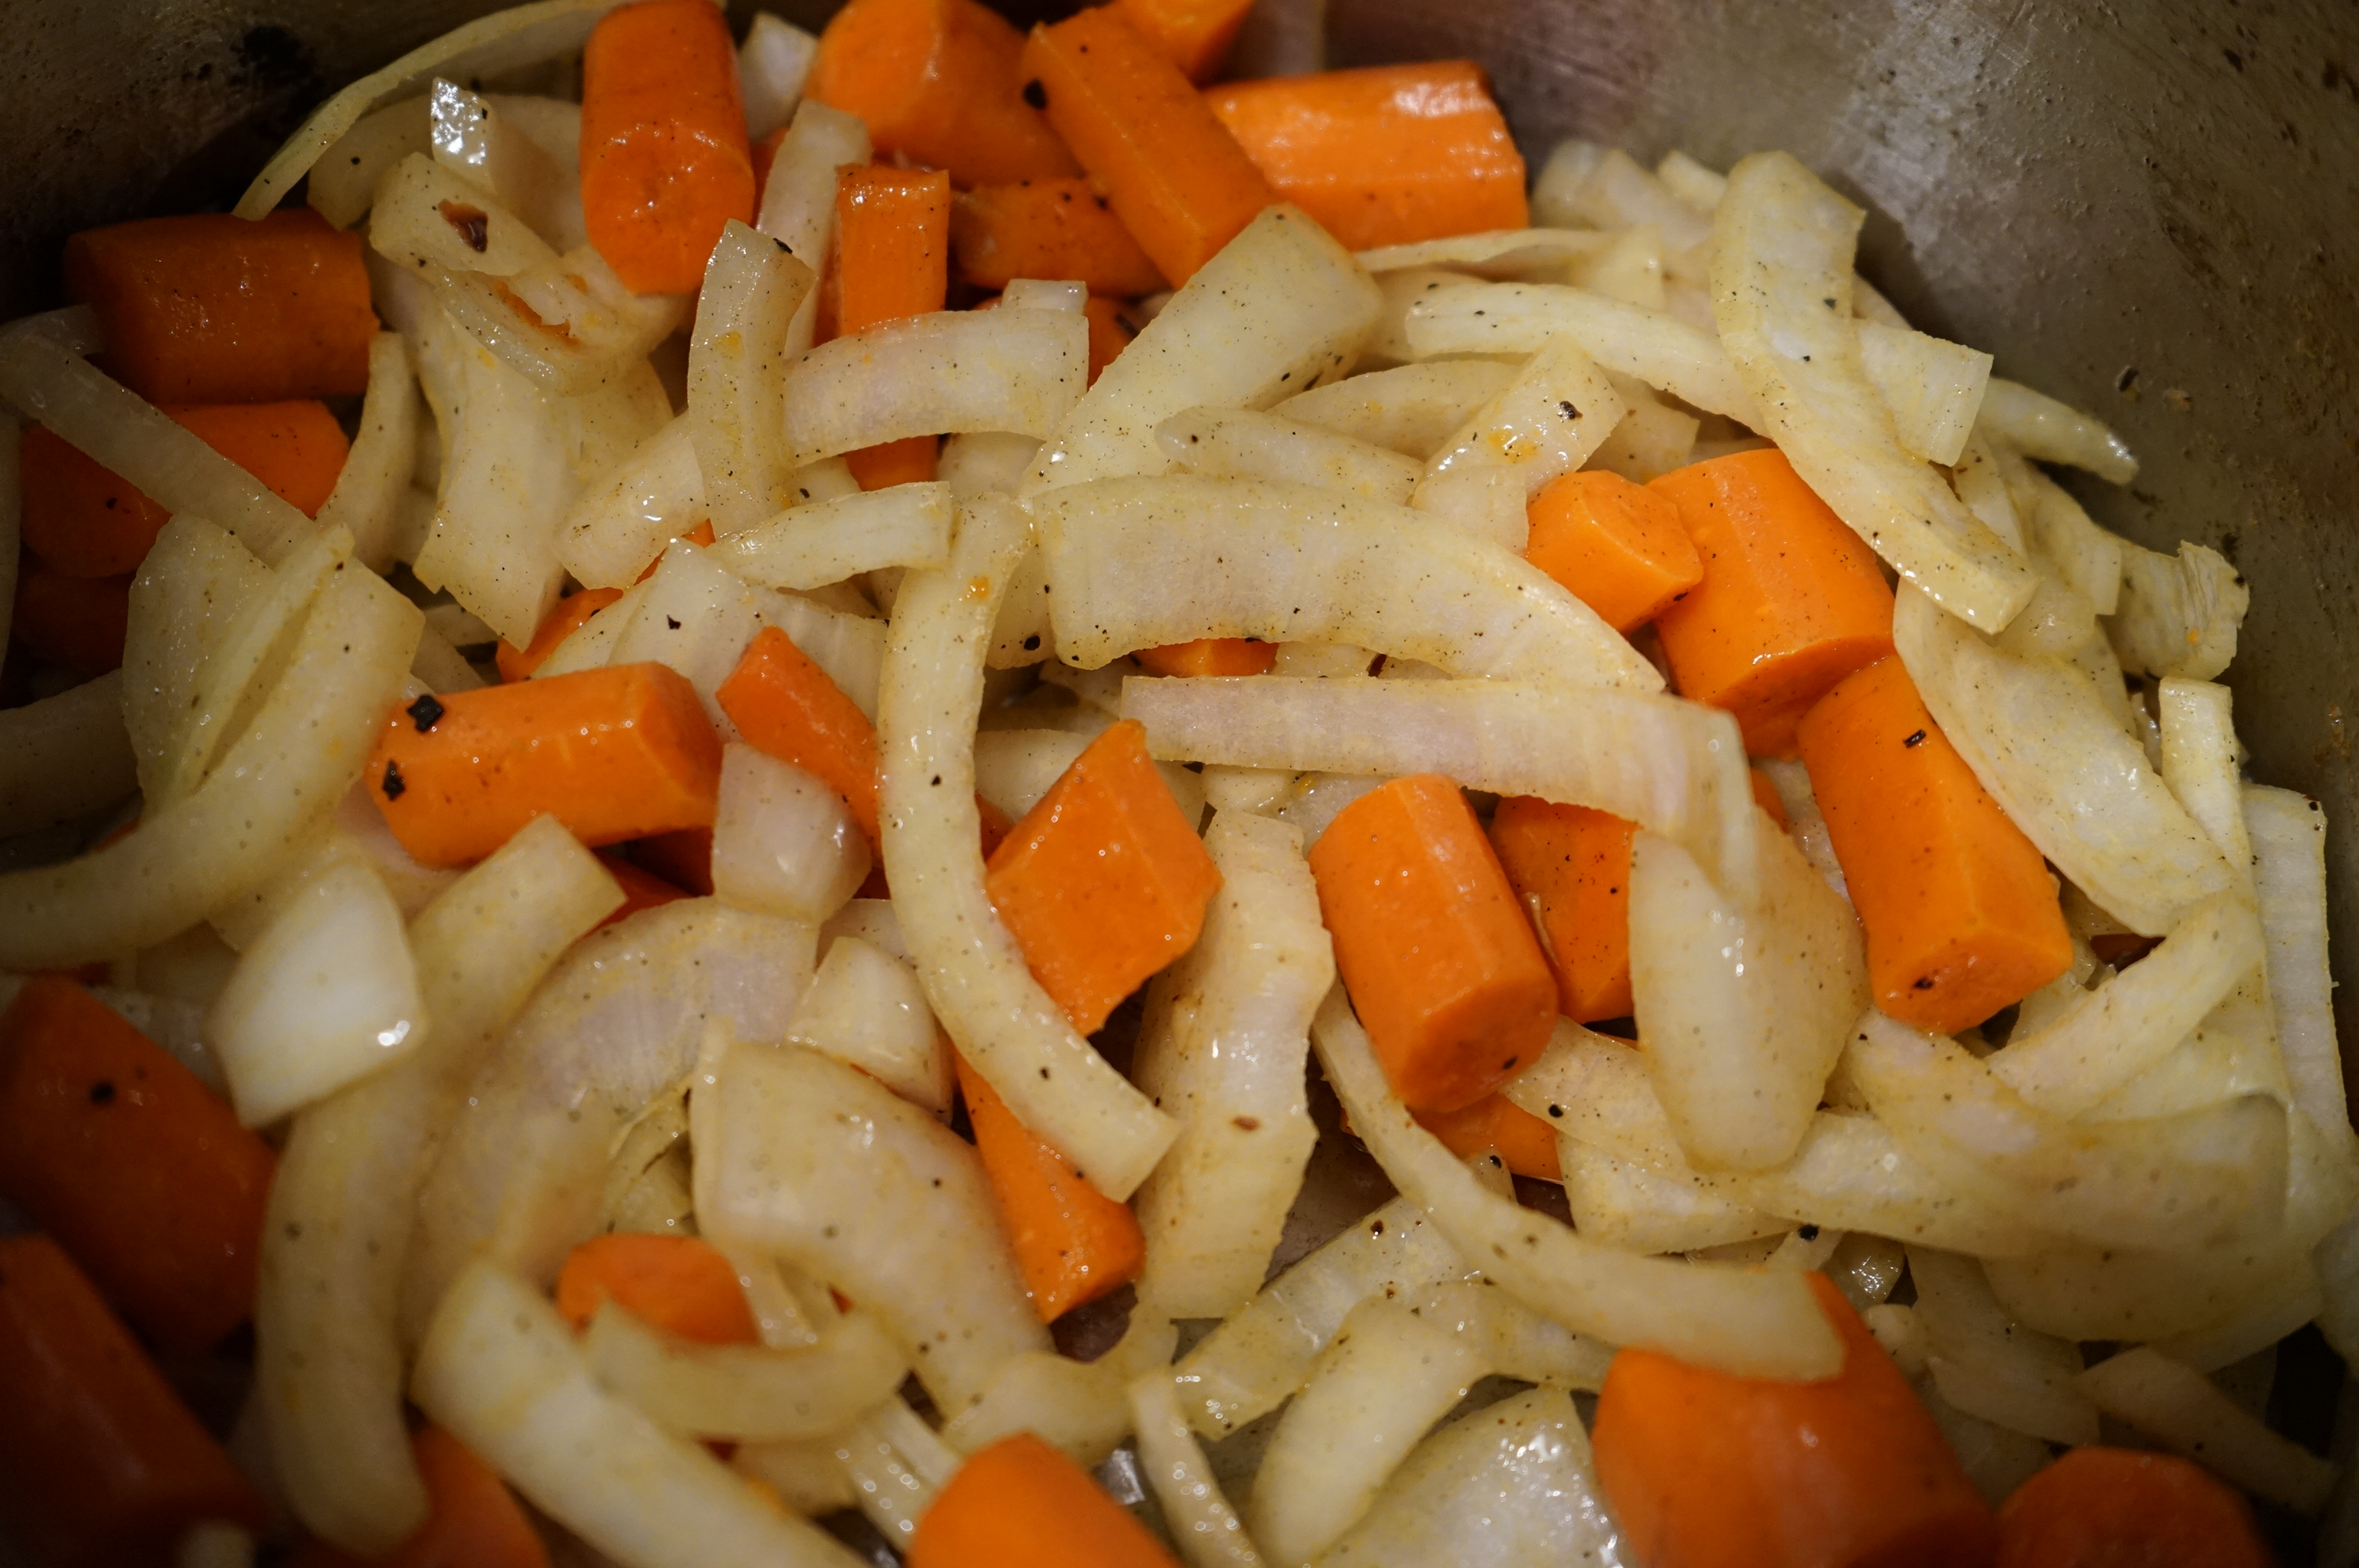

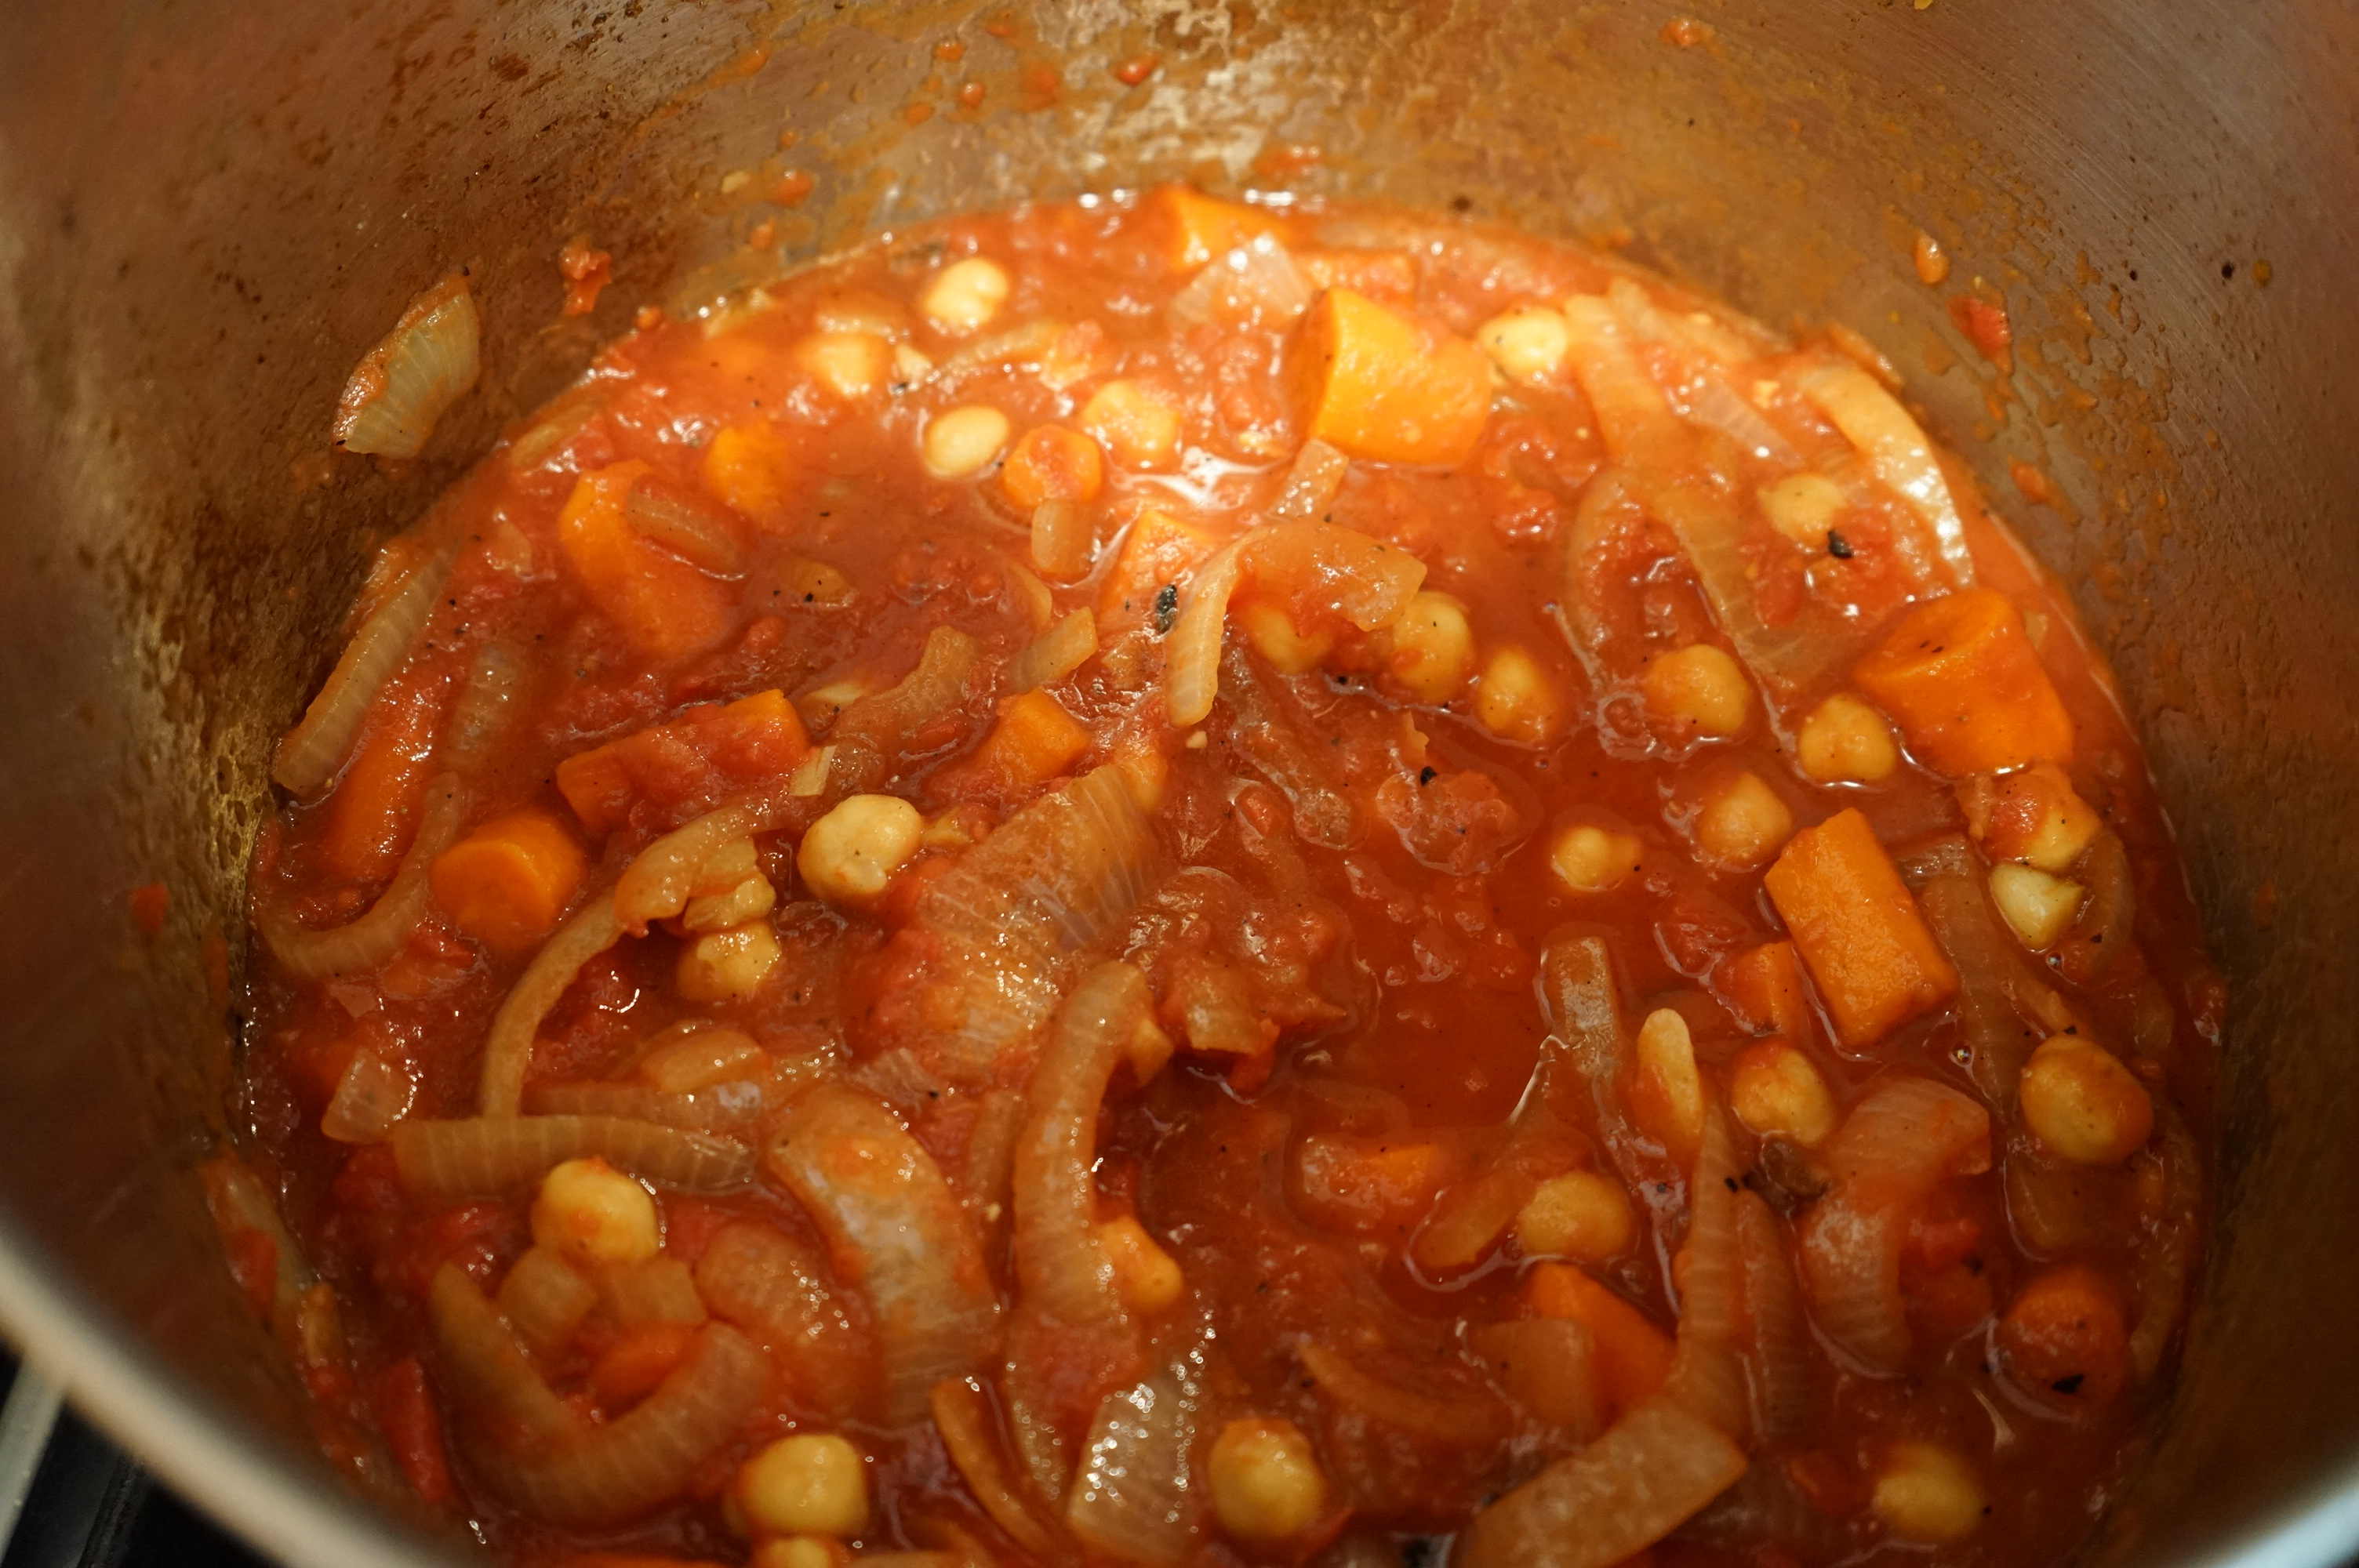

 Add the roasted tomatoes, as well as a few sprigs of rosemary and parsley to the pot and give it a big stir


Gremolata:


Couscous:
I like my couscous a little more moist and stuffing-esqe as opposed to many recipes that like each of the couscous pearls to be separate from each other. Try it my way, and if you don’t like it, then go back to the other way next time