Recipe: Morroccan Chicken Tagine

The other day, someone who I had met at a food festival asked me for the recipe for this Moroccan Chicken. They had eaten it at an event I had catered in Philadelphia a couple of months ago though my catering company, J2Food, and loved it. I don’t always give out some of my more secret recipes, but since she was so nice, I decided to write it up and post it here for all of you 🙂 This Moroccan Chicken dish isn’t actually cooked inside of a “tagine” pot, but it echoes a lot of the flavors that I love when I ordering tagines at Moroccan restaurants — a little bit sweet, salty, sour, savory and the protein is always fall apart tender. It’s very comforting in this winter weather, and is also great to make in the slow cooker! Let me know how yours turns out.

Ingredients:

  • 1 package of boneless chicken thighs
  • 1 large yellow or sweet onion
  • 5-6 carrots chopped into chunks
  • 2-3 medium onions chopped roughly
  • 1 cup of pitted green olives
  • 1 cup dried apricots
  • 3-4 garlic cloves
  • Spices: smoked paprika, turmeric, salt, pepper, cumin, cinnamon, coriander
  • Saffron, 2-3 threads
  • 3-4 cups of chicken broth
  • 1/2 cup lemon juicephoto-nov-20-6-45-21-pm
  • 2 preserved lemons, chopped — can substitute 2-3 regular lemons, juices and zest grated. Can buy preserved lemons at most specialty food stores
  • Parsley
  • Cilantro (optional)

Cooking Directions:

  1. Blend the spices and any other spices you like into a rub and divide in halfphoto-nov-20-5-52-19-pmphoto-nov-20-5-54-06-pm
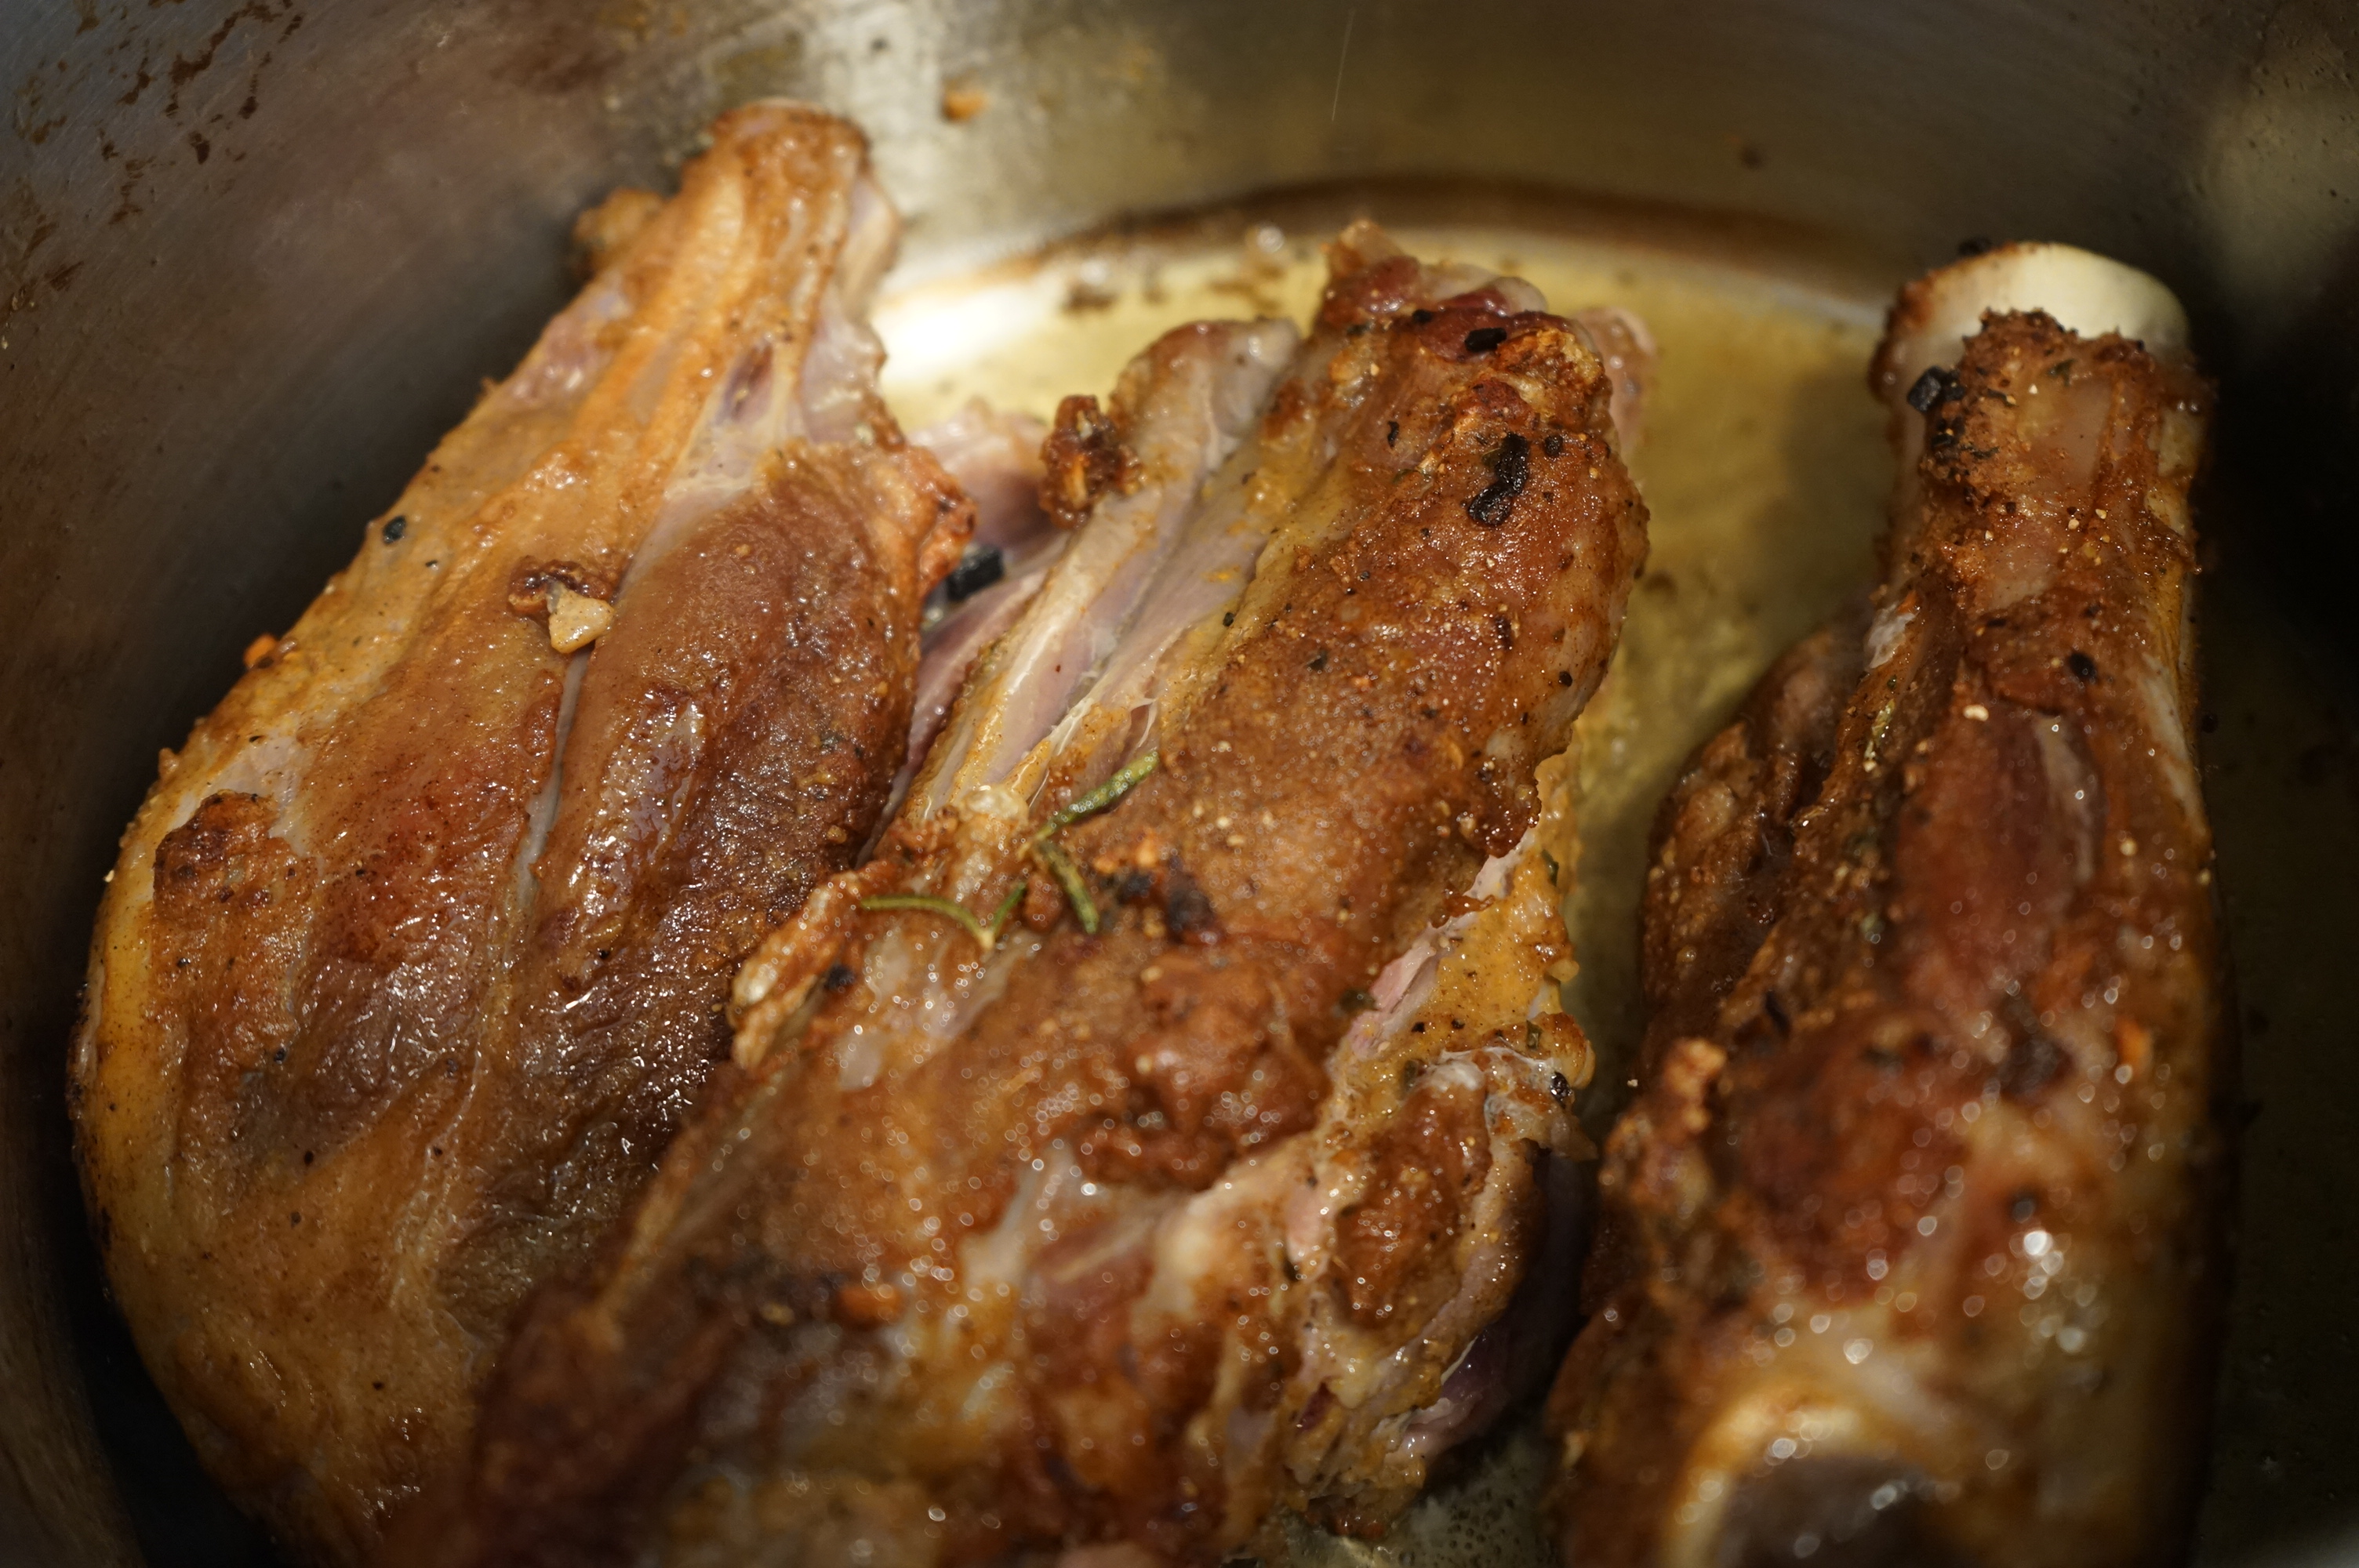
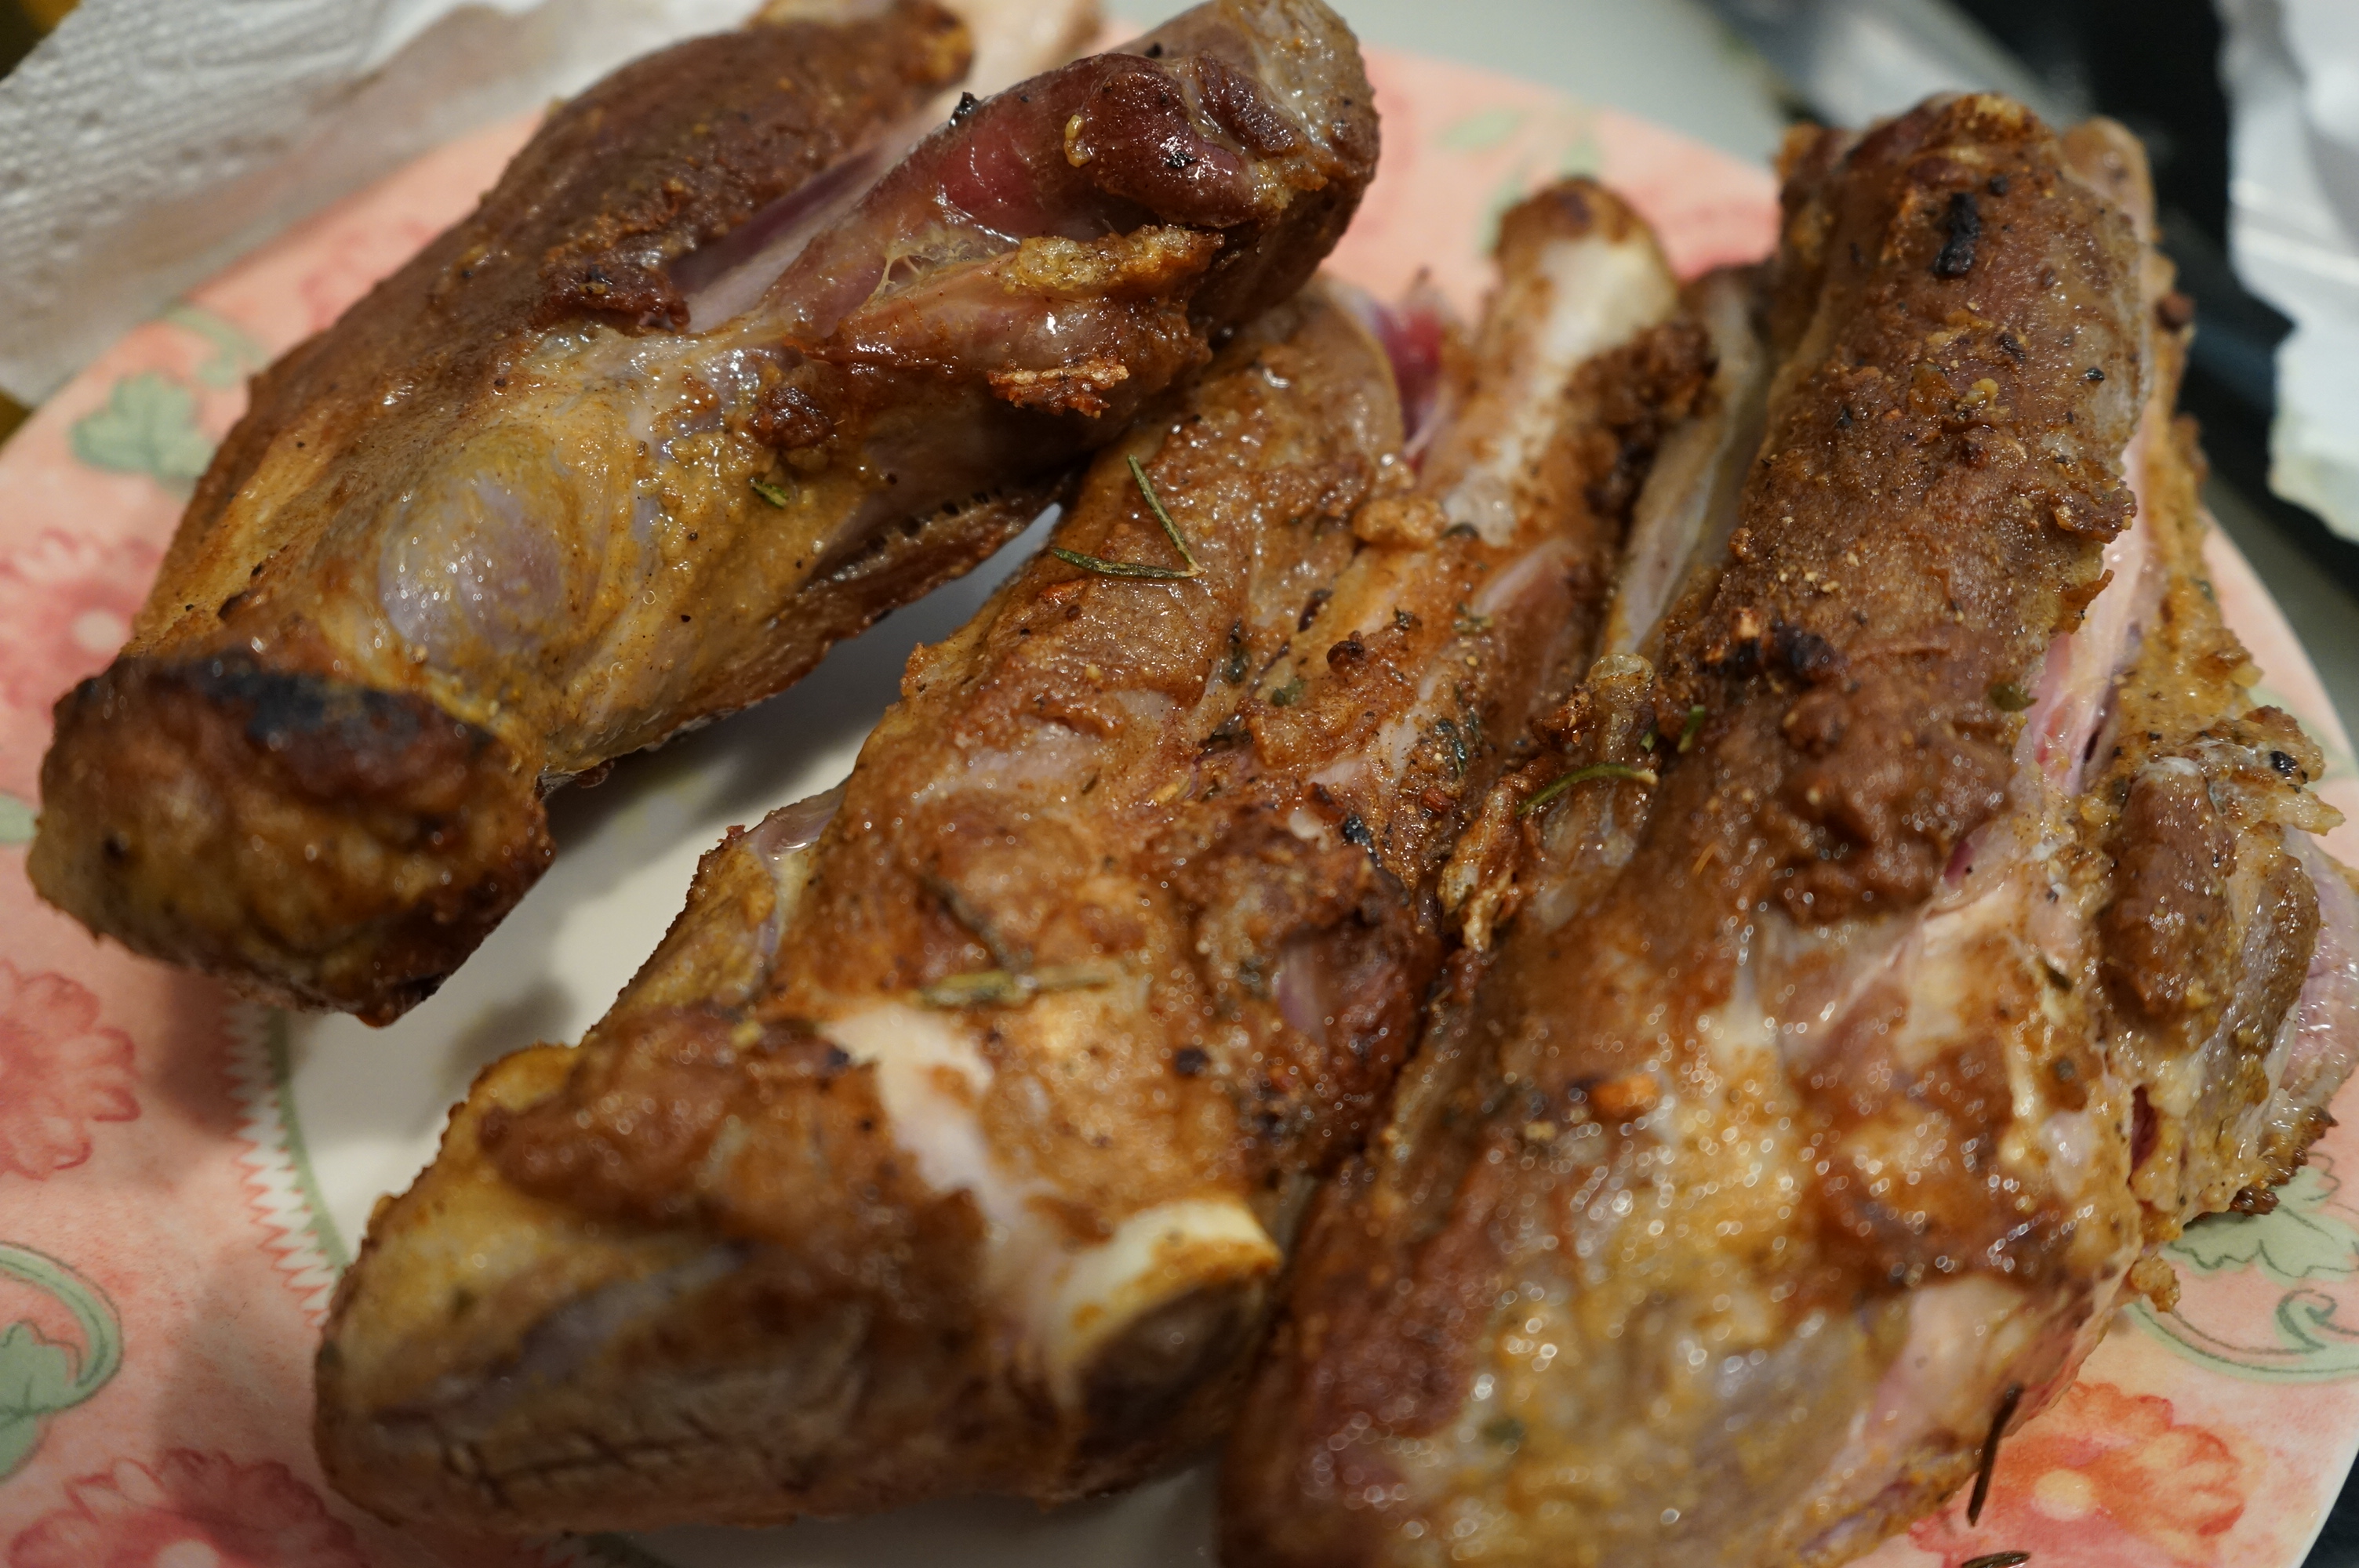
  2. Mix one half of the rub with olive oil to form a loose paste and Coat the chicken on all sides with itphoto-nov-20-6-17-19-pm
  3. Sauté chicken in olive oil in a hot Dutch oven or deep pot on both sides until browned but not fully cooked throughphoto-nov-20-6-40-23-pm
  4. Remove chicken and set aside. You’ll come back to it
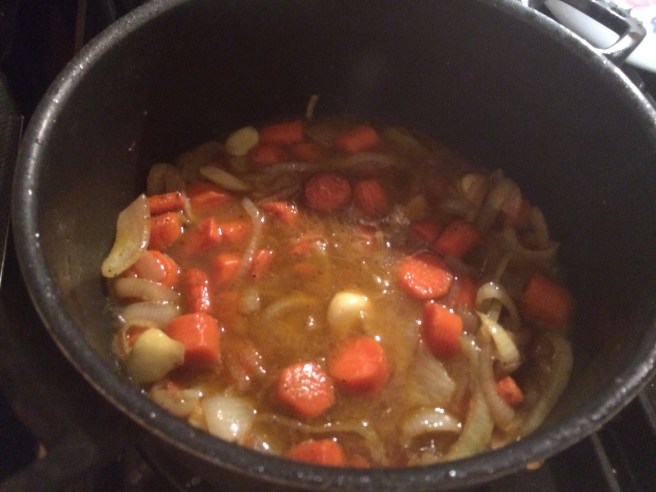
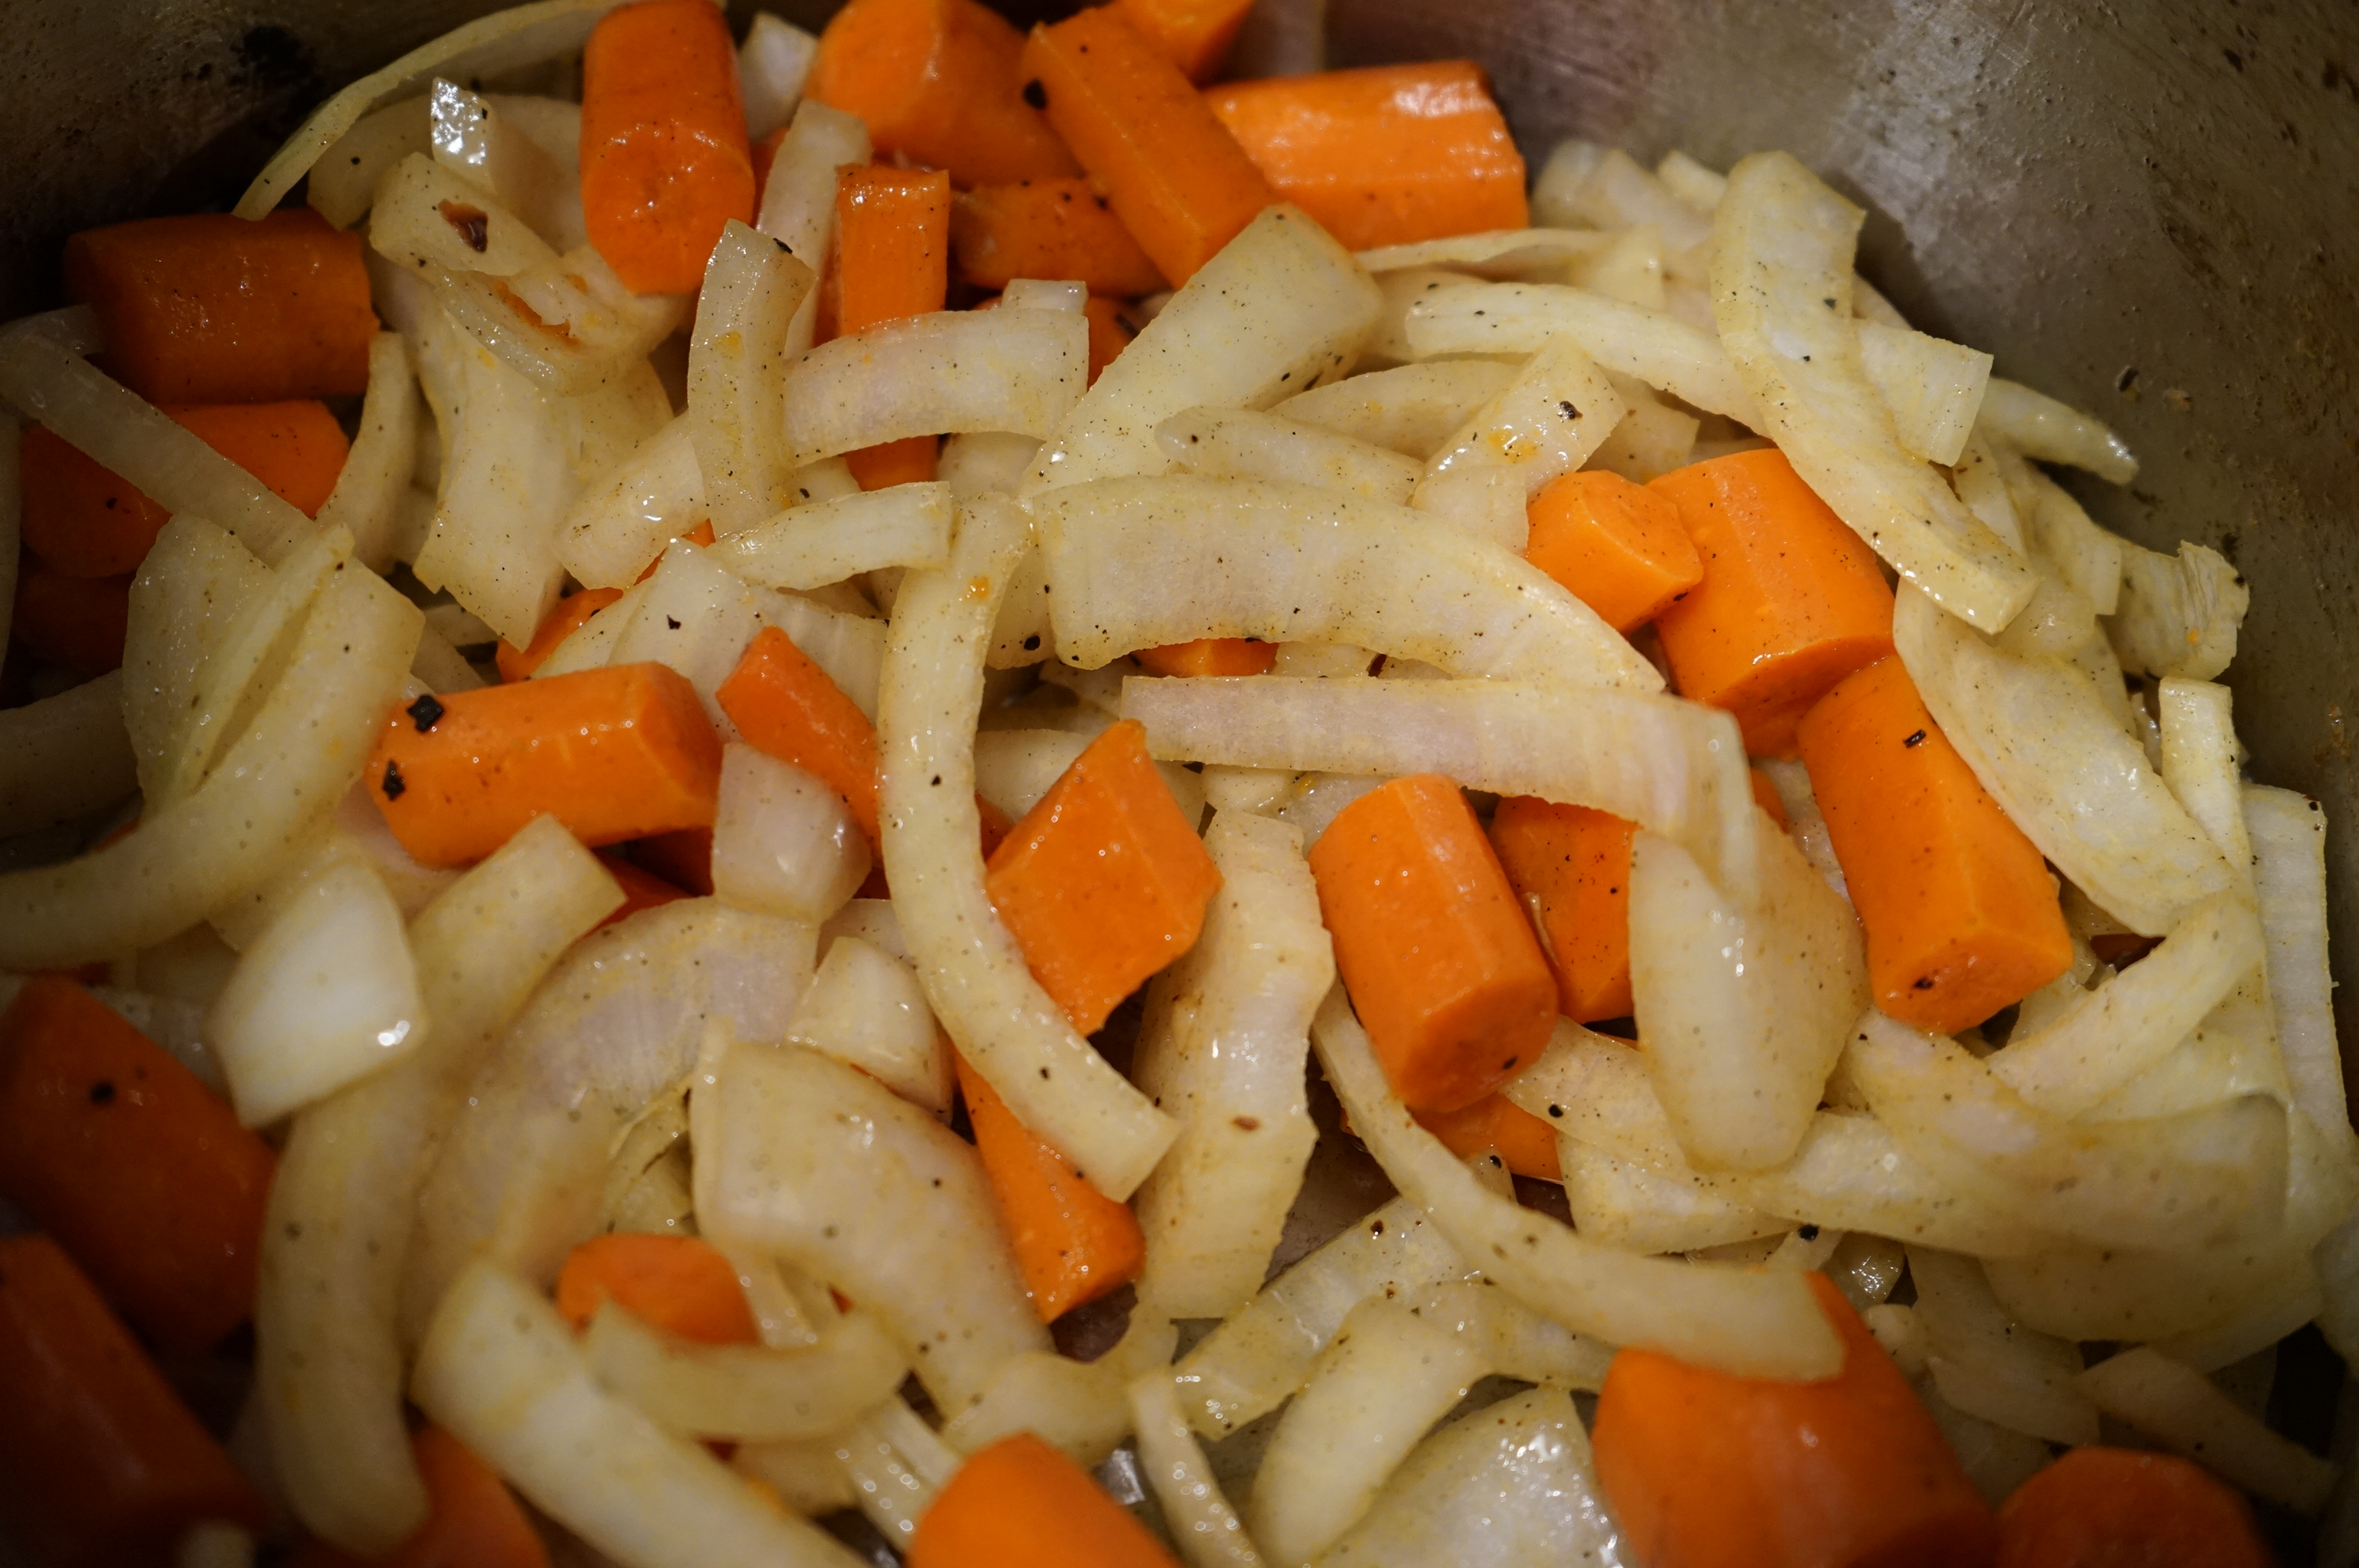
  5. In same pot add garlic and onions and cook until starting to brownphoto-nov-20-6-40-05-pm
  6. Add carrots and onions and keep cooking
  7. Add more of the same spice mixture to the pot with the vegetables and heat until fragrantphoto-nov-20-6-40-39-pm
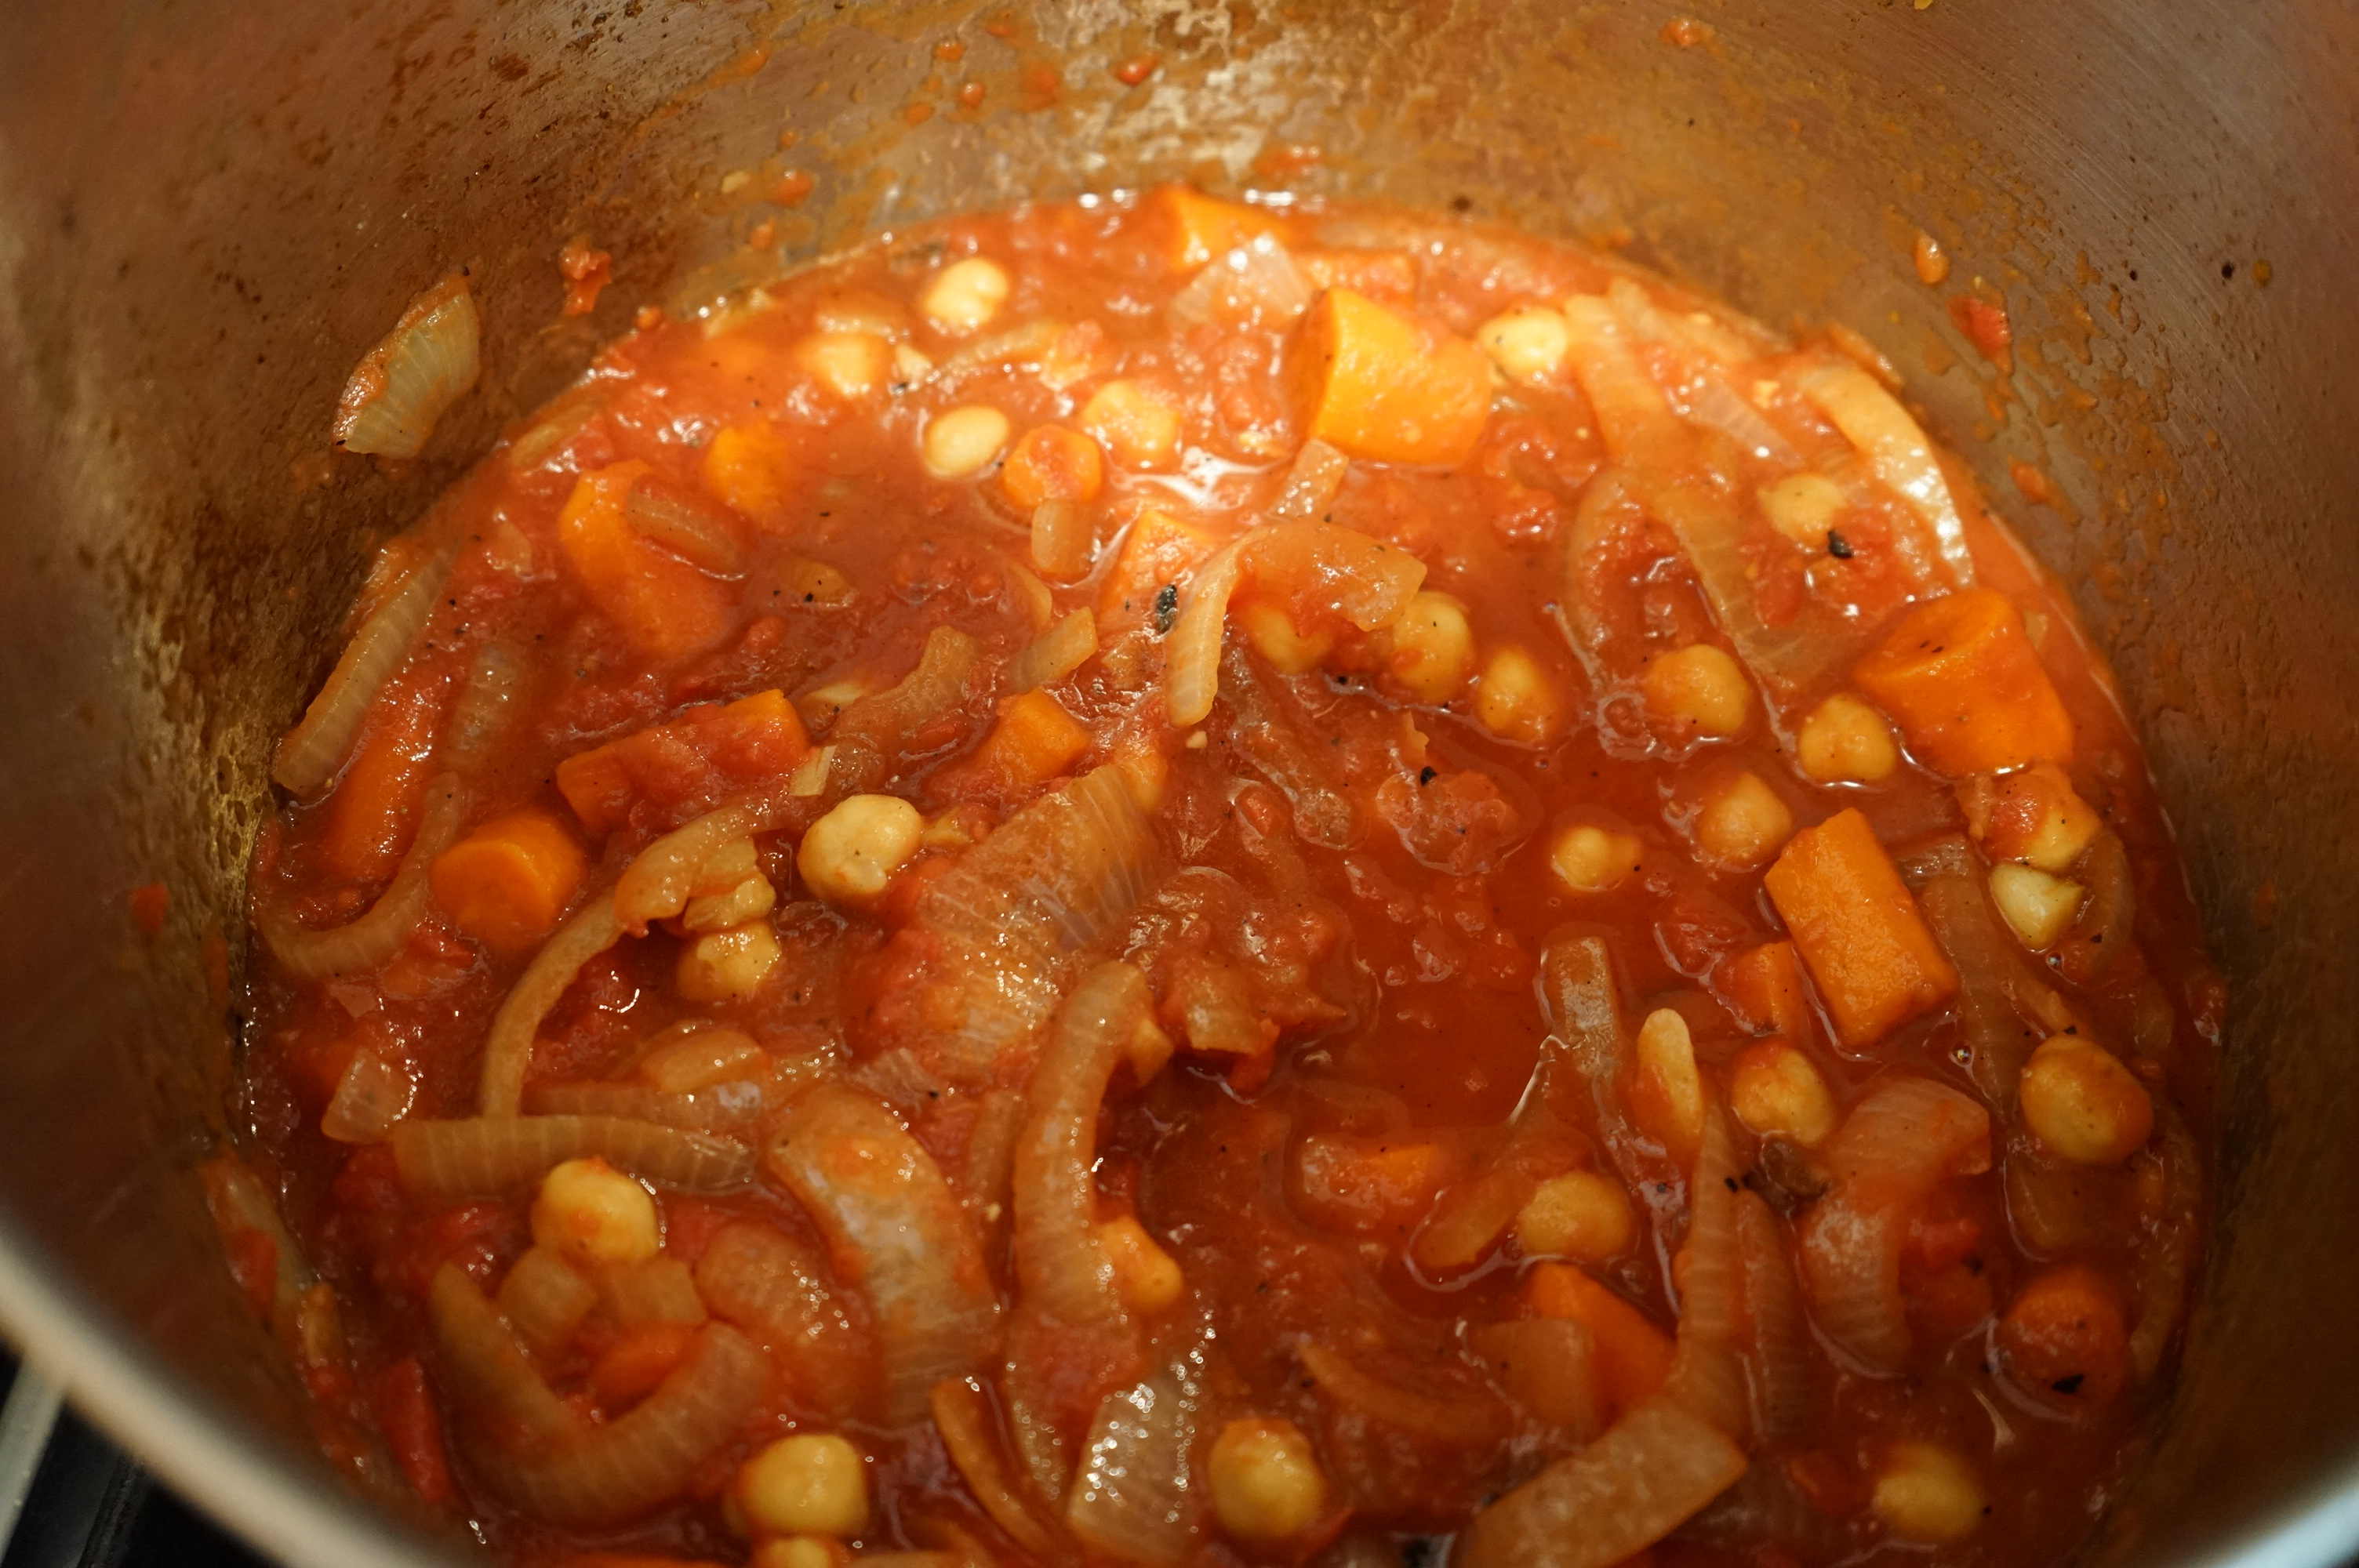
  8. Add preserved lemon, lemon juice, saffron, (zest) and cook for a couple of minutesphoto-nov-20-6-45-06-pm
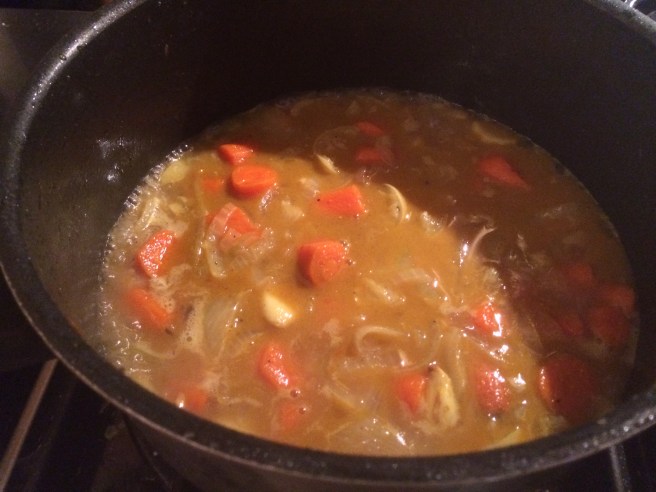
  9. Add broth and make sure to scrape bottom of the pot for flavor bits — add just enough broth so that the liquid covers the ingredientsphoto-nov-20-6-45-51-pm
  10. Add olives to the pot and make sure to give everything a good mix!photo-nov-20-6-56-01-pmphoto-nov-20-6-47-16-pm
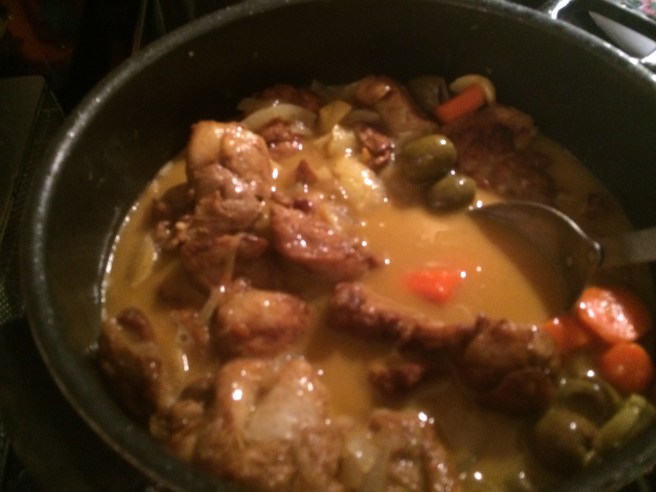
  11. Add the chicken back in and stir all together — taste the liquid and adjust seasonings to your taste. Maybe add more lemon, salt etcphoto-nov-20-6-47-16-pm
  12. Heat on medium high for 5-10 minutes, then cover and lower heat to medium low and simmer for about 45 min – 1 hour
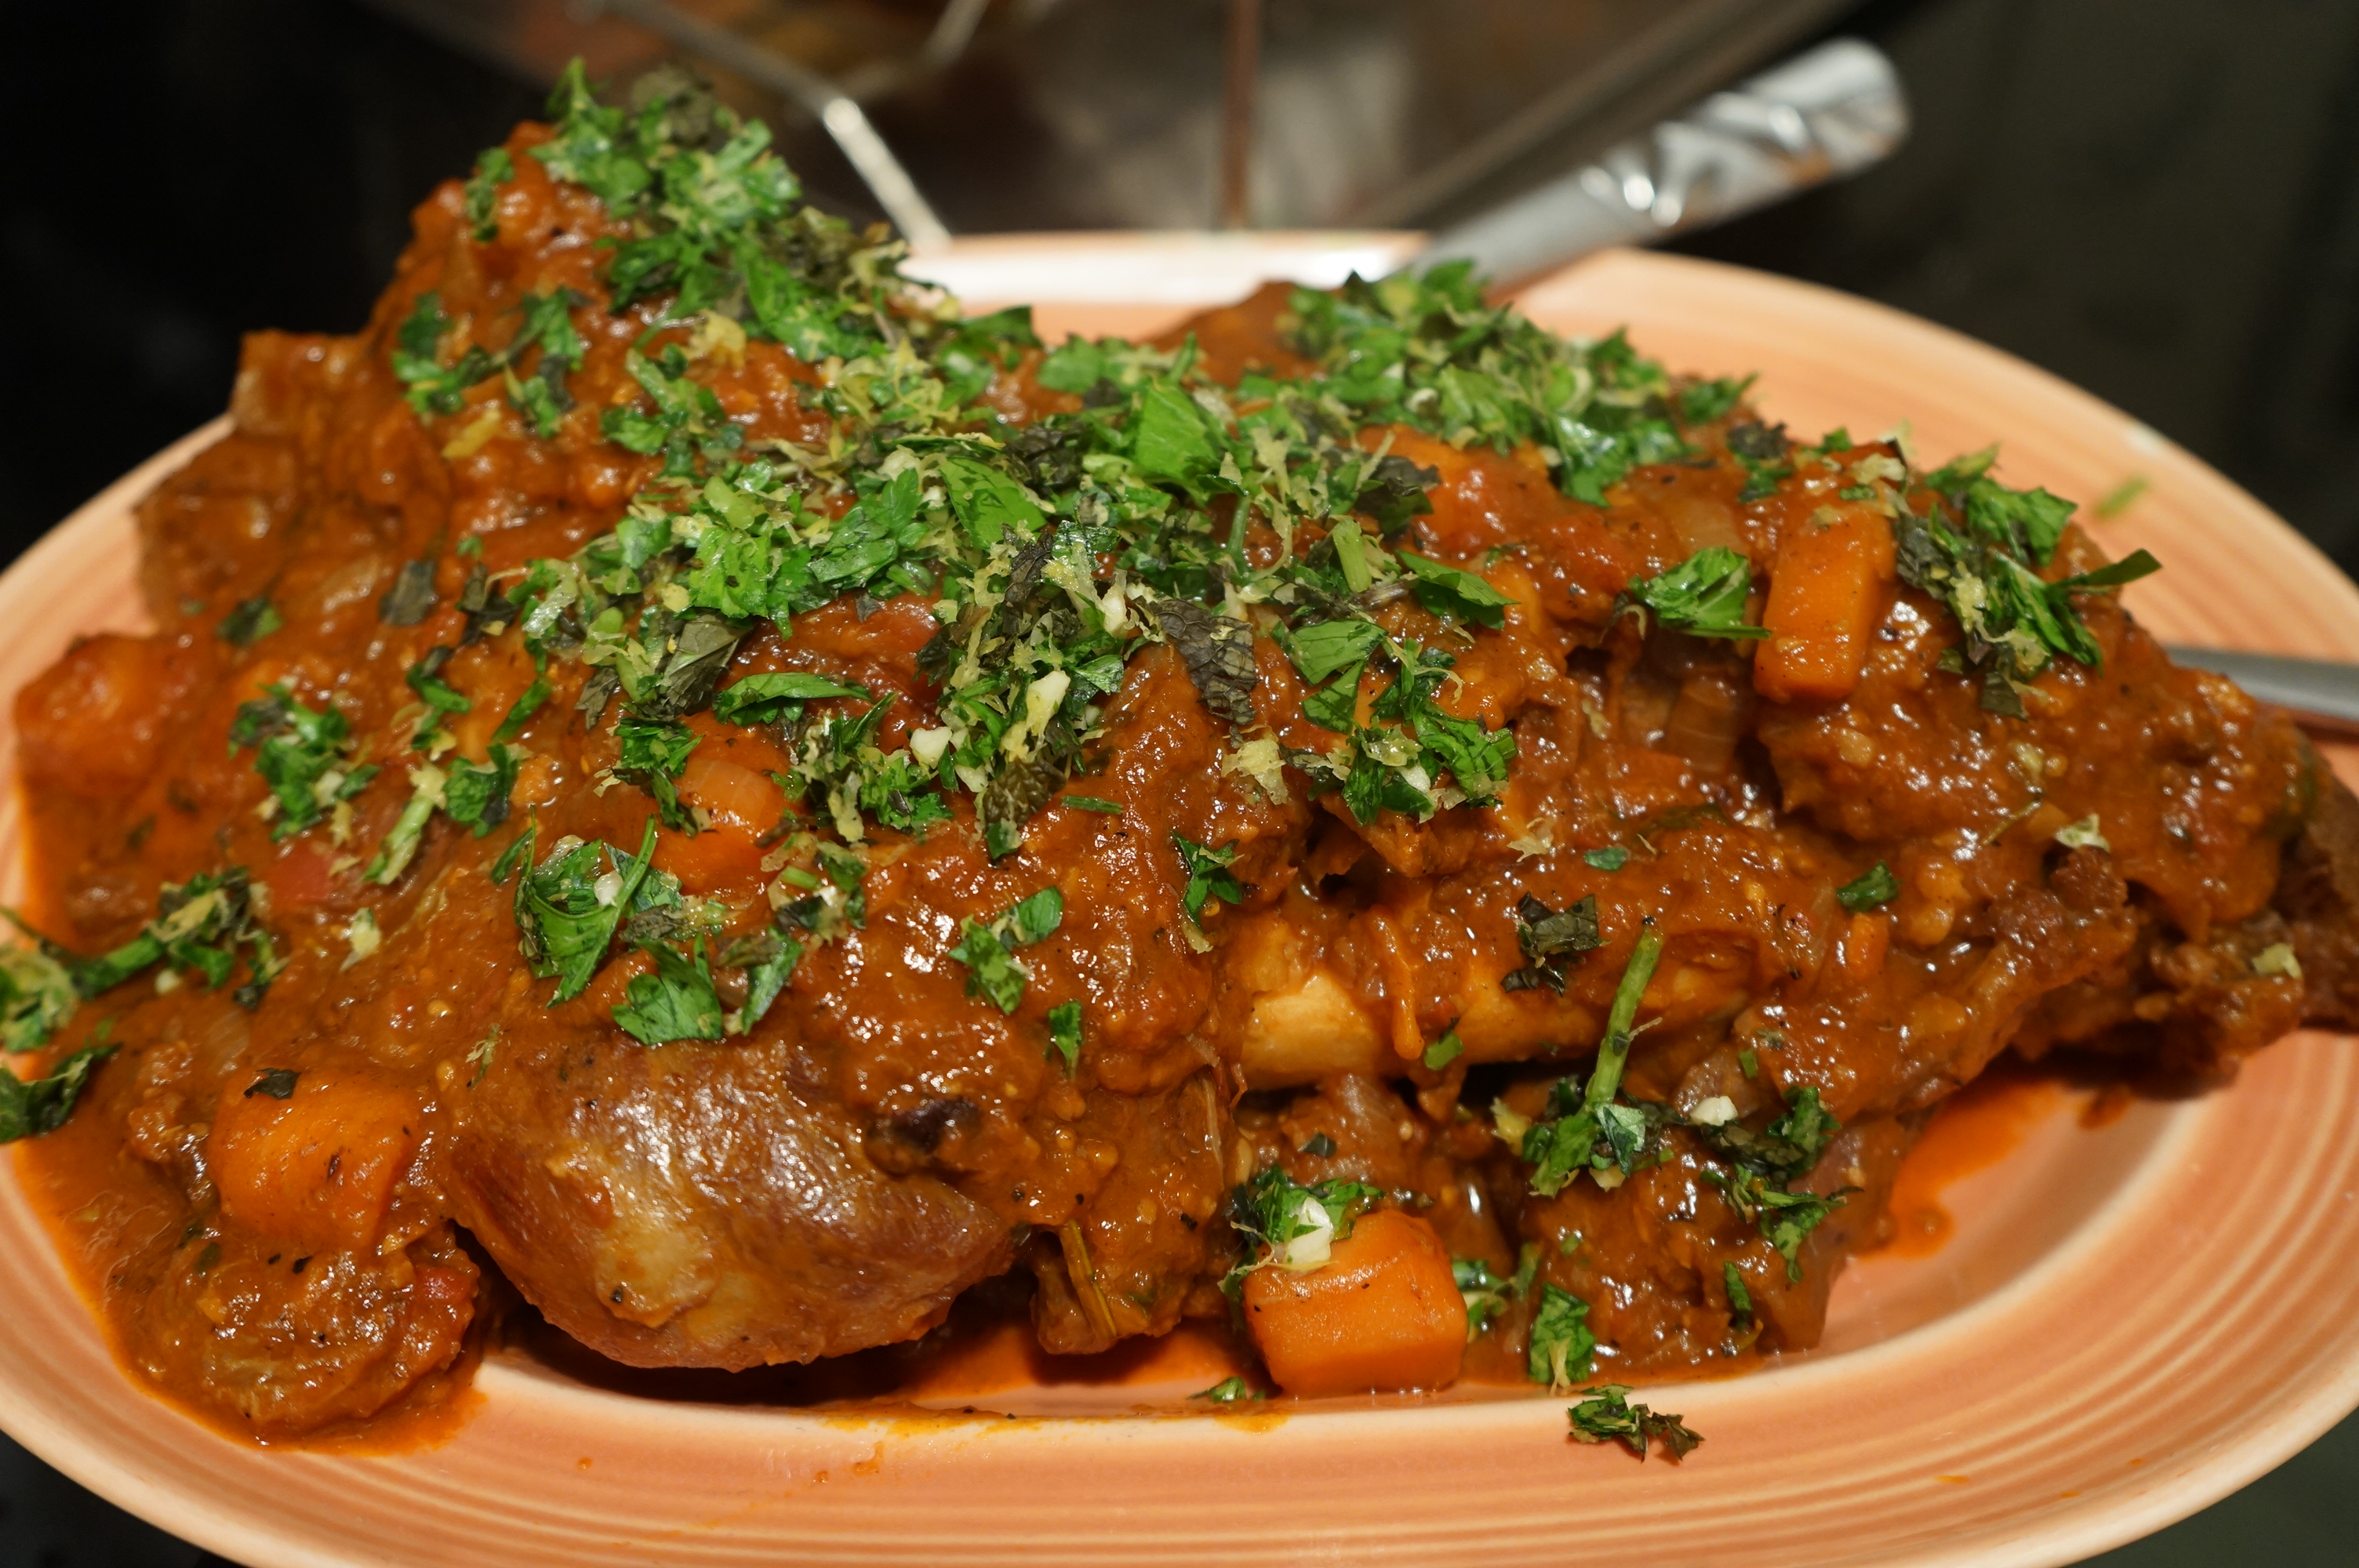
  13. Add parsley and simmer for another 5 minutes on high uncovered photo-nov-20-7-52-16-pm
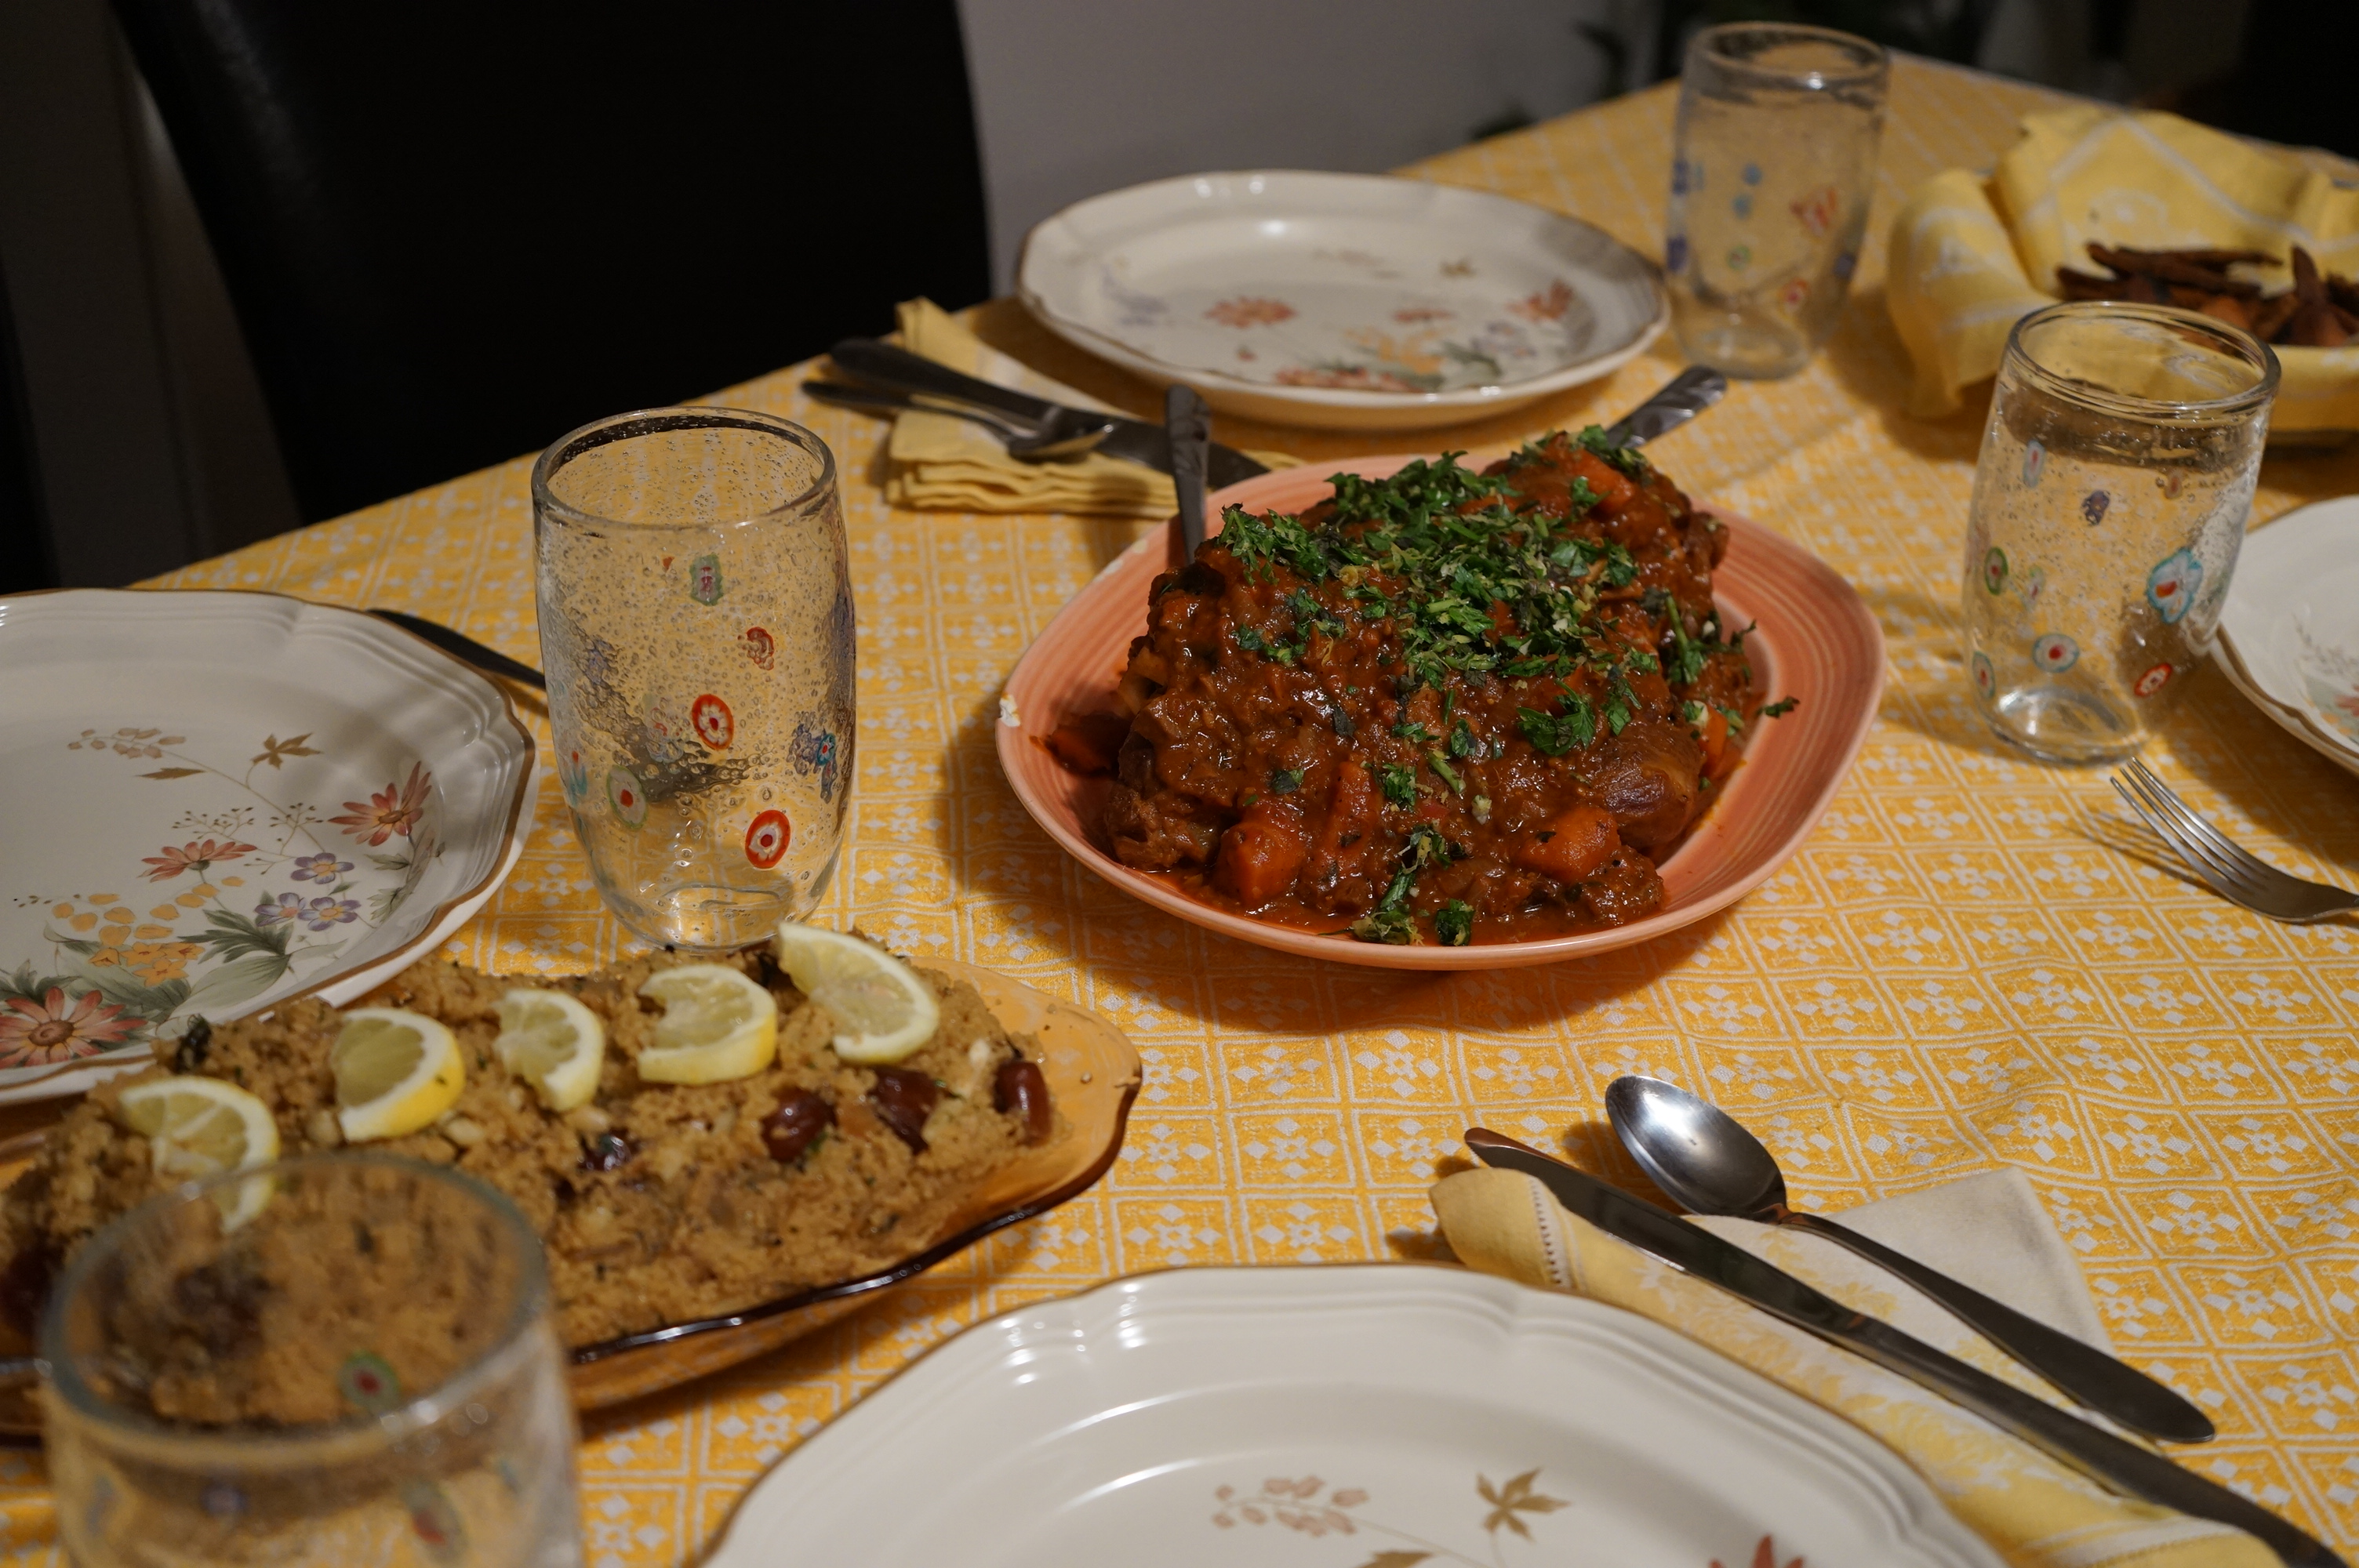
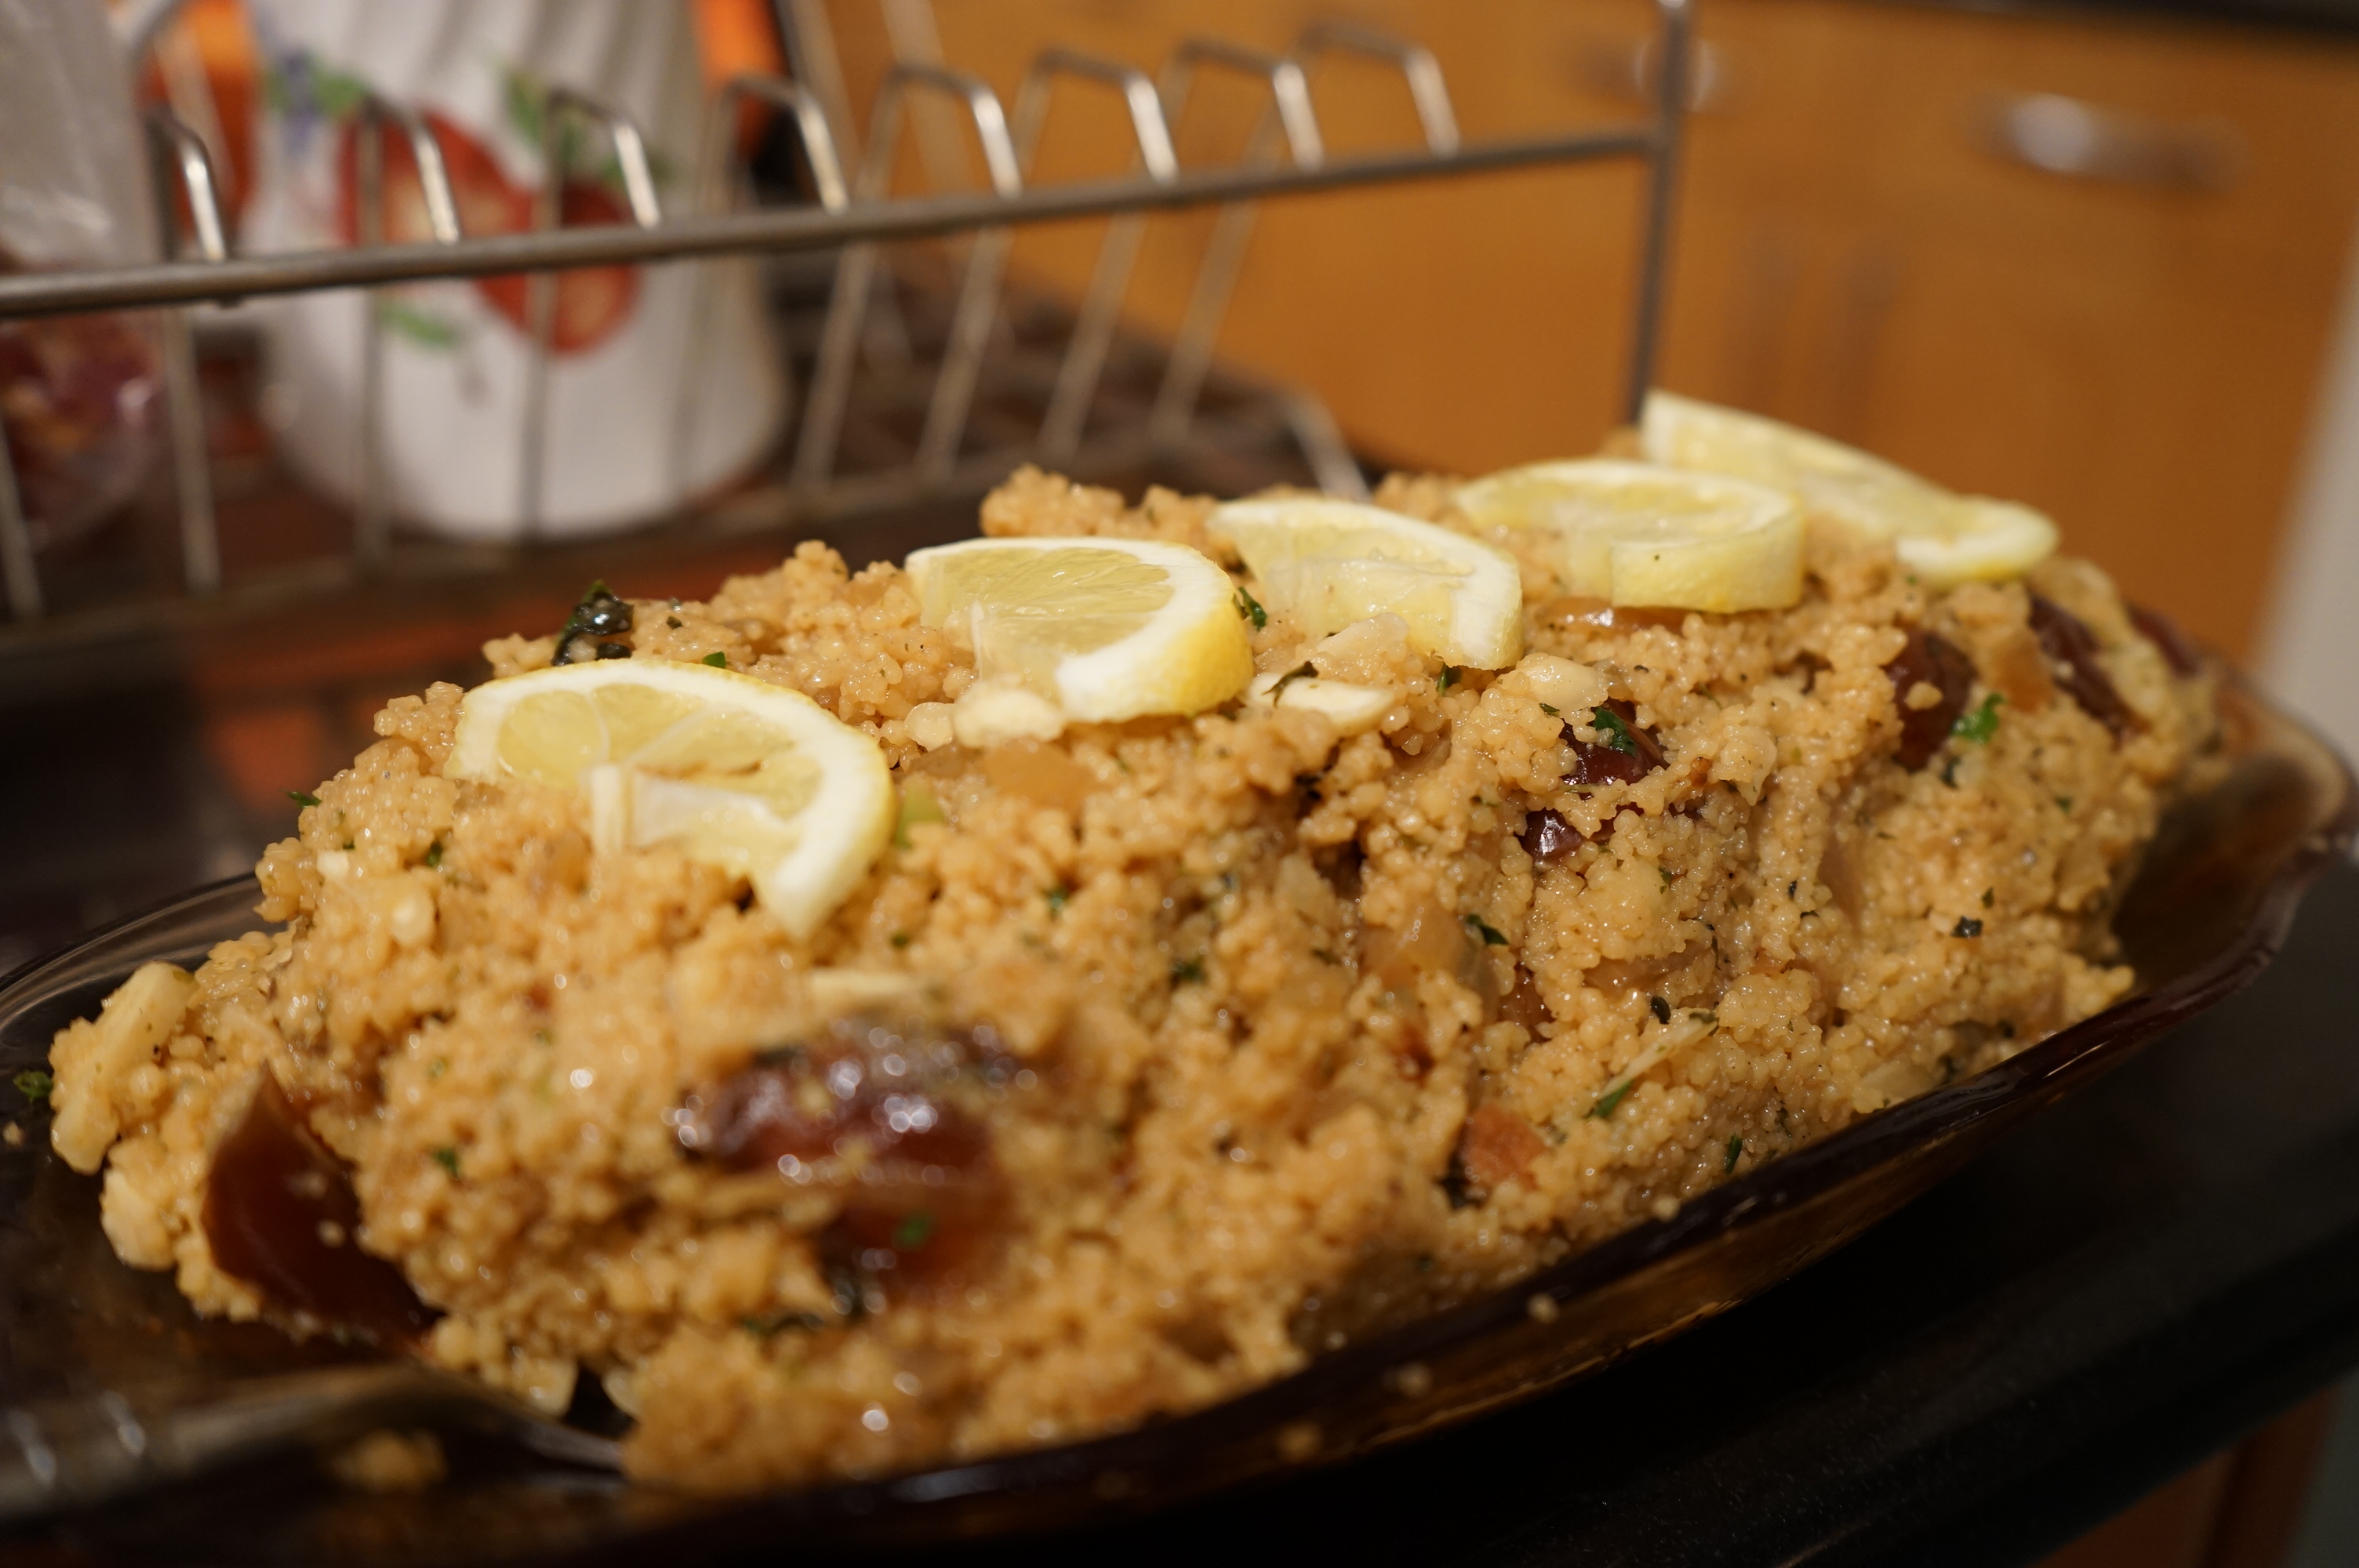
  14. Garnish with fresh chopped cilantro then spoon over couscous or serve in a bowl with sides of your choosing

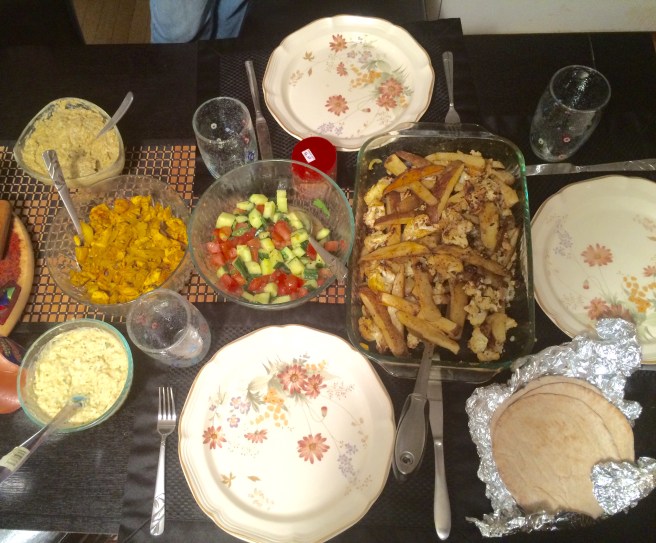
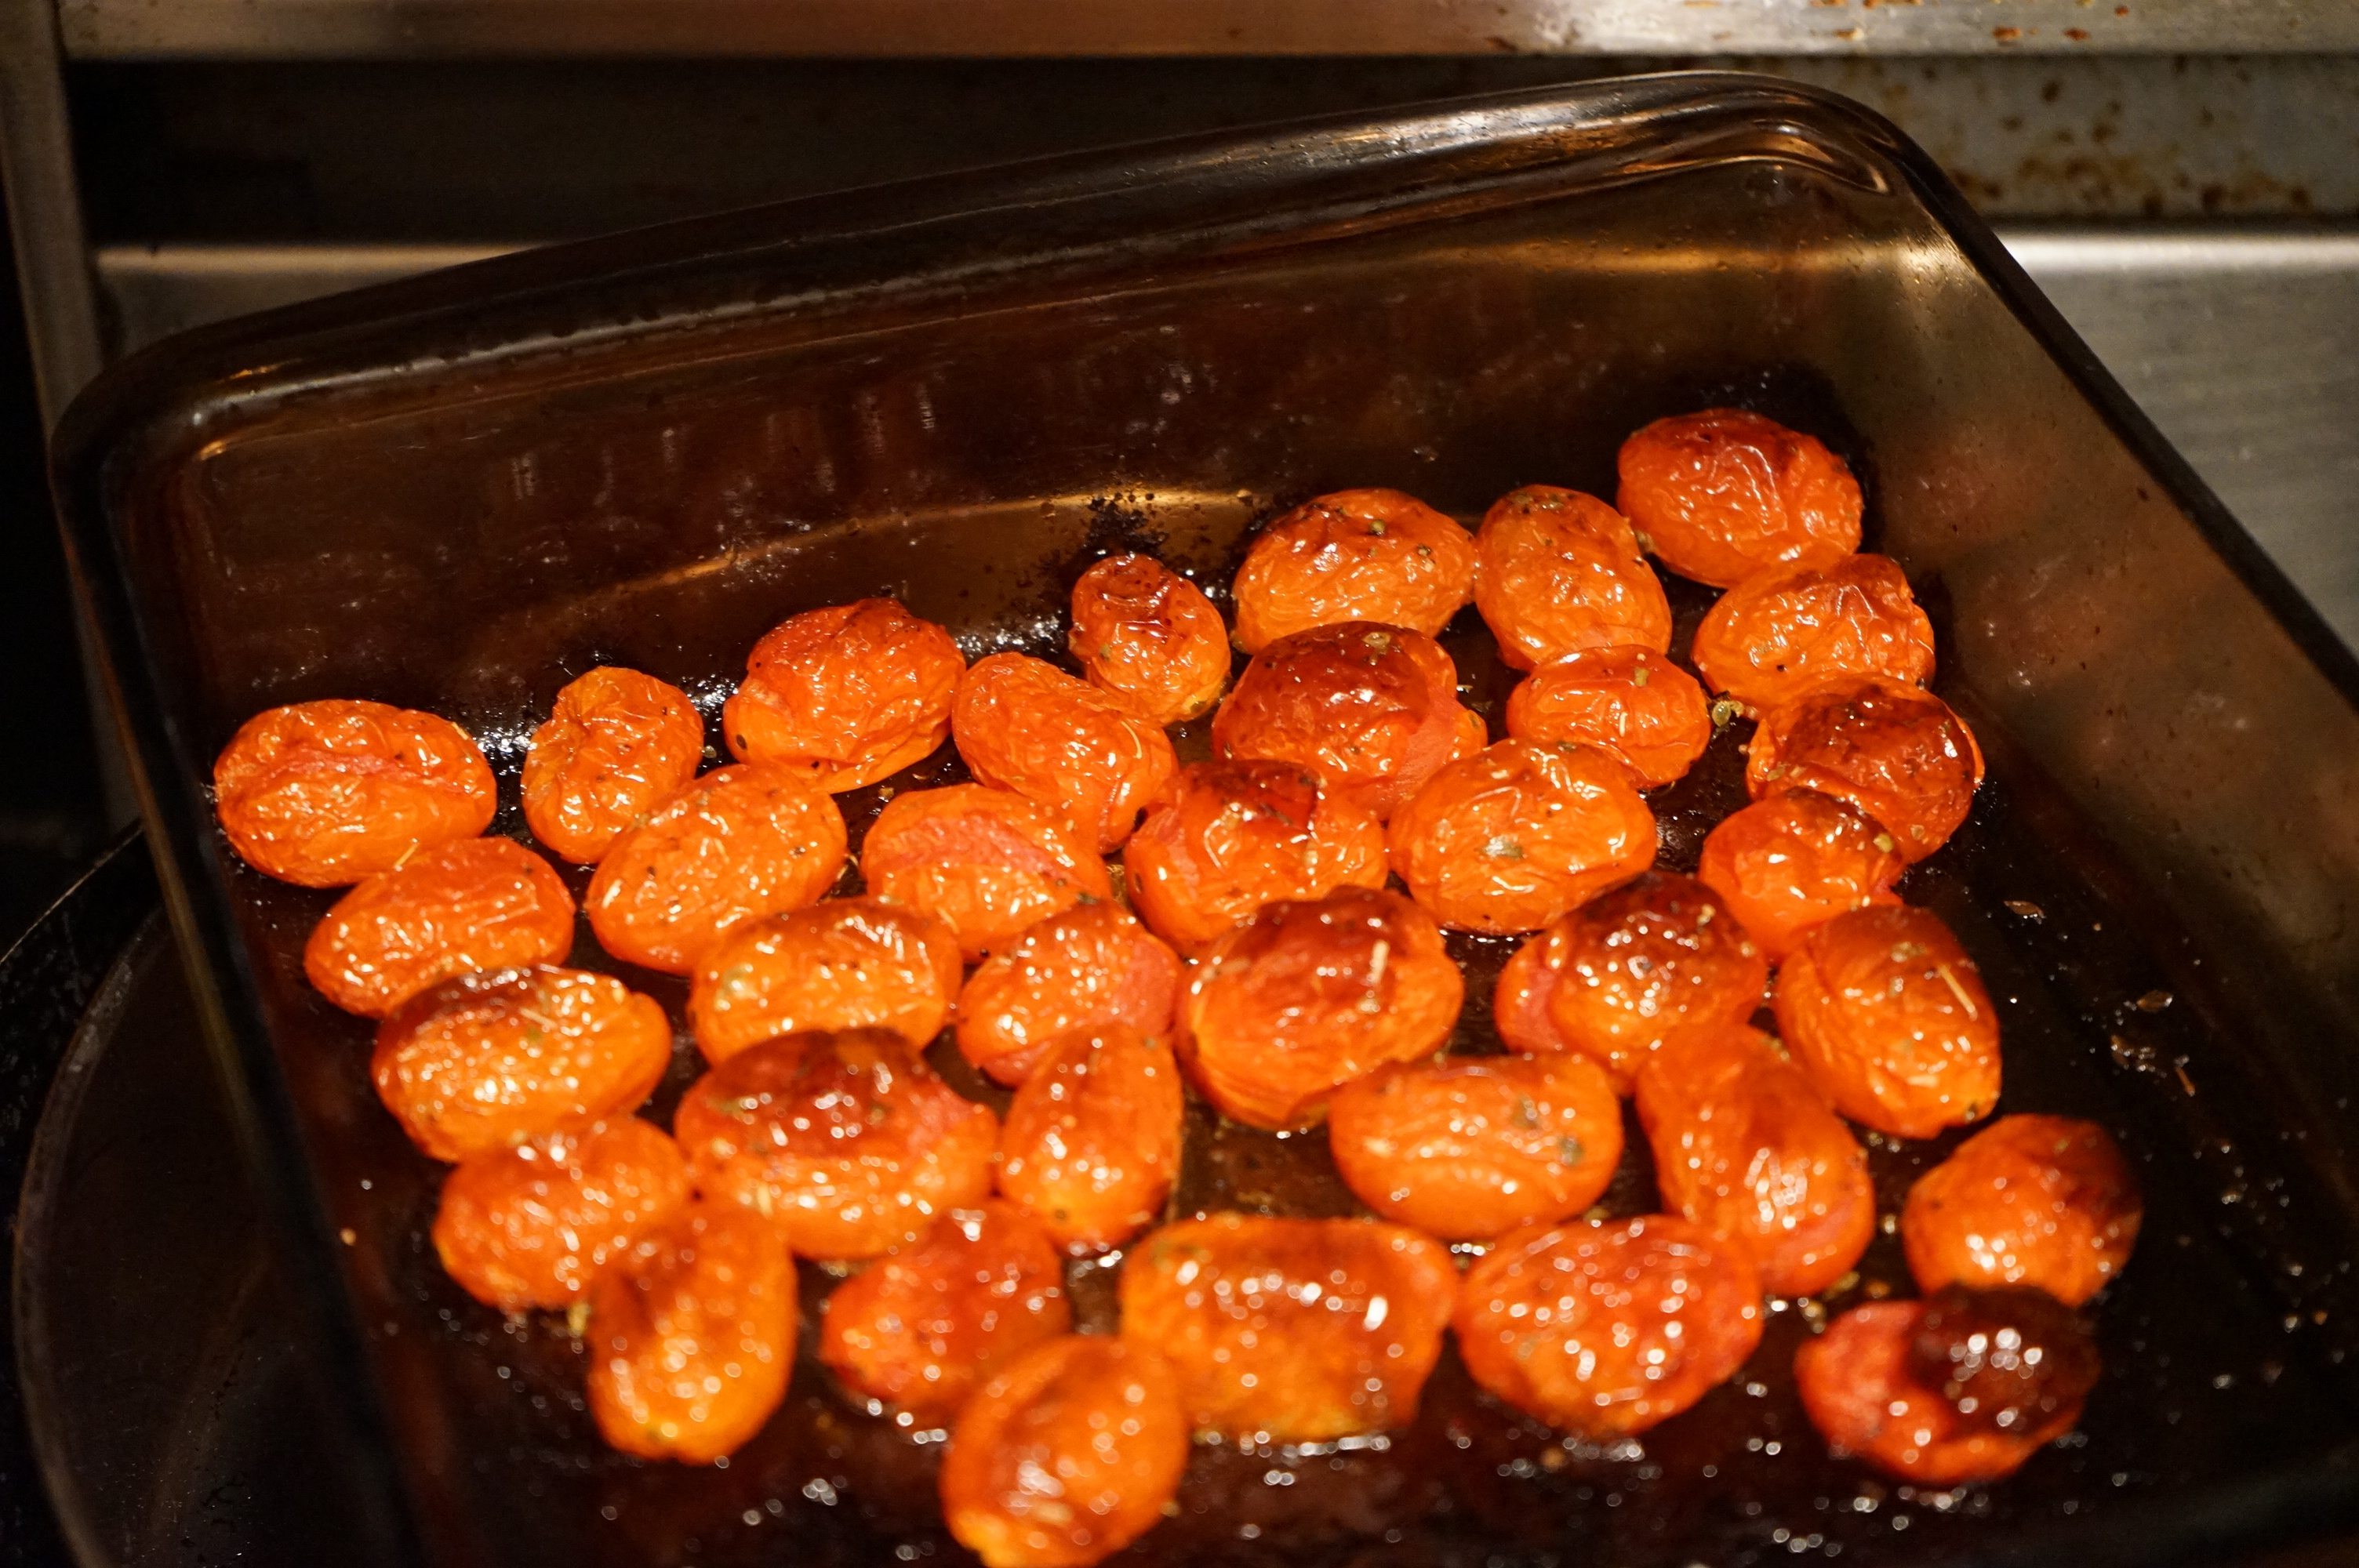
I served this dish with some braised collard greens, herb roasted tomatoes and some crusty bread to mop up the sauce. It was a big hit!

photo-nov-20-8-02-21-pm


Advertisement

Middle Eastern Night at Home

Photo Oct 15, 9 01 35 PM

The other night I was thinking about what to make for dinner on my way home, when I passed by one of the ubiquitous Halal carts. I don’t know why, but whenever I pass a Halal food cart, I always take a big sniff…it just smells so good! It immediately made me think of Middle Eastern flavors with lots of spices, citrus, and conversation. That night I made chicken shawarma for dinner with fixings, and instead of using store-bought dips, I decided to make my own–and it was so easy! Rustic lemon hummus consists of a quick trip to the pantry for most of the ingredients, and roasted eggplant babaghanoush will make your fellow diners think you’re a spice savant! Try these Middle Eastern spreads at home and you’ll never feel the need to head to the grocery the next time you want to eat some hummus.

Rustic Lemon Hummus

  • 1 can of chickpeas—canned chickpeas are super easy and always in my pantry, but dried chickpeas that you soak overnight are really the best for this recipe and will give you a cleaner flavor
  • 3 tablespoons of tahini paste
  • 2 lemons—juice of both, and the zest of one
  • 1 tablespoon of fresh parsley, chopped
  • 1 tablespoon of salt
  • 1 teaspoon of black pepper
  • 2 teaspoons of ground cumin
  • 3-4 garlic cloves, finely chopped
  • 1 teaspoon of paprika
  • Olive Oil
  1. Rinse the chickpeas off under cold water until you get rid of all of the gunk from the can off of the chickpeas
  2. In a food processor or blender–I only had my KitchenAid mixer available, so that’s what I used–add the chickpeas, tahini, lemon juice and zest, salt and pepper4
  3. Start to mix all of the ingredients on low to slowly break up the chickpeas until it becomes a thick paste5Photo Oct 15, 7 45 21 PM
  4. Add in the rest of the spices, and gradually add the oil as you increase the speed to mediumPhoto Oct 15, 7 47 05 PMPhoto Oct 15, 8 17 59 PM
  5. The hummus is done when it gets to your personal consistency preference—I like mine a bit chunky—great for pita chips!Photo Oct 15, 9 01 48 PM
  6. Spoon out into a bowl and eat with chips, pita, or use it was a topping for your favorite falafel. Hummus is also delicious as a spread or used in place of mayonnaise or mustard on sandwiches

Roasted Eggplant Babaghanoush

  • 1 large eggplant
  • 1 1/2 tablespoon of smoked paprika—this goes well with the roasted and charred eggplant, but regular paprika works just as well
  • 1 1/2 tablespoon of cumin—add the extra teaspoon if you don’t have smoked paprika. The cumin has a natural smokiness that can compensate
  • 4 garlic cloves, grated
  • 1 1/2 tablespoons of salt
  • 2 teaspoons of black pepper
  • 1 tablespoon fo fresh parsley, chopped
  • Olive Oil
  • Juice of 1 lemon
  • 2 tablespoons of tahini paste
  • 1/4 of an onion, grated
  • Hot sauce (to taste)—I like mine spicy, but this dip is delicious mild as well
  1. Preheat the oven to 425 degrees fahrenheit1
  2. Cut your eggplant in half lengthwise—Resist the urge to peel it at this point! The peel will not only help keep moisture in the eggplant flesh, but also hold it together in the oven.
  3. Use a fork or sharp paring knife to poke holes into the eggplant skin all over2
  4. Rub the flesh side with olive oil and season with 1/2 tablespoon of salt, 1 teaspoon of pepper, 1/2 tablespoon of paprika and 1/2 tablespoon of cumin
  5. Roast the eggplant for 20-25 minutes until the skin is charred and the flesh becomes slightly creamy and the outside if browned—you want the skin to get black10
  6. Once the eggplant has cooled a bit, but still hot, use a knife or fork to remove the charred skin—it should come off very easily
  7. Discard the skin and spoon the flesh into the bowl of a mixer or food processor11
  8. Pulse together the eggplant with the remaining ingredients until it comes together in a thick dip—feel free to blend it as much as you’d likePhoto Oct 15, 8 21 40 PM
  9. Serve similarly to the hummus, and garnish with a squeeze of lemon juice and extra parsley, and enjoy—One of my favorite ways to consume the eggplant is to make sabich, an Iraqi sandwich that consists of hard boiled eggs and fried eggplant on fresh pita bread. Babaghanoush would be a wonderful substitute for the traditional fried eggplant, and maybe add some salty feta cheese to give the sandwich a rich umami flavor22

All I know is that both of these spreads are absolutely delicious, and are perfect for any dinner party or even an afternoon snack. You can also feel free to customize your hummus and babaghanoush—substitute cilantro for the parsley for a more Mexican version, top your hummus with some mushrooms sautéed with zhatar spice, or make a festive zucchini version of babaghanoush and spread it on some thick toast and top with avocado. Yummy! I love to simply serve them with some homemade pita chips!

Recipe: Roasted Vegetable Lasagna

Sorry I’ve been away for a few weeks, but work’s been crazy! This recipe is actually inspired by all of the craziness. I wanted something that was not only delicious, but also comforting. This lasagna is packed full of roasted vegetables, so it’s also a healthy dinner to serve your family. This recipe might seem like it has a lot of steps, but all of them are simple and can be multitasked. So if you want to feed a crowd, or have a lot of leftovers–which are delicious!–try this recipe for Roasted Vegetable Lasagna.DSC00340DSC00341

Ingredients:

  • 28 oz can of crushed tomatoes—my favorite brand is San Marzano for its inherent sweetness, but any brand should be fine
  • ½ teaspoon of crushed red pepper flakes
  • 2 ½ teaspoons of dried oreganoDSC00369
  • 1 tin of anchovy filets—it’s important that the anchovies are packed in oil as opposed to water since you want to flavor and richness of the oil to help flavor the sauce. Flat filets are also easier for melting into the oilDSC00368
  • 4-5 medium garlic cloves, roughly chopped
  • 1 pound of grape tomatoes—quartered whole tomatoes or cherry tomatoes could work in this dish too, but grape tomatoes are a nice size and roast beautifully in the oven
  • Salt and pepper
  • 1 pound of cremini mushrooms, halved or quartered depending on size
  • 2 small to medium zucchini, cut into half moons
  • 2 small to medium yellow squash, cut into half moons
  • 1 green pepper, sliced into strips
  • 1 large onion, chopped roughly
  • 1 pound of ricotta cheese—it might be tempting to use low fat here, but use whole milk ricotta—trust me, you’ll taste the difference!
  • 1 cup of Parmesan cheese—shredded or grated as long as you’d eat it on your pasta
  • 2 eggs
  • 10 oz package of frozen chopped spinach, thawed and drained—Make sure you squeeze as much water out of the spinach as you can
  • 1 box of oven ready lasagna noodles
  • 1 bag of shredded mozzarella—one of those Italian blends works too
  • 1 small ball of fresh mozzarella (optional)
  • Olive oil

To Cook:

  1. Preheat oven to 400 degreesDSC00345
  2. Toss tomatoes with 1 tablespoon of oil, 1 teaspoon of oregano and salt, and ½ teaspoon of black pepper
  3. Spread tomatoes on a sheet pan and roast for 15-20 minutesDSC00343DSC00344
  4. At the same time, use a second, larger sheet pan for the zucchini, squash, pepper and onion and increase to 2 tablespoons of oil, 1 tablespoon of salt, 2 teaspoons of oregano, and 1 teaspoon of pepper
  5. Roast the veggies for around 30 minutes, while you prepare the rest of the components for the lasagna
  6. Drop the heat to 375 degrees when the veggies come out of the ovenDSC00363DSC00362
  7. While the veggies are in the oven, add enough olive oil to a big sauté pan to coat the bottom and heat on medium-high heatDSC00370
  8. Add anchovies to the pan and break them up with a back of a wooden spoon—Don’t skip this step! Even if you don’t like anchovies, the high heat will melt the filets into the oil and it will give needed background and depth to your sauceDSC00371
  9. Once the anchovy is melted, add the garlic and brown for about a minute or twoDSC00372
  10. Add the mushrooms—it’s important for mushrooms to be spread out for them to brown evenly. If they’re too crowded in the pan, then they’ll start to steam and turn rubberyDSC00373
  11. Once the mushrooms have cooked, season with a teaspoon of salt, ½ teaspoon of black pepper,½ teaspoon of oreganoDSC00375
  12. Add the crushed tomatoes to the pan and stir—you want the seasonings to be evenly spread throughoutDSC00374
  13. Reduce the heat to medium low, and simmer until the roasted tomatoes are ready to come out of the oven, and then transfer tomatoes to the sauce
  14. Continue to simmer for another 5 minutes
  15. While the sauce is finishing up, you can work on the ricotta layerDSC00364DSC00365DSC00366
  16. In a large bowl, add ricotta cheese, parmesan, eggs, and spinach, as well as a teaspoon of salt and ½ teaspoon of pepperDSC00367
  17. Whisk all the ingredients together for about 3-4 minutes
  18. Time to assemble the layers! In a 9×13 baking dish, spoon a bit of the tomato sauce on the bottom of the dish
  19. Add the lasagna noodles to the dish in a single layer all the way across—I shingled a little and also got creative by using one noodle that I cracked to fill in empty crevicesDSC00378
  20. The next layer should be some more tomato sauce
  21. Next up is a layer of the roasted vegetables
  22. After the vegetables should be a layer of the ricotta mixture—don’t skimp on the ricotta!DSC00377
  23. After the ricotta comes the cheese layer—add about ¼ of the bag of mozzarella cheese over the ricottaDSC00379
  24. Repeat the layering another 3 times, and top with a layer of noodlesDSC00380
  25. For the final layer, add a thick layer of tomato sauce all over the top, followed by the rest of the cheese, and a handful of parmesan—for my top layer, I actually like to use some fresh mozzarella since it melts so beautifully and makes for a beautiful presentation
  26. I place the whole thing onto a larger sheet tray so that if there’s spillage, it doesn’t go all over the oven floorDSC00383
  27. Bake in the oven at 375 degrees, uncovered, for 30-35 minutes

DSC00384Let it cool for at least 5-10 minutes before you cut into it. In fact, lasagna is a great make-ahead dish that you can keep in the fridge for up to 2 days before heating it. If you plan to refrigerate, make sure you add an additional 10-12 minutes to the cooking time. Also, this makes for a pretty saucy lasagna, but if you want you can reserve some extra sauce and spoon it over the top of each piece as it’s served, and garnish with some extra parmesan. Now who wouldn’t want a piece of that beauty? Buon Appetito!

Homemade Pita Chips

One of my favorite things to do in the kitchen is to experiment, and, of course, make my own version of restaurant dishes at home. Earlier in the day, I had gotten some Indian food for lunch, and of course eaten some fluffy, warm naan bread. The best part of naan—for me at least—is that you can use it to mop up the delicious curries and sauces. So, I asked myself, “What can I dip into my leftover lamb sauce?” Then it hit me—pita! But, plain pita is boring, so what about pita chips? These were so easy to make it’s ridiculous. Make these pita chips at home, and you’ll never feel like buying them at the store again. This recipe yields 18 chips, but feel free to make much, much more!

  • 3 whole pita breads
  • 1 tablespoon of chopped fresh parsley–I happened to have fresh herbs for another recipe, but dried herbs would work just as well
  • 1 tablespoon of chopped fresh rosemary
  • zest of 1 lemon
  • 2 teaspoons of salt
  • 1 teaspoon of black pepper
  • 3 tablespoons of vegetable oil
  1. Cut each pita in half lengthwiseDSC00243
  2. Cut each half into 3 equal sized wedgesDSC00242
  3. Mix the parsley, rosemary, lemon zest, salt and pepper with the oil
  4. Let the herb oil mixture sit for about 15 minutes, and set the oven to 300 degreesDSC00246
  5. Toss the pita triangles with the herb oil to lightly coat, and arrange in a single layer on a baking sheet
  6. Bake the pita chips for about 20-22 minutes, or until they are browned and crisped upDSC00256
  7. Allow the chips to cool before consuming with hummus, guacamole, onion dip, or delicious braising liquid from lamb shanks!DSC00259

Recipe: Braised Lamb Shanks with Moroccan Lemon Couscous

I recently attended the 2015 International Food Bloggers’ Conference in Seattle, organized by Foodista. Until I actually got on the plane, I was waffling back and forth on whether to actually go. I kept thinking to myself—will they like me? Does my blog have a relevant and unique voice? Will I learn anything? As a matter of fact, I had an amazing time and learned so much. So much so, that you should expect to see a major uptick in the frequency of blog posts 🙂

2015-09-19 16.37.06One of my favorite sessions was all about lamb. We got to hear all about the versatility of lamb, the variety of cuts available, insider cooking and butchery tips, and even got to sample some delicious lamb pate, lamb’s cheese and cold smoked lamb loin. Yum! So, when I got home, I was inspired to put my own spin on a lamb dinner. While lamb chops and rack of lamb might be more prevalent, and often seen on your favorite steakhouse’s menu, lamb shanks are the unsung hero of the lamb family. All they need is a little TLC and time, and they become tender, succulent and out of this world delicious. My version of braised lamb shanks is great for entertaining guests at an elegant dinner party, impressing that special someone, or even cooking for your family—perfect for the slow cooker! I serve mine with Moroccan inspired, lemon couscous and homemade pita chips (see recipe here), but feel free to substitute mashed potatoes, creamy polenta or any number of sides. Enjoy!

DSC00271DSC00209Ingredients:

  • 4 medium to large lamb shanks—you should be able to find these in the meat section of your grocery store, but if not, then you could just ask your butcher. Short ribs could be a good substitute, but they won’t have the same presentation
  • 1 tablespoon and 1 teaspoon of AP (all-purpose) flour
  • 1/2 teaspoon of cinnamon
  • 1/2 teaspoon of black pepper
  • 1 teaspoon of salt
  • 1/2 teaspoon turmeric
  • 1/2 teaspoon dried parsley
  • 1/2 teaspoon dried sliced onion—minced onion works fine too
  • 1/2 teaspoon ground cumin
  • 6 sprigs of fresh rosemary
  • 1 bunch of fresh Italian parsley
  • 1 package of fresh mint
  • 2 large Spanish onions, chopped
  • 5-6 large carrots, cut into chunks
  • 5 medium garlic cloves (or 4 large cloves), chopped
  • 1 can of chickpeas, drained
  • 28 oz can of crushed tomatoes
  • 1 lb. package of cherry tomatoes
  • 1 1/2 cups of red wine—use something you’d drink, since the flavor will end up concentrating as you cook out the alcohol
  • 4 1/2 cups of chicken, veal or beef stock—I only had chicken broth, but veal or beef is really the best to use in this recipe
  • 2 lemons
  • 1 teaspoon of paprika
  • 1 teaspoon of garlic powder
  • 2 cups of couscous
  • 1/4 cup of slivered almonds
  • 1/2 cup of dried dates, halved or quartered

Lamb Shanks:

  1. Pat the lamb dry, this will help them stay moist when you cook itDSC00218
  2. Mix the flour, cinnamon, pepper, salt, turmeric, dried parsley, dried onion, cumin, and a teaspoon of chopped rosemary (about 1 sprig) in a medium-sized bowl
  3. Coat the lamb in the seasoned flour mixture—this will do double duty for you by helping make a crust on the lamb, and also thicken up the braising liquid into a sauce later on
  4. In a dutch oven or heavy bottom pot heat oil—use a neutral oil since you’ll require a very high cooking temperature to sear the outside of the meatDSC00220
  5. Add the lamb shanks—in batches if necessary—and brown for a few minutes on all sides. Contrary to popular belief, the sear does not “lock in the juices,” rather it helps make a great crust and caramelizes the spices on the outside of the meat DSC00223 DSC00224 DSC00225DSC00226
  6. Once the shanks have browned take them out and put aside on a plate—don’t clean out the pot. All of those delicious drippings and brown bits on the bottom of the pan = flavor!DSC00227 DSC00228DSC00229
  7. Add a bit more oil and add in the chopped carrots and sauté for another couple of minutes, then add the garlic and one onion to the potDSC00230
  8. Cook for a few more minutes, and then add the chickpeasDSC00232
  9. Once the veggies have started to brown, it’s time to deglaze the pan—deglazing means you add liquid (in this case tomatoes, wine and broth) in order to scrape up the browned bits on the bottom of the pot
  10. Add the crushed tomatoes, and bring to a simmer
  11. Add about 1 1/2 cups of red wine and 1 cup of the stockDSC00239
  12. When it starts to bubble slightly, it’s time to add the lamb back in, and don’t forget the meat juices DSC00235Add the roasted tomatoes, as well as a few sprigs of rosemary and parsley to the pot and give it a big stir
  13. Let the pot simmer on medium for about 20-25 minutes uncovered—this helps cook out the taste of raw broth and wine. Give it another big stir and move the lamb and veggies all around the pot
  14. Cover with a tight-fitting lid, reduce the heat to medium low and let it braise for at least 2 hours—you should stir the pot every 25-30 minutes, but don’t mess with it too much. This is important spa time for your meaDSC00263
  15. After a couple of hours, the meat will super tender and following off the bone—In fact, your shank bones should look like they’ve been frenched, which means the end of the bone is cleaned of meat so you can hold it like when you order rack of lamb at a fancy restaurant DSC00265
  16. Remove  the lamb shanks, and crank the heat back up to medium to medium high for another 5 minutes uncovered. The sauce will continue to thicken a bitDSC00267
  17. Plate the lamb shank with the bone prominently displayed, and smother the meat with the braising liquid that’s chock full of carrots, herbs, onion, garlic, chickpeas and meat that’s fallen off the boneDSC00269
  18. Garnish with the gremolata, and serve alongside some couscous and some homemade pita chip for dipping

DSC00273

Gremolata:

  1. Mix together about 1 tablespoon of chopped parsley, 1 teaspoon of chopped rosemary (about 2 sprigs), and zest of a lemonDSC00245 DSC00254
  2. Use as garnish for heavy dishes, and add when it’s still hot—the gremolata will not only help cut through the richness of the dish, but also perfume the plate as the heat slightly cooks the herbs and lemon peel

Couscous:

I like my couscous a little more moist and stuffing-esqe as opposed to many recipes that like each of the couscous pearls to be separate from each other. Try it my way, and if you don’t like it, then go back to the other way next timeDSC00255

  1. In a medium-sized pot, add some oil
  2. Add the remaining onion to the pot and start to sweat the onions
  3. Season with salt, pepper, garlic powder and paprikaDSC00258
  4. Saute the onion until it starts to brown and caramelize
  5. At this point, add 3 1/2 cups of chicken stock and the juice of both lemons to the pot. Increase the heat to medium or medium-high
  6. Bring the liquid to a boil, and then add the couscous. Stir to make sure all of the couscous is covered, and not sticking together
  7. Turn the heat off and cover the couscous
  8. After 4 minutes, add the dates, slivered almonds, as well as the remaining parsley and mint
  9. If the couscous seems dry or not soft enough for you after 5 minutes, add some more stock or lemon juice, stir and cover again for a few minutesDSC00261 DSC00262
  10. Serve the couscous garnished with some lemon slices and a squeeze of lemon over the top

DSC00277

DSC00277

Recipe: Mediterranean Inspired Lamb Flatbread

The other day I was in the mood to make some fish tacos at home, but the local market I went to only had these small onion flatbreads. So, I decided to scrap the idea for the night. The  flatbreads actually turned out deliciously for my “new” tacos—or really chalupas maybe—and I ended up having a few of them leftover. So I thought of what I could do with a flatbread and was feeling in a very Mediterranean mood. I felt this was a very appropriate recipe since I’ve dedicated the last couple of weeks of blog posts to my recent vacation in the Middle East, and decided to do a fusion of Greek and Israeli cuisines.

These (not so mini!) lamb flatbreads were an experiment, but I knew the flavor combinations would mesh well together. The spicy lamb mixture, the creamy and tangy feta sauce, the briny pickled red onions and the soft, chewy onion flatbreads make a killer combination for dinner, appetizers or even to entertain!

Ingredients:

  • 1 lb. of ground lamb
  • 8 oz block of Feta cheese–I’m going to echo the Barefoot Contessa by saying that you should make sure to use a quality feta in your dish—preferably Greek or Bulgarian
  • 1/2 cup of lemon juice
  • 1 cup of Greek yogurt, plain
  • 1 teaspoon of mint, dried
  • 6 large garlic cloves (or 8-9 small cloves)
  • 2 teaspoons of black pepper
  • (optional) Balsamic vinegar
  • 1/2 teaspoon Cumin
  • 1 teaspoon Oregano
  • 7-8 dried red chilies
  • 1/2 can of pitted Black olives
  • 1 teaspoon Olive oil
  • 1 large red onion
  • 1 tablespoon and 2 teaspoons of salt
  • 1 tablespoon Sugar
  • 1/2 cup of apple cider vinegar
  • 1/2 teaspoon of crushed red pepper flakes

Feta sauce:

  1. In the food processor, add the 3/4 of the feta cheese, lemon juice, yogurt, mint, 1 large or 2 small garlic cloves, and 1 teaspoon of black pepper
  2. Whir it up until the feta is completely broken up, but the sauce still has some consistency to it—I like my sauce to still have some body to it, but blend to your own preference
  3. Taste for seasoning!—I don’t add any salt since the feta is already so salty, but everyone has a different palette.

Pickled red onions:

  1. Peel and slice the red onion thinly and place into a sieve or pasta strainer with small holes
  2. In a jar or bowl—whatever canister you’d like to use to make your onions, I use a mason jar for my leftover—pour the sugar, tablespoon of salt and crushed red pepper
  3. Cover with water and fill the jar, but leave enough room for the onions as well. Stir to dissolve
  4. Add the vinegar—plain white vinegar is alright as well. Even rice wine vinegar could make these delicious for a banh mi sandwich
  5. Boil a few cups of water in a kettle or on the stove, and when the water comes to a boil, pour over the onions
  6. Place the par-blanched onions into the sugar-salt bowl. There should be enough water/vinegar mixture to cover all of the onionsPhoto May 18, 11 48 35 PM
  7. Leave for at least one hour, but I left mine most of the dayPhoto May 18, 11 50 55 PM.jpg

Lamb mixture:

  1. In your food processor—no worries if it has residual sauce, it’s all going on the same dish—finely chop the olives, chilis, and remaining garlic
  2. Mix together the lamb, salt, cumin, oregano, chile-olive-garlic mixture, olive oil, and the rest of the pepper in a bowl—use your hands to really get the meat to absorb the marinadePhoto May 18, 8 42 24 PM.jpg
  3. Don’t mix the mixture too much or you might make the meat tough when it eventually cooks
  4. Let the meat sit and absorb the spices and marinade ingredients for at least 30-45 minutes and up to overnight

To assemble the flatbreads:Photo May 18, 11 33 11 PM.jpg

  1. Lay flatbreads flat on a baking sheet—a pita or even naan bread would be a good substitute. Just make sure you use a bread that has a large flat surface and has some heft to itPhoto May 18, 11 35 25 PM.jpg
  2. Spoon some feta sauce on the bread and spread around the surface with a spoon to almost the edge—I put a good amount of sauce, but don’t use it all!Photo May 18, 11 38 00 PM.jpg
  3. Using your hands, spread the equal amounts of the lamb mixture onto each flatbread and form into semi thick layer—at first I was going to cook the lamb first, but actually ended up forgetting to. By the time I remembered, it has already started cooking and the fat from the lamb ends up absorbed by the bread and flavored the whole dish amazinglyPhoto May 18, 11 38 40 PM
  4. Sprinkle some feta over the top of the lamb, and slide these babies into the ovenPhoto May 18, 11 47 18 PM
  5. Bake in the oven at 375 degrees for about 10 minutes—some ovens vary so if your oven tends to get super high, maybe stay on 350 insteadPhoto May 19, 12 05 53 AM
  6. Remove from oven and let rest for a couple of minutes Photo May 19, 12 05 55 AM
  7. Scatter some picked red onions all over the flatbreads after it comes out of the ovenPhoto May 19, 12 07 49 AM.jpg
  8. Crumble some fresh feta over the top, as well as a few dollops of feta sauce
  9. This last step is purely optional, but I thought it gives it a wonderful fruity afternoon and a bit of panache. Pour a little bit of thick balsamic vinegar over the top to garnish. I used a deliciously thick grapefruit, white balsamic that I had in the pantryPhoto May 19, 12 09 44 AM.jpg
  10. Slice with a pizza cutter and enjoy! Απολαύστε το γεύμα σας!

The Secret to Perfectly Fluffy Scrambled Eggs

When I asked people what their favorite breakfast food was, I got a lot of answers—French toast, pancakes, oatmeal, smoothies, Cheerios, etc. The most common answer I got was eggs. The incredible, edible egg is a common, but delicious ingredient. It can top your burger to give you that runny yolk that adds a new level of decadence, be incorporated into a cake batter, baked into a quiche for company, or just hard-boiled. Personally, I love a great plate of soft scrambled eggs. It makes a fabulous breakfast, or a simple, weekday dinner. There are a lot of methods that people use to get their eggs perfectly scrambled—some with sour cream, milk, oil—I am an egg purist. The secret to my perfectly fluffy scrambled eggs: extra egg…and patience. This recipe takes some time, but it’s worth it!

Ingredients:

3-4 eggs

1 tablespoon (or ⅛ of a stick of butter)

Salt + Pepper

Cooking Steps:

image1

  1. Crack 2-3 eggs into a bowl.
  2. Crack the last egg and add just the yolk into the bowl—you can save the egg white, maybe whip it for a meringue or incorporate it into a protein shake. While egg yolks may have a higher amount of cholesterol, they also contain lots of vitamins and iron. The extra yolk in this dish not only keeps the eggs moist and soft, but also helps it keep its distinctive yellow color.
  3. Add a pinch of salt and black pepper to the eggs.image3image2
  4. Using a fork, beat the eggs in a counter-clockwise direction from top to bottom. If it helps, tilt the bowl as you whip the eggs in the circular motion. Mixing the eggs this way will also help with the fluffy texture.image4
  5. In a medium sauté pan, add your butter and heat on lowimage5
  6. When the butter starts to melt, add your egg mixture to the pan
  7. Using a rubber spatula scrape the bottom and sides of the panimage6
  8. Keep cooking, continually moving the eggs around in the pan for 5-10 minutes. The eggs will start to solidify and come together, just make sure to constantly mix it upimage7
  9. Once the eggs are cooked, but still shiny and look slightly wet, turn the heat off and get your toast or sides ready—it might seem raw, but the eggs are cooked and safe to eat.image8
  10. Sprinkle a pinch of sea salt on the eggs to finish them off. The mixture will be fluffy, moist and you don’t need cheese with these eggs since they are so soft and luxurious. A nice addition might be some fresh herbs though, like dill or parsley. Yum!image10

Recipe: Chicken Parmigiana Meatballs

I’ve been thinking about how to put a twist on some classic dishes lately. One of my favorites is Chicken Parmigiana. Who can resist the call of crispy chicken, hearty tomato sauce, and gooey cheese? Not this guy. But there are only so many ways to reinvent the wheel when it comes to a good chicken parm. So, I thought, “what about chicken parmigiana as a meatball?” and the idea for this dish was born. These meatballs have all the aspects of a plate of chicken parm that you love, without all of the work, and in a new, unique way.

Ingredients:

IMG_18891-2 lbs of ground chicken—I like white meat, but if you’re afraid of your meatballs drying out, then dark meat is delicious. Same thing with ground turkey

1 tablespoon of minced garlic

1 teaspoon of minced onion, dried

1 teaspoon of salt

1/2 teaspoon of pepper

1 egg

IMG_1886
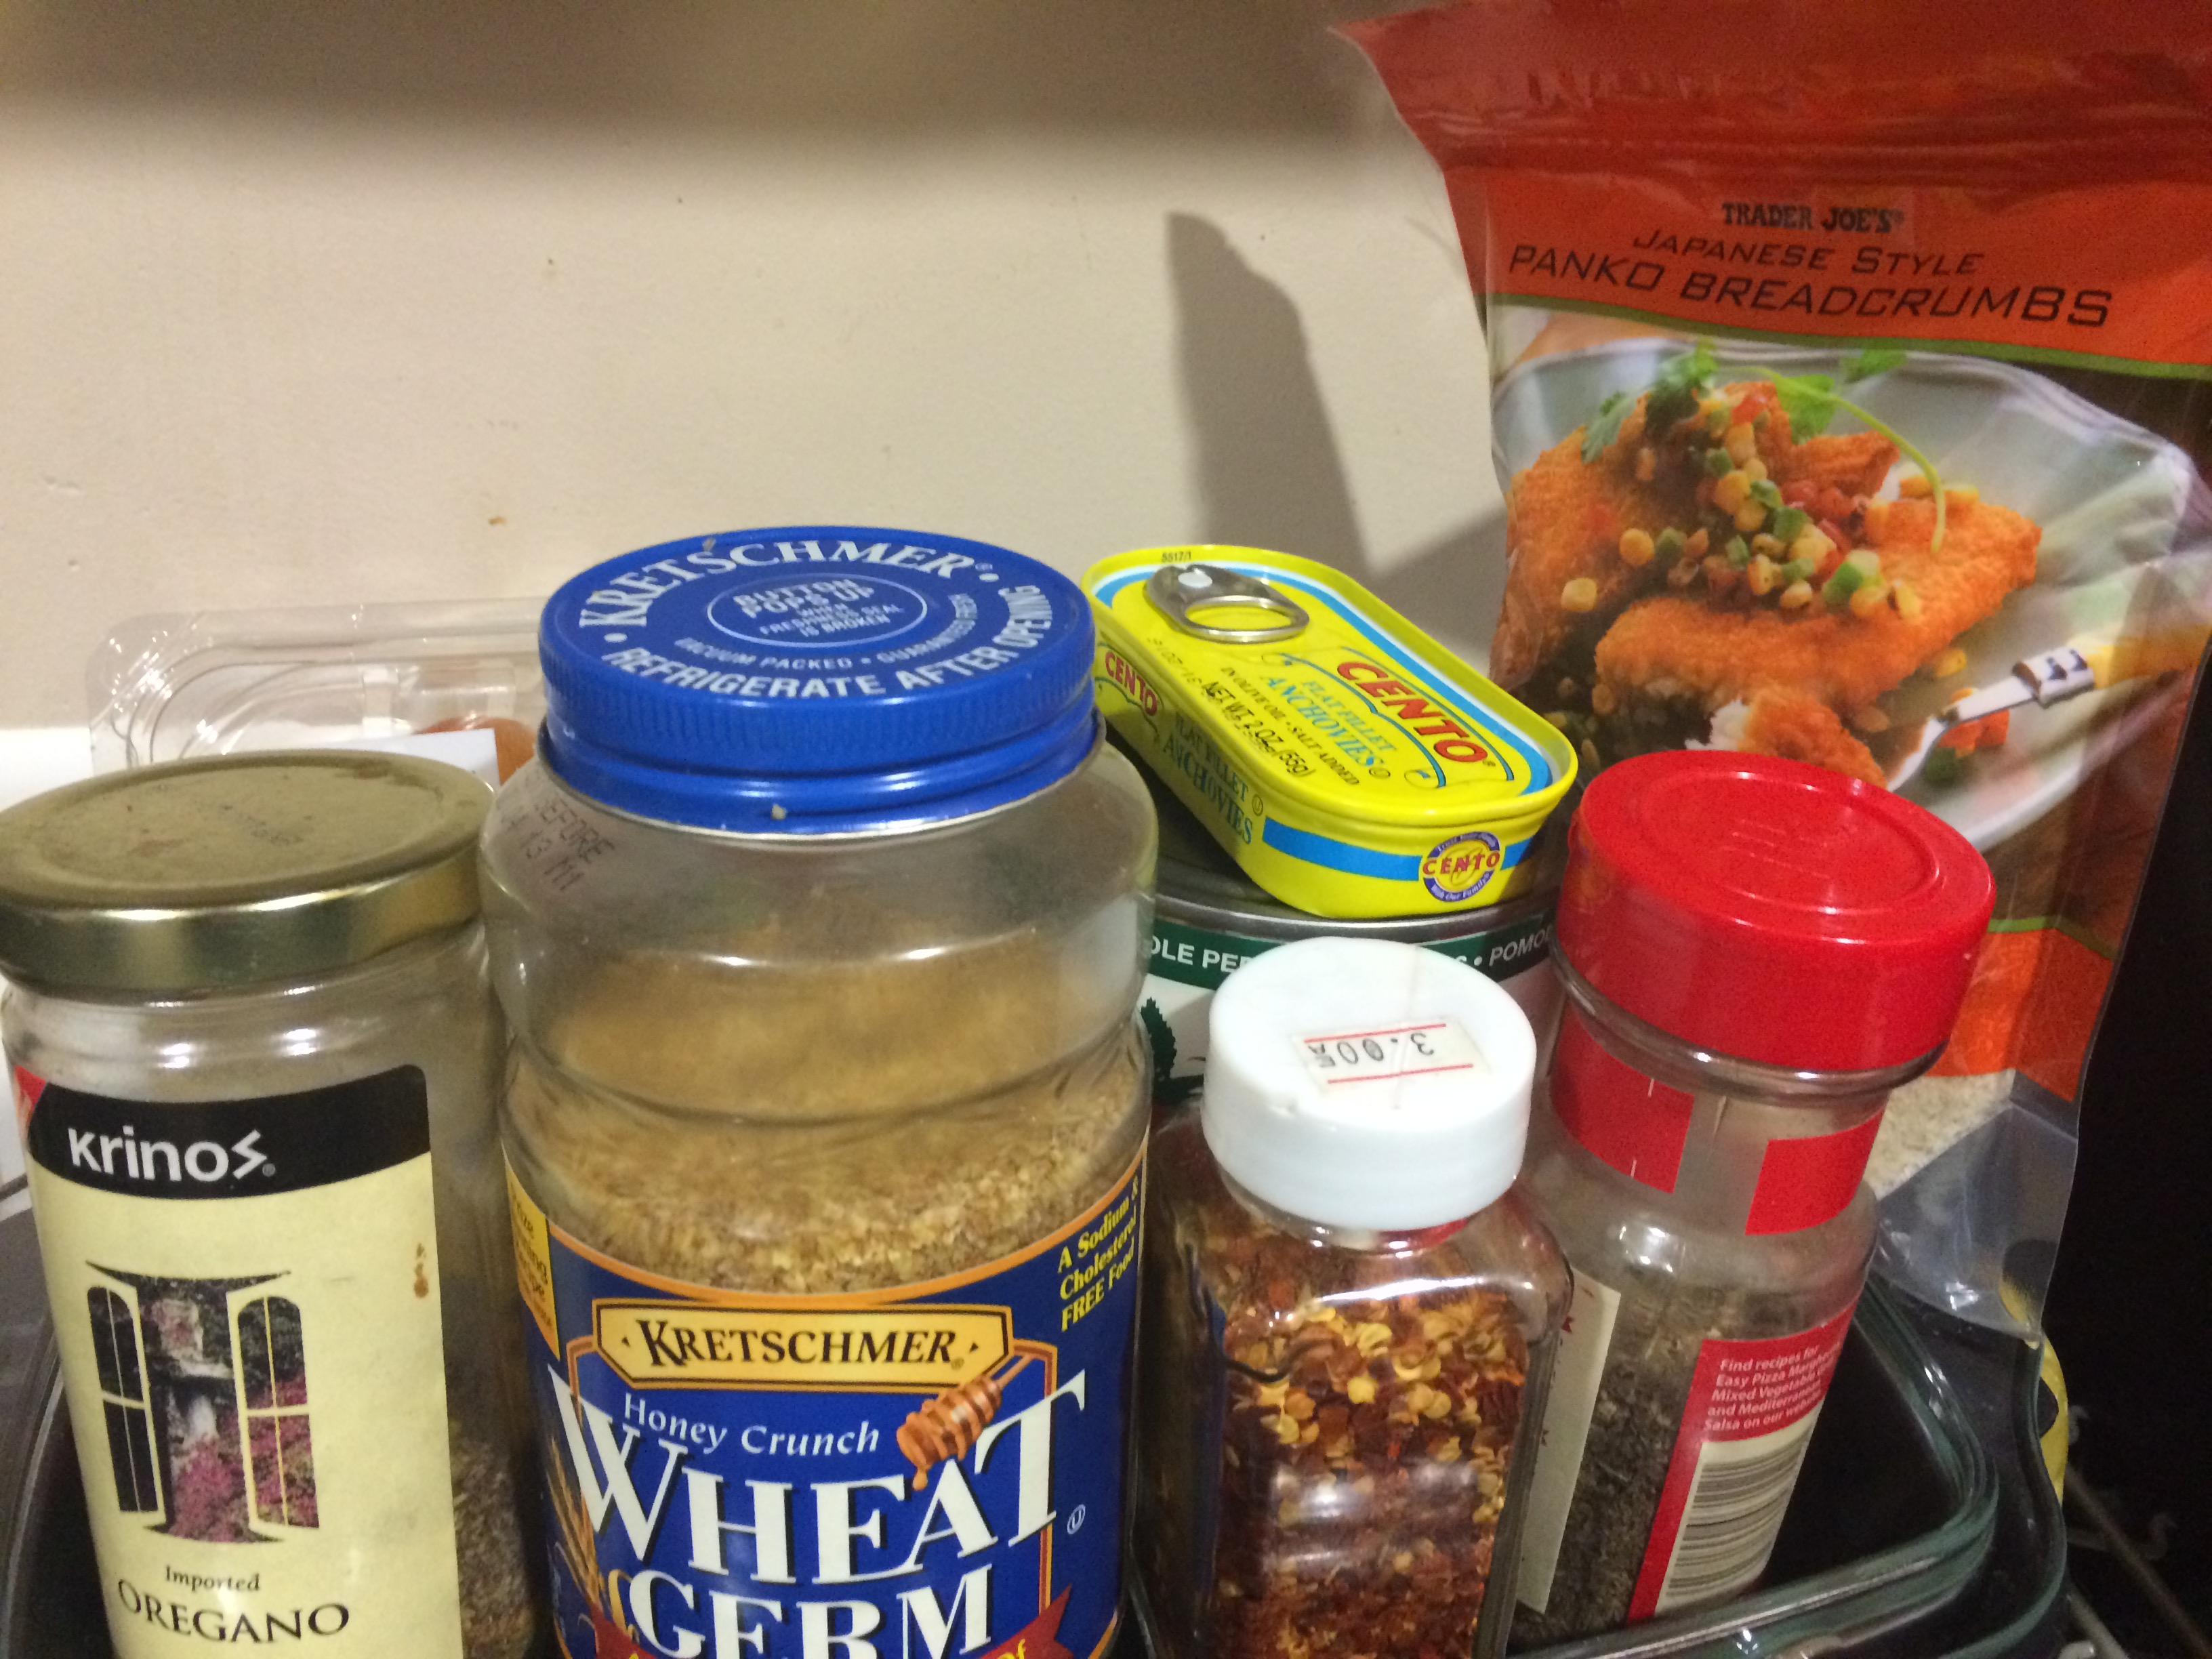
1/4 cup of wheat germ—breadcrumb lam work well too, but I think the wheat germ in the actual meatball gives it a little bit of sweetness that you often find in slow cooked chicken parmigiana dishes

IMG_18911 ball of fresh mozzarella

1/2 cup of Panko breadcrumbs

1/2 cup and 1-2 tablespoons of Parmesan cheese

1/2 teaspoon of crushed red pepper flakes (use a sliding scale depending on your preference)

1/4 teaspoon of basil, dried

1-2 cups of tomato sauce (see recipe here)

To Make the Meatballs:

  1. Preheat your oven to 400 degrees.
  2. In a bowl, mix ½ cup of Parmesan cheese with the Panko breadcrumbs, and set aside
  3. Cut a few slices of the mozzarella, about ½ of the ball, and cube all but 2 of them
  4. In another bowl, combine ground chicken, wheat germ, egg, salt, pepper, basil, garlic and onion together in a bowlIMG_1890
  5. Mix the meat mixture, but not too much, just until it becomes homogenous
  6. Grab about 1/8 of the meat mixture and form into a small patty
  7. Use your thumb to make a small well in the center of the patty and place a couple of cubes of cheese there
  8. Use your fingers to curl the meat around the cheese into a ball and your other hand to seal the edges. All do the cheese should be covered by meat so it doesn’t leak out
  9. Roll the meatball in the Parmesan breadcrumb mixture until coated all over
  10. Place the coated meatballs on a greased baking sheet, evenly spaced apart
  11. Put the meatball sheet into the refrigerator for about 30-60 minutes, or 15-20 minutes in the freezer to firm up
  12. Add a bit of olive oil to the top of each meatball before bakingIMG_1899
  13. Bake in the oven for 15 minutes
  14. Once they’re starting to brown, flip the meatballs and bake for another 15 minutesIMG_1903
  15. Remove the meatballs from the oven and turn the heat up to 425 degreesFullSizeRender-2
  16. In a small baking dish, or a large one, if you’d like to do them all at once, place your meatballsIMG_1902FullSizeRender-6FullSizeRender-7
  17. Cover with 1-2 cups of the tomato sauce and the remaining cheese
  18. Bake the meatballs again in the oven for 6-8 minutes. You just want to get the meatballs to absorb some of the sauce, and the cheese to melt nicelyIMG_1912

Serve and enjoy! I like mine with a nice Caesar salad on the side, but these would be great with some pasta tossed in the same tomato sauce, on a sub, as a topping for pizza, or even as an appetizer. You’ll love this twist on your normal meatball recipe. Go balls to the wall! 😉

FullSizeRender-3

Recipe: Everyday Special Tomato Sauce

I am a self-labeled foodie, and I love cooking as much as going out to eat…but I’m also a foodie on a budget. So, I’m always looking for ways to save some money, while at the same time not skimping on the flavor. One of the easiest and tastiest ways I’ve found is by making my own sauces. A quality jar of tomato sauce at the grocery store can run you anywhere between $5-$10. What I like to do is buy the much cheaper canned tomatoes, and make my own sauce at home. Not only will this save a lot of $ over time, but I can flavor it exactly as I like.

This is sauce that I came up with a few years ago and it’s my go to tomato sauce recipe. Flavored with garlic, oregano, crushed red pepper as basil, it has a bold, all day taste, but can be made in 30 minutes.

Ingredients:

IMG_18971 28 oz can of whole peeled tomatoes—I prefer San Marzano because they’re sweeter, but any brand works. Just make sure they’re not flavored with anything. Also, don’t get tomato purée or sauce in a can, ugh.

1 package of grape or cherry tomatoes–any kind of tomatoes really works well, even vine ripened or beefsteak tomatoes

Salt

Pepper

4-5 cloves of garlic, minced

1 tin of anchovy fillets, packed in oil and salted—don’t worry if you don’t like eating anchovies or worry that it’s too fishy. The anchovies will melt in the pan, and give your sauce the salt it needs, and a deep umami flavor. This is actually a trick I learned from Rachael Ray a while ago. I was skeptical when she added as well, but it takes the sauce to another level

1 tablespoon of crushed red pepper flakes

½ tablespoon of oregano, dried

½ tablespoon of basil, dried—if you’re going to serve this sauce right away, then a handful of fresh basil is a great way to finish the sauce before it gets tossed with some pasta

Olive oil

 To Make the Sauce:

  1. Set your oven to 400 degreesIMG_1888
  2. Add the grape tomatoes to a baking pan and toss with olive oil, salt and pepperIMG_1892
  3. Roast in the oven for 15-20 minutes as you complete the rest of the stepsIMG_1893
  4. Heat some oil in the bottom of a sauce pot on medium-high heat until very hot, but not smokingIMG_1894
  5. Add the anchovies to the pot. As they hit the hot pan, they will begin to melt. Make sure to break them up with a wooden spoon to help them alongIMG_1895
  6. As the anchovies are melting, add the garlic and cook together. Your kitchen will begin to smell amazing. Like your favorite Italian restaurant!IMG_1896
  7. Let the garlic and anchovies cook for a couple of minutes until the garlic browns a bit
  8. Add the red pepper flakes, oregano and basil to the pot and stir everything together for a couple of minutes more
  9. Add the canned tomatoes to the pot and scrape up any bits that might have stuck to bottom of the pot
  10. Reduce the heat to medium and add the roasted tomatoes to the pot as well. Stir well to incorporateIMG_1898
  11. Cover and cook for about 5-10 minutes. Resist the urge to keep checking on it. Let everybody get to know each other in the hot tub!
  12. Uncover and stir. Taste the sauce for seasoningIMG_1900
  13. If it tastes right, then use an immersion hand blender and pulse the sauce until it is mostly smooth but slightly chunky. If you like a smoother sauce, I would purée it up in a blender or food processor. I like a slight chunkiness to my sauceIMG_1901
  14. Continue to cook the sauce on the stove for another 3-5 minutes, uncovered this time aroundFullSizeRender-1

Once the sauce is ready, you can eat it right away, or store it. I always make a big batch of sauce, so I have some to use that day and a jar or two to keep in the freezer. If frozen, it’s good for a couple of months at least. You can use the sauce for pasta, lasagna, meatballs, pizza, as a base for chili, or any number or recipes.

Recipe – Passover Edition: Matzah Brei

FullSizeRender-9

It’s Passover this week, and I’m not back home after spending the past weekend eating big Seder meals and a lot of matzah. So, I felt that it was not only a good idea to share one of my favorite Passover recipes, but an obligation to dedicate a post to this delicious Passover tradition. We usually serve it for breakfast, but it’s delicious for lunch or dinner, and even when the holiday is over. In fact, many of the diners in NYC growing up would also make matzah brei around the Passover season.FullSizeRender

Matzah Brei, also called fried matzah by some, is almost akin to a matzah omelet, but so much better. It has great texture, delicious flavor, and is a great way to use up all that leftover matzah and eggs too! There’s a big divide about whether it should be served savory or sweet, but my family is sweet all the way! Although, this dish would also be delicious if you added some smoked salmon and onions to the egg mixture, and maybe some cream cheese on top—a play on Lox, Eggs & Onions. Sweet is really the one to beat though. Anyone else have a good matzah brei custom in their house? I’d love to hear all about it!

Ingredients:

2 sheets of matzah—say about 2 sheets per person, but you can make as much or as little as you want

3 eggs (per person)

1/4 cup of whole milk—skim is fine too, but whole gives a richer flavor

1 tablespoon and 1/2 teaspoon of ground cinnamon

4 tablespoons of white sugar

1/2 teaspoon of nutmeg

1/8 of a stick or 1 tablespoon of unsalted butter

1 pinch of salt

To Make the Matzah Brei:

  1. Use your hands to break up the matzah sheets into a colander—I recommend a colander with small holes or mesh so that pieces of matzah don’t fall throughIMG_1751
  2. Cover the matzah with water for 45 seconds to a minute—I know this seems weird, but it helps make the matzah pliable
  3. Drain the matzah really well
  4. In a medium to large bowl, crack the eggs and add the milk
  5. Whisk the eggs and milk together
  6. Add the salt, 1/2 teaspoon of cinnamon, nutmeg, and 1 tablespoon of sugarFullSizeRender-2
  7. Once the mixture is homogenous, add the matzah to the liquid and toss to coat all of the matzah with the eggsIMG_1752
  8. Heat a frying pan to medium heat and add butterFullSizeRender-5
  9. When the butter has melted, add the matzah and egg mixture to the panFullSizeRender-4
  10. Use a spatula or spoon to spread the mixture and shake the pan to get as much surface area exposure to the heat as possible. You should hear a bit of a sizzleIMG_1750 FullSizeRender-1
  11. While it’s cooking, mix together the cinnamon and the remaining 2 tablespoons of sugar to make cinnamon sugar. This is also great for cinnamon toast or for mixing into oatmeal!FullSizeRender-10
  12. Keep cooking until there are crispy edges and the eggs have dried up a bit—cook it to your desired consistencyFullSizeRender-8
  13. Plate the matzah brei and sprinkle the cinnamon sugar all over. The hot matzah brei will absorb the sweetness of the cinnamon sugar. Maple syrup is also a common matzah brei topping.FullSizeRender-7

Enjoy your delicious Passover breakfast!